
On this page 8 sections
Your guide
What you'll learn
Plyometrics exercises should be an integral part of any lower extremity rehab or injury prevention program to increase power development and teach proper absorption movement mechanics. In the rehab realm, you could argue that it's even more important to learn how to absorb forces than to increase power development - although you will work on both through proper plyometric progressions. Absorption forces need to be progressed appropriately, as overloading a sensitive tendon or weight-bearing structure like the meniscus can lead to a slower rehabilitation process. Even more of a problem is skipping out on plyometric progressions altogether - as this leaves the athlete unexposed to the high amount of forces and loads that they undoubtedly will face in day-to-day life like going down a flight of stairs, taking a misstep, and needing to put your foot down to prevent a fall, going on hikes with friends and family, and ultimately sport demands! This article will cover some of the tenants of plyometric progressions and special considerations for rehab!
Plyometric Progressions For Rehab
Plyometric exercises are defined as explosive exercises that look to exert maximal levels of force over a short interval of time, taking advantage of what is known as the stretch-shortening cycle (SSC). In short, the true definition of a plyometric exercise is one that quickly loads the musculotendinous junction (the joint and it's associated muscles and tendon) with a quick stretch (eccentric portion), which leads to higher levels of activation during the concentric portion of a movement (due to stored elastic energy from the muscle-tendon unit (MTU) during the quick stretch) while minimizing contact time on the ground (amortization phase). Movements that fall into this category of a "true plyometric" would be depth jumps, hurdle jumps, and pogos, for example. While the strength and conditioning professional can and should flush out the intricacies of a plyometric progression plan for athletic development, this article is going to focus more on the plyometric progressions for rehab. In particular, looking at progressing the quality, quantity, and skill of load absorption required in a rehabilitation plan. Thus, we will use the term "plyometrics" in the article to define any movement that involves our body leaving the ground like jumps, bounds, and hops - which we will dive into a bit later.
Work On the Brakes (landing) Before The Gas (Take Off)
Would you drive a car 100 MPH if the brakes only worked up to 75 MPH?! Of course not if you're a logical human being! The rule is no different when it comes to human movement - you need to learn how to decelerate and control the movement before you focus on making it faster! When it comes to plyometric progressions, we accomplish this by first mastering landing mechanics and the ready position, check out the quick video below where Mike breaks down this topic.
Like Mike said, weight distribution is really important! We discuss weight distribution, form, and more in regards to teaching landing mechanics in the article below!
READ: Teaching Landing Mechanics

What else is there to consider when teaching and assessing landing mechanics? What about common compensations and how to correct them? Check out the video below where Craig & Mike dive deeper into the topic!
How To Assess And Teach Landing Mechanics
Plyometric progressions are much more than just two-legged landings though, continue reading as we will now dive into how to progress from two feet to one leg!
Plyometric Progressions For Rehab!
From Jumps, To Bounds, To Hops
First up, we need to define some of the more commonly used terms in plyometrics as it relates to how many feet are involved.
- Jump = 2 feet to 2 feet
- Bound = Take off on one leg, and landing on the opposite leg
- Hop = Take off on one leg, and landing on the same leg
As we progress from jumps to hops, our body is required to absorb significantly more force per leg, as our body mass is the same yet we are now only landing on one leg! Furthermore, as we progress to single-leg activities, we introduce control of tri-planar motion. On two legs, typically we are only trying to control the vector that we jump in. For example, when we jump forward on two feet, we are asked to absorb the majority of that force with our sagittal plane dominant muscles like the hip extensors (glutes/hamstrings), knee extensors (quadriceps), and ankle plantar flexors (calf muscles). However, when discussing a forward hop, which is in the same sagittal direction, we must now also control the increased frontal and transverse plane forces that our body is subjected to due to the unilateral nature of the landing. Just standing on one leg requires you to have good frontal plane control with your lateral hip abductors and core muscles, while also demanding transverse plane control with your hip rotators and core muscles. Notice how important it is to train the core in all 3 planes of motion?! Now, it is not like these muscles don't have to work in these other planes of movement on bilateral jumps (they do), just the demand on them is much less in comparison to unilateral bounds and hops.

Exercise 01 of 07
Exercise demonstration
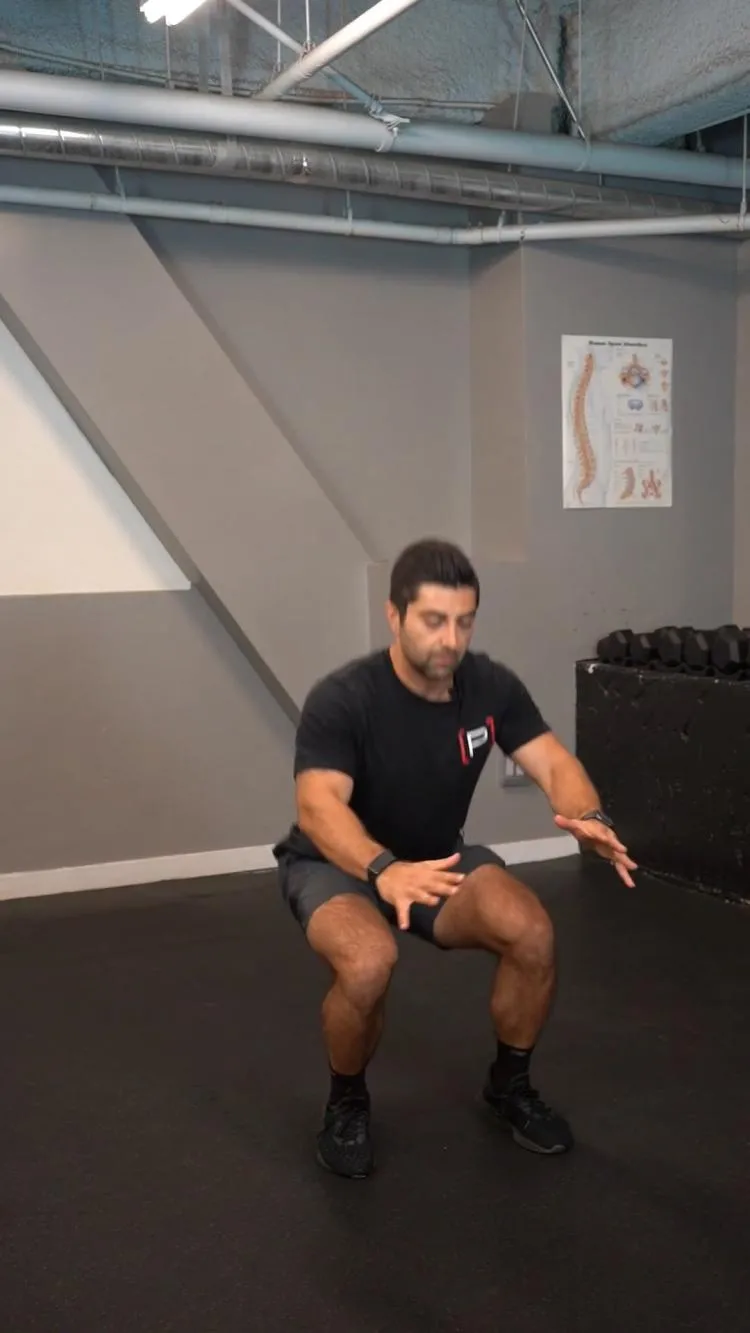
Broad Jump
View exercise instructions
- HOW: Start in a tall standing position with your feet shoulder width apart. All in one motion, bend your knees, hinge forward at the waist, push into the ground and jump forward with both feet as far as you can. Walk back to the starting position and repeat as directed.
- FEEL: You will feel all the muscles in your legs working.
- COMPENSATION: Landing Position. Make sure your knees are aligned over your toes. They should not dive inwards on the landing. Your goal is to absorb as much of the landing forces as you can and land softly. That means that you want your hips and knees to bend as much as they need to, to absorb the force. If you do not let them bend much, you will land "stiff" and hard. Let your hips go back and while keeping your chest up to help absorb the forces. Your toes should touch the ground first when you land and quickly your heels will follow. You should land in a "ready position" like you would if you were playing sports, with your weight ever so slightly forward on the balls of your feet. You should not fall forward or backwards after landing.
- For a detailed video on landing mechanics on two legs, click here: https://youtu.be/RThUCYRDyZw
Exercise 02 of 07
Exercise demonstration
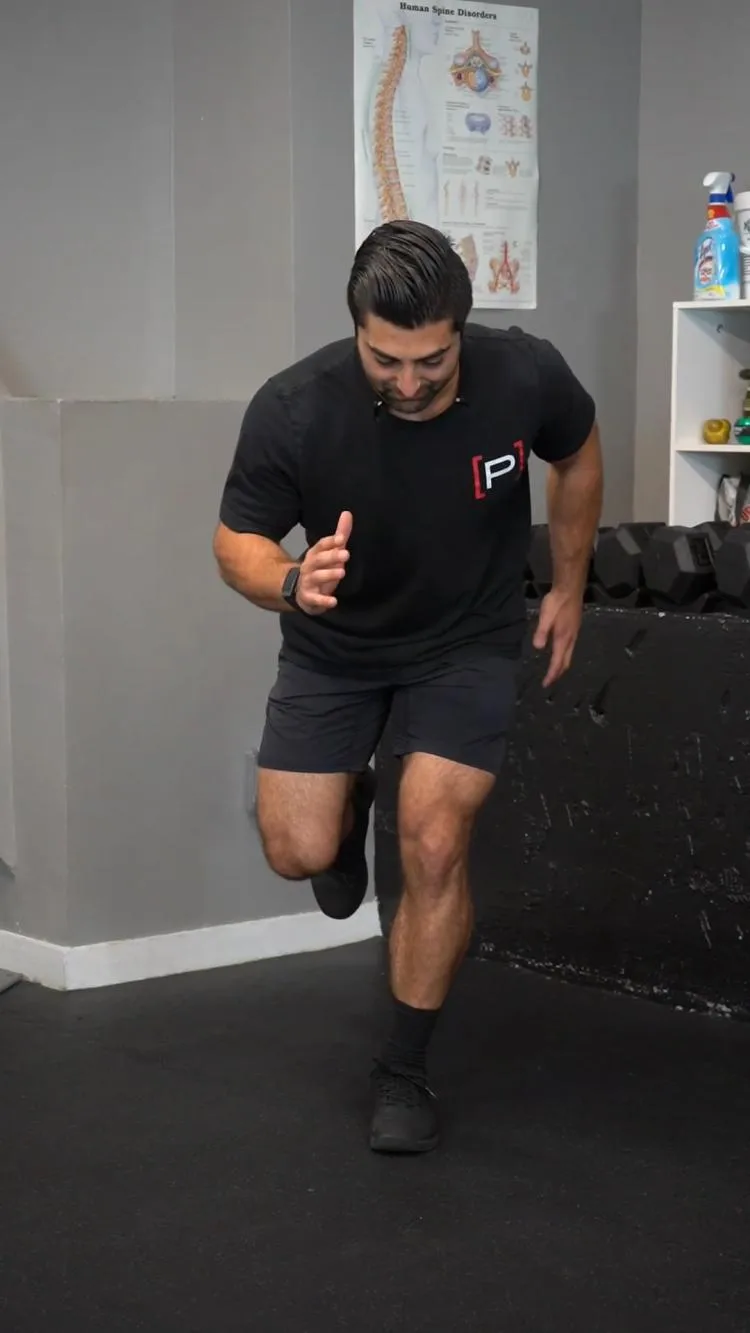
Forward Bound
View exercise instructions
- HOW: Start in a standing athletic position. Shift your bodyweight to one side, then jump forward and land on the opposite foot. Land softly and by bending at your hips, knee, and ankle slightly by performing a small squat on the landing leg. Stay strong in the hip, knee, and ankle as you land. Then, push off with that leg and land back on your other leg, where you started. Repeat this going forward.
- FEEL: You should feel this in your glutes, quadriceps, and calf muscles.
- COMPENSATION: Don’t let your knee cave in as your land, keep it straight. Don’t arch your back as you hop forward.
Exercise 03 of 07
Exercise demonstration
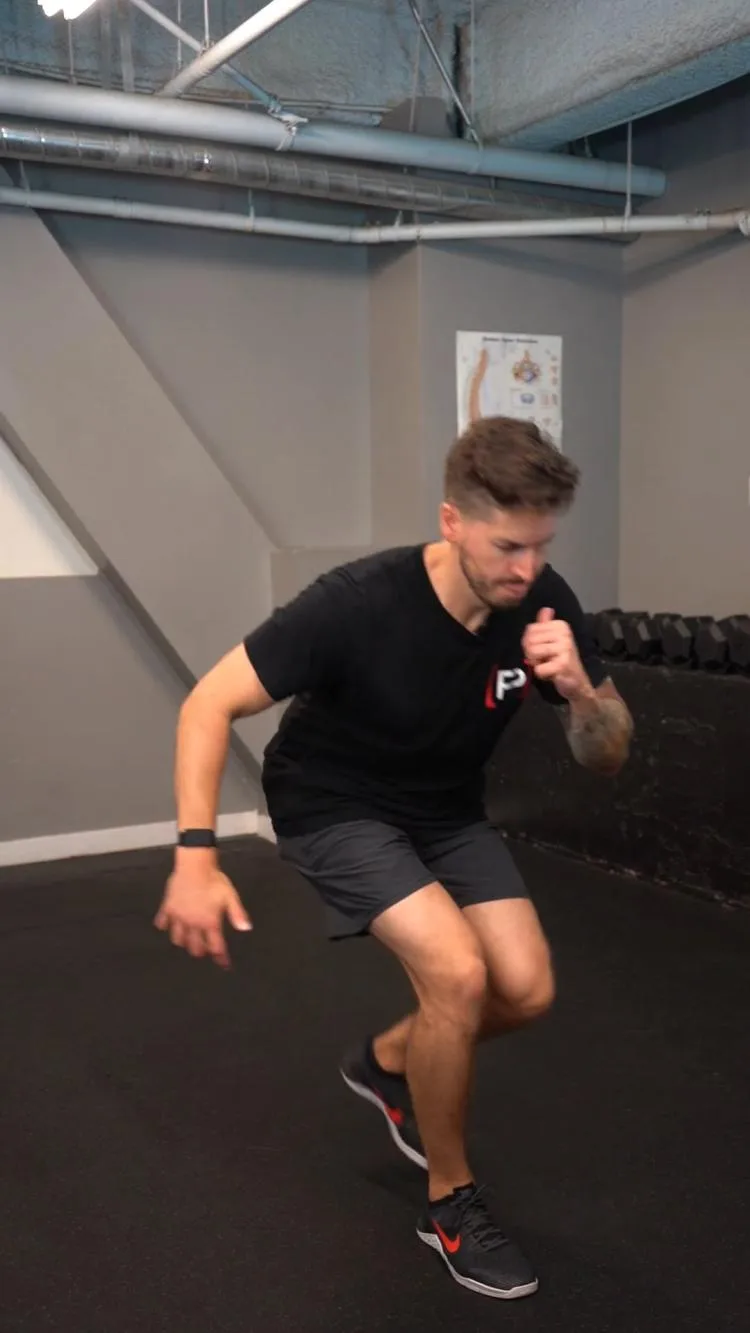
Forward Hop
View exercise instructions
- HOW: Shift your weight to one leg with your knee slightly bent and the other leg off of the ground. Then push into the ground and hop forward as far as you can landing on the same leg. Walk back and repeat for the prescribed amount of reps.
- FEEL: You will feel all the muscles in your legs working.
- COMPENSATION: Landing Position. Make sure your knees are aligned over your toes. They should not dive inwards on the landing. Your goal is to absorb as much of the landing forces as you can and land softly. That means that you want your hips and knees to bend as much as they need to, to absorb the force. If you do not let them bend much, you will land "stiff" and hard. Let your hips go back and while keeping your chest up to help absorb the forces. Your toes should touch the ground first when you land and quickly your heels will follow. You should land in a "ready position" like you would if you were playing sports, with your weight ever so slightly forward on the balls of your feet. You should not fall forward or backwards after landing.
- For a detailed video on landing mechanics on one leg, click here: https://www.youtube.com/watch?v=6RCOGM5tZRM
Sample Jump Performance [P]ehab Program
Plyometric Progressions By Plane Of Motion
The second thing we need to consider when working through our plyometric progressions is the plane of motion we are moving in. Whether it's the...
- Sagittal plane (back and forth)
- Frontal plane (side to side)
- Transverse plane (rotational)
Before even working on moving through different planes of motion, master the basics first with jumping in place! After mastering your jumps, bounds, or hops in place, we can now begin working on moving through different planes of motion. Typically, the easiest place to start will be the sagittal plane simply due to the fact that most athletes are used to moving in this plane. An example of this would be a broad jump or forward jump. However, starting in the sagittal plane isn't always the easiest. Say you have a knee rehab patient who has weak(er) quads and doesn't tolerate loads as well into the anterior knee and tends to shift back on their heel with exercises. This patient, in particular, may actually prefer to start their movement progressions in the frontal plane so they can rely on the hip musculature more.
The exact opposite scenario may hold true for a patient rehabbing from a lateral ankle sprain. This patient "rolled their ankle" and thus would be more hesitant with accepting loading in the frontal plane, but maybe rock-solid in the sagittal plane! The majority of people will do good with a general movement progression from the sagittal, to frontal, to transverse planes of motion across all jumps, bounds, and hops, but it always depends! Read more about ankle sprains HERE!
Plyometric Progressions By Height
Boxes can be used for a variety of different reasons in a rehab progression, but typically they are used to increase or decrease the amount of landing absorption forces or increase force/power output and the rate of force development (RFD). Typically, people use boxes to try to work on the rate of force development and the concentric phase of plyometrics. The higher the box the more force must be exerted into the ground to clear the box! However, this doesn't always hold true, as you can easily tuck your legs to clear a higher box (this is what you'll see in almost any gym)! As you'll see in the short video below, Mike is jumping the same height with each box jump. Why risk clipping your feet on a super high box jump?!
Exercise demonstration
When is Too High For Box Jumps?
We all see the videos on Instagram…someone jumping onto a ridiculously high box and celebrating thinking they're the next @jjwatt. But is that super high box jump necessary? What is the athlete getting out of it? What's the risk vs reward of a high box

In lower extremity rehab, typically we are concerned with the amount of force through the limb during a landing. Boxes come in handy here as when we do a box jump onto an elevated surface, we actually have less force to absorb! This is because the distance and time it takes to go from the peak height of our jump to the surface of the box are much less than the time it takes to go all the way to the ground.
This same application of adjusting landing absorption forces also holds true when we step off a box. You can increase the amount of landing absorption forces by doing things like depth drops/landing, where the goal is to solely focus on form and force absorption. These types of plyometric progressions are a great place to start before having someone perform depth jumps/bounds/hops or true continuous plyometrics.
Exercise 04 of 07
Exercise demonstration
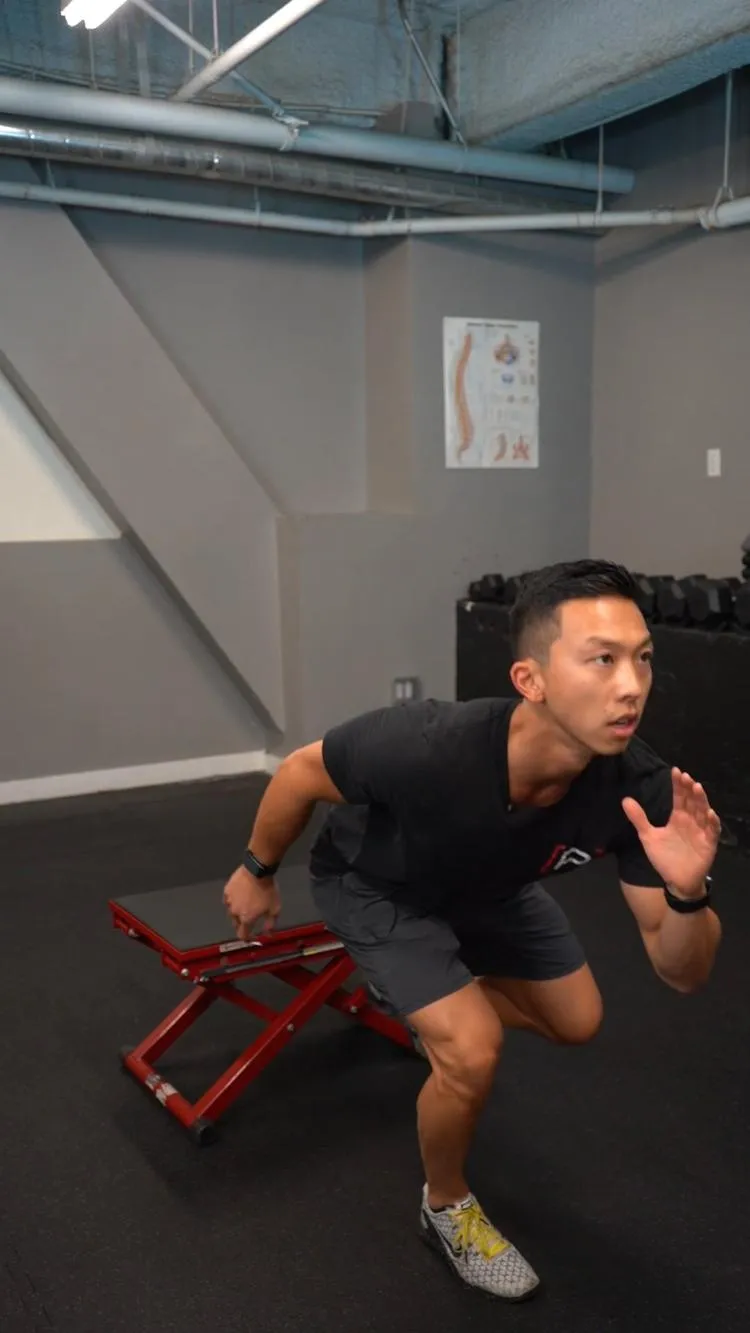
Single Leg Depth Drop
View exercise instructions
- HOW: Standing on an elevated surface, step off with one leg straight down and absorb the landing.
- FEEL: You will feel all the muscles in your legs working.
- COMPENSATION: Landing Position. Make sure your knees are aligned over your toes. They should not dive inwards on the landing. Your goal is to absorb as much of the landing forces as you can and land softly. That means that you want your hips and knees to bend as much as they need to, to absorb the force. If you do not let them bend much, you will land "stiff" and hard. Let your hips go back and while keeping your chest up to help absorb the forces. Your toes should touch the ground first when you land and quickly your heels will follow. You should land in a "ready position" like you would if you were playing sports, with your weight ever so slightly forward on the balls of your feet. You should not fall forward or backwards after landing.
- For a detailed video on landing mechanics on one leg, click here: https://www.youtube.com/watch?v=6RCOGM5tZRM
Exercise 05 of 07
Exercise demonstration
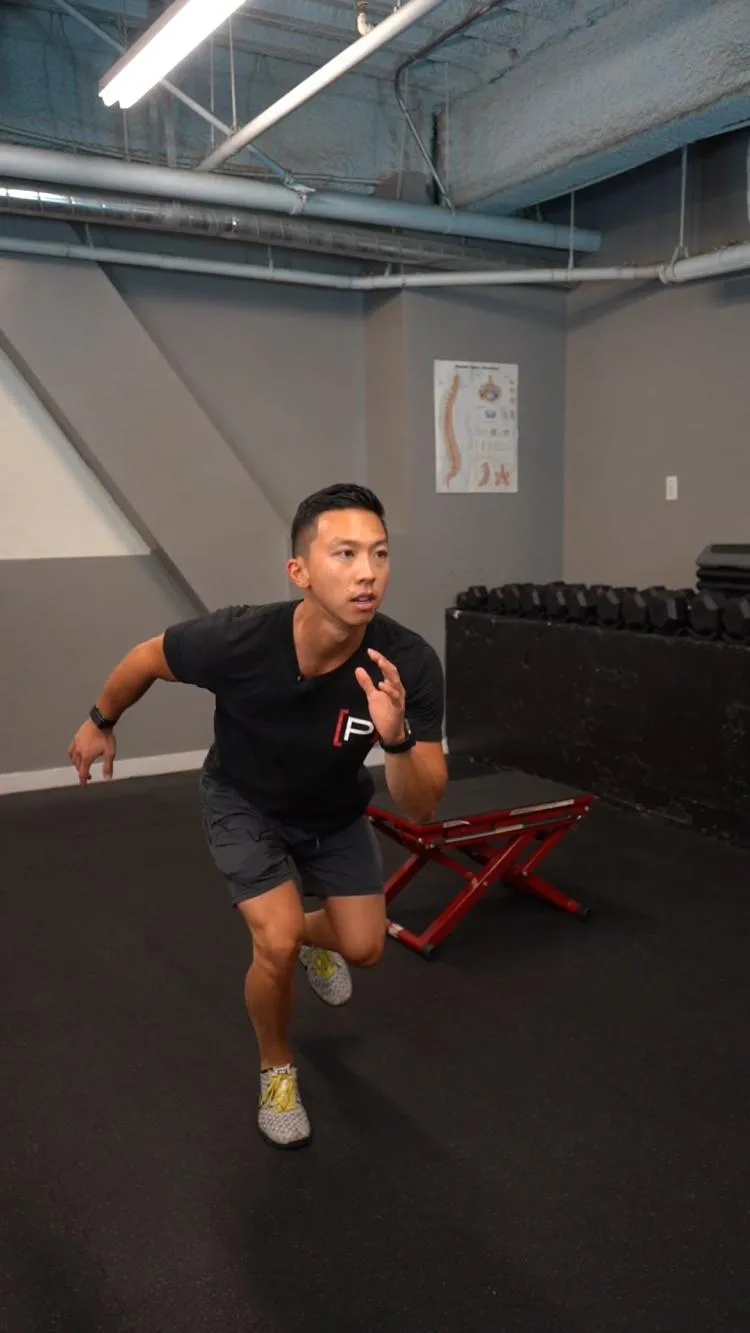
Single Leg Depth Drop To Lateral Hop - Outside
View exercise instructions
- HOW: Standing on an elevated surface, begin by stepping off with one leg straight down. As you absorb the landing with one foot, push into the ground and jump to the outside of that leg and land with the same foot.
- FEEL: You will feel all the muscles in your legs working.
- COMPENSATION: Landing Position. Make sure your knees are aligned over your toes. They should not dive inwards on the landing. Your goal is to absorb as much of the landing forces as you can and land softly. That means that you want your hips and knees to bend as much as they need to, to absorb the force. If you do not let them bend much, you will land "stiff" and hard. Let your hips go back and while keeping your chest up to help absorb the forces. Your toes should touch the ground first when you land and quickly your heels will follow. You should land in a "ready position" like you would if you were playing sports, with your weight ever so slightly forward on the balls of your feet. You should not fall forward or backwards after landing.
- For a detailed video on landing mechanics on one leg, click here: https://www.youtube.com/watch?v=6RCOGM5tZRM
Continuous Jumps/Bounds/Hops
Another important factor to consider and work towards with plyometric progressions is continuous plyometric movements or true plyometrics. To better understand when and why you would choose continuous movements with plyometrics, we need to think about what is the phase emphasis we are working on with our plyometric program and to what degree. Like we mentioned earlier when defining plyometrics, there is an eccentric phase as well as a concentric phase to the movement. When teaching landing mechanics, there is a greater degree of emphasis on the eccentric portion (force absorption) whereas a box jump would have a greater degree of emphasis on the concentric portion (force/power output and RFD).
What is unique about continuous plyometric movements is that there is a relatively equal degree of emphasis on both the eccentric and concentric portion of the movement! Continuous plyometric movements are also very valuable because they can be sport-specific and valuable for improving sport-related skills. There is a large body of scientific evidence to support plyometric training can improve jump, sprint, change of direction performance, throwing/hitting velocity, muscular strength, and even help with preventing injuries (2). Below are some of our favorite continuous plyometric progressions designed to improve change of direction performance!
Exercise 06 of 07
Exercise demonstration
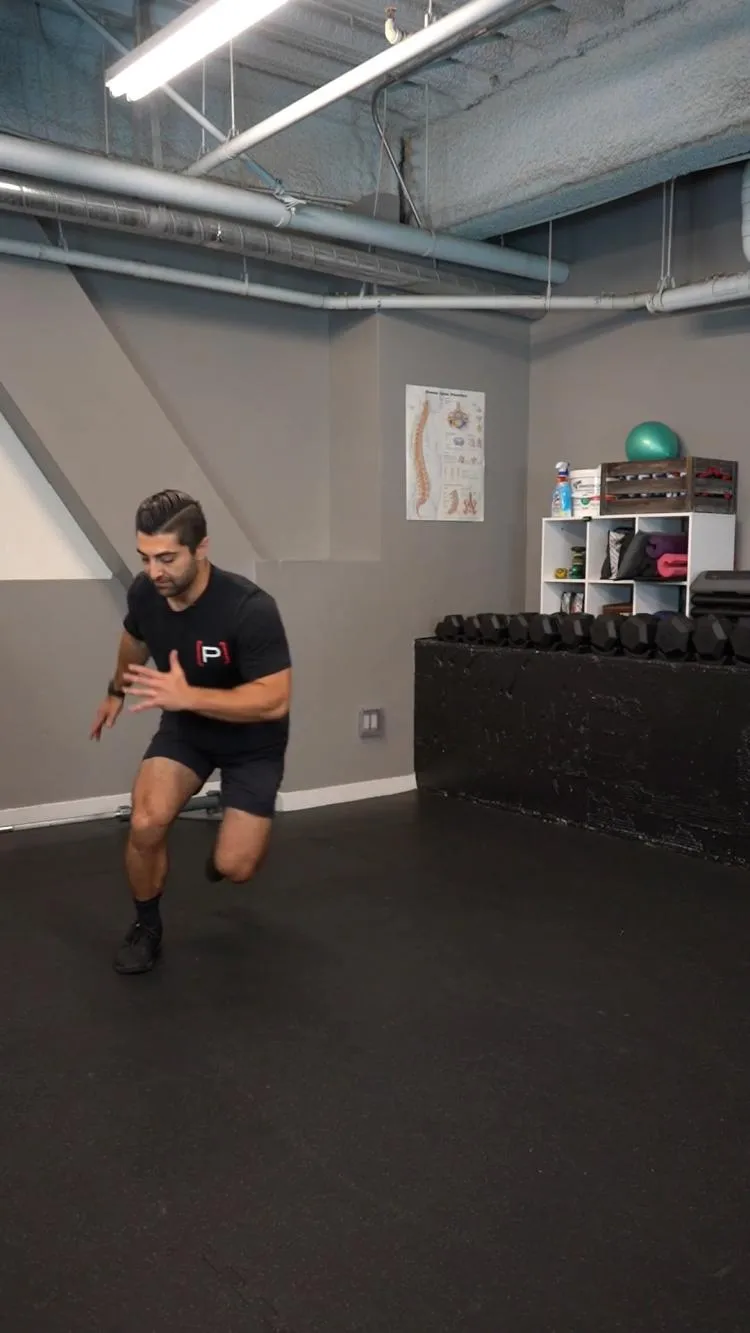
Diagonal Bound - Continuous
View exercise instructions
- HOW: Start in an athletic position. Shift your weight to one side. Jump off of that leg in a diagonal motion going forward. Land softly with the opposite leg. Stay strong in the hip, knee, and ankle as you land. Then, rapidly push off with that leg and land back on your other leg, where you started. Alternate jumps in that diagonal motion trying to minimize how long you stay on your leg.
- FEEL: You should feel your hip, thigh, and calf muscles working.
- COMPENSATION: Keep your chest up as you jump and land. Land on the balls of your feet, not flat footed. Make sure to jump at around a 45 degree angle, not straight forward or lateral.
Exercise 07 of 07
Exercise demonstration
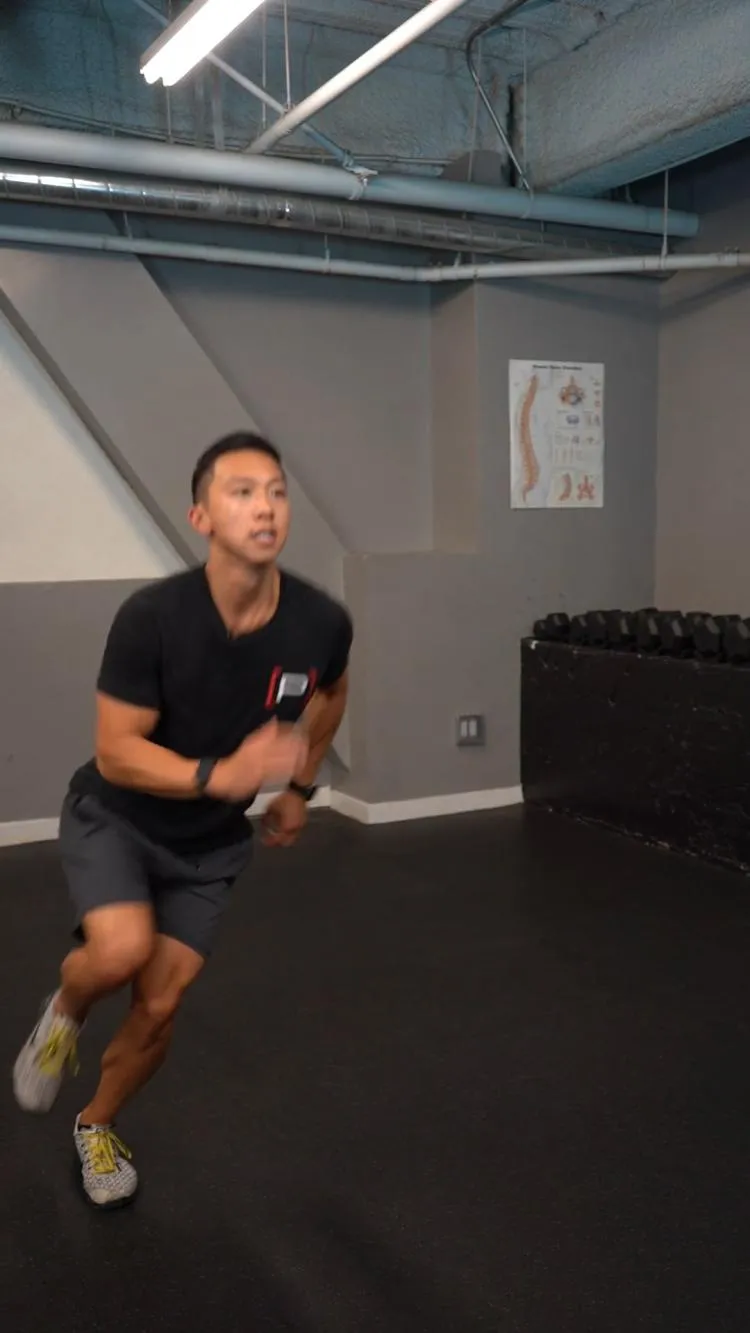
Continuous Lateral Hop - In Place
View exercise instructions
- HOW: Shift your weight to one leg with your knee slightly bent and the other leg off of the ground. Then push into the ground and hop to one side and then return. Perform this in a continuous motion for the prescribed amount of reps.
- FEEL: You will feel all the muscles in your legs working.
- COMPENSATION: Landing Position. Make sure your knees are aligned over your toes. They should not dive inwards on the landing. Your goal is to absorb as much of the landing forces as you can and land softly. That means that you want your hips and knees to bend as much as they need to, to absorb the force. If you do not let them bend much, you will land "stiff" and hard. Let your hips go back and while keeping your chest up to help absorb the forces. Your toes should touch the ground first when you land and quickly your heels will follow. You should land in a "ready position" like you would if you were playing sports, with your weight ever so slightly forward on the balls of your feet. You should not fall forward or backwards after landing.
- For a detailed video on landing mechanics on one leg, click here: https://www.youtube.com/watch?v=6RCOGM5tZRM
Closing Thoughts
There are a lot of considerations when it comes to plyometric progressions! However, with a thorough understanding of plyometrics and all of the variables involved, you most definitely can program plyometric progressions for rehab. It just requires planning, trial & error, adapt, and repeat! If you want to take the guesswork out of plyometric progressions, look no further than our Jump Fundamentals & Plyometrics Prehab Programs!
Time To Take Flight With Our Program!
The first effort to be taken is showing gravity that you are willing to go against it with improving your jump performance! However, beforee the plane takes off let's make sure the landing gear is ready. In the first few weeks, you will earn foundational landing mechanics to prep the landing gear before take-off!
References
- Bogdanis et al. 2017, "Comparison between Unilateral and Bilateral Plyometric Training on Single and Double Leg Jumping Performance and Strength." J Strength Cond Res. 2017 Apr 18. doi: 10.1519/JSC.0000000000001962
- Suchomel, T.; Wagle, J.P.; Douglas, J.; Taber, C.; Harden, M.; Haff, G.G.; Stone, M.H. Implementing Eccentric Resistance Training—Part 2: Practical Recommendations. J. Funct. Morphol. Kinesiol. 2019, 4, 55.
About The Author
Michael Lau, PT, DPT, CSCS
Prehab Co-Founder & Chief Product Officer
 Michael was born and raised in Northern California but now currently resides in Sunny SoCal ever since attending the University of California, Los Angeles as an undergraduate majoring in physiology. After his undergraduate studies, he received his Doctorate in Physical Therapy from cross-town rival the University of Southern California. As a licensed physical therapist with a strong background in strength and conditioning, Michael likes to blend the realms of strength training and rehabilitation to provide prehab, or preventative rehabilitation, to his patients. A common human behavior is to address problems after they become an issue and far often too late, which is a reactionary approach. He believes the key to improved health care is education and awareness. This proactive approach-prehab-can reduce the risk of injuries and pain in the first place. He is a huge proponent of movement education and pain science. Clinically, he has a special interest in ACLR rehab and return to sport for the lower extremity athlete.