
On this page 9 sections
Your guide
What you'll learn
“This blog is one of our ‘clinical pearls’, which is designed to assist clinicians in understanding exercise progressions for various clinical conditions. Throughout each of these clinical pearls, you will learn multiple ways to attack similar issues we all see when treating our patients. We also highlight many of our personal exercise library videos throughout these pearls, all of which you can gain access to as an exercise library member!”
Detailed Subjective: Training, Running Experience, Injury History
When starting to put together your pieces to the puzzle of differentially diagnosing runner's knee, it is important to gather a detailed subjective regarding your patient's running training as well as experience. Here are some key questions that you will want to ask:
What is your training volume? How many days are you running per week? What training surfaces do you run on?
We know that most running injuries occur due to OVERTRAINING. Oftentimes, simply educating your patients on appropriate training and programming can solve the issue!
If a runner is training on the same surface, it may make them more susceptible to injury. This is especially the case for uneven surfaces on the road if the runner is running on a slanted road, as well as downhill running in regards to runner's knee, as this can create moment arm changes at the hip and knee, placing more stress and tension on the attachments of the IT band as well as the patella.
Have you had any previous injuries from running or outside of running?
Previous injuries are also a risk factor for recurring running injuries. It also may give you perspective on a patient's movement impairments, running technique, etc. when moving forward with your evaluation. Common injuries to screen for include plantar fasciitis, stress fractures, posterior tibial tendinopathy, Achilles tendinopathy, runner's knee, hip tendinopathy, or low back pain.
How long have you been running?
If someone is new to the sport of running, he or she may need more guidance in regards to running technique, proper training techniques, and how to build their body the right way for the sport.
What footwear do you utilize? Do you keep track of how often you change your running shoes?
Research is conflicting in regards to if shoe type truly matters in regards to preventing running injuries. However, research has shown that as the wear and support decrease on a shoe due to increased mileage, there is an increase in the amount of ground reaction force (GRF) that the body undergoes, which can lead to injury.
There is variability in regards to how often to change footwear, with most research agreeing around 300-500 miles depending on how quickly one wears down their shoes. Moreover, educating patients to try and have 2 pairs of shoes they can interchange throughout their training helps improve the lifespan of shoes.
The Ultimate Resource For Educating and Programming For Your Patients

Are you searching for a better way to provide education and exercise programming for your patients? The Prehab Exercise Library is the best library available to the public that can optimize the resources you are providing for your patients and clients! Click HERE to gain access today.
What Is The Root of the Issue?
Before even starting with the rehab process for an individual with runner's knee, you must figure out the root of the issue. From a pathophysiology perspective, we know that two of the most common causes of this condition include iliotibial band friction syndrome and patellofemoral pain syndrome. That is not to say that these pathologies are not able to occur simultaneously, as this occasionally is the case.
Here are some (not all) of the movement screens I like to utilize when evaluating runners:
Exercise 01 of 12
Exercise demonstration
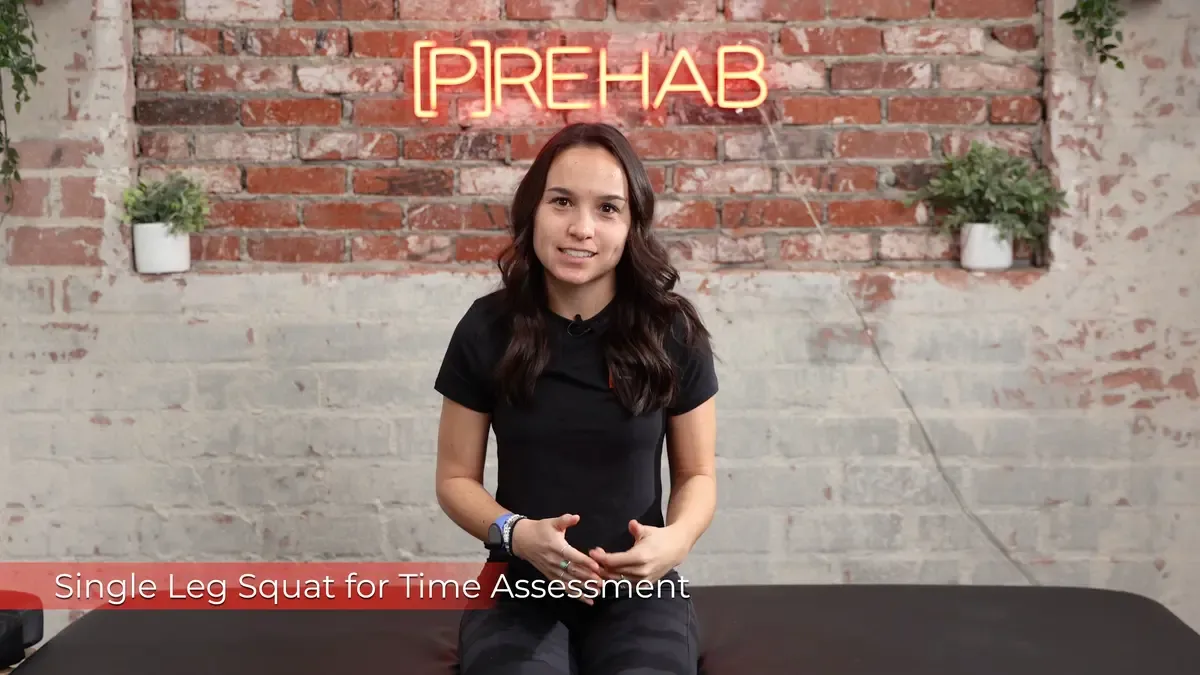
Single Leg Squat For Time Assessment
View exercise instructions
Sample Prehab Exercise Library Assessment Video
Movements to keep an eye out for include: Knee valgus, excessive forward trunk lean, early heel rise, and poor eccentric control
Exercise 02 of 12
Exercise demonstration
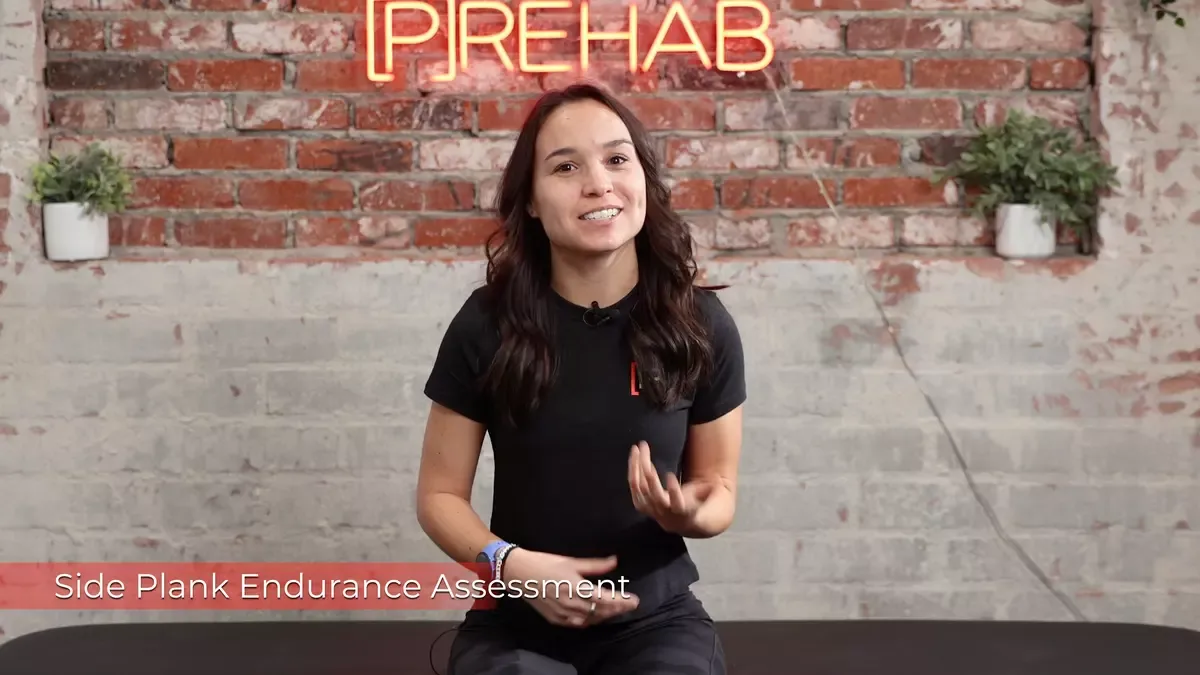
Side Plank Endurance Assessment
View exercise instructions
Goal I shoot for initially is 20 seconds, and also if they can abduct the opposite hip
Lateral Step Down Endurance Test: Look for similar compensations you may see with single leg squat to chair
Single Limb Stance Opposite Hip Flexed and Eyes Closed: This gives me the ability to quickly screen the patient's joint proprioception and foot positioning in single limb stance, which is heavily demanded during running.
Foot Posture Index: This will help you assess foot positioning and help you gather more information objectively when going through your examination process. You can find access to the Foot Posture Index HERE!
Single Leg Bridge Endurance Test: This is a great test to look for asymmetries with single limb positioning as well as motor control of the glutes
Functional Squat (unloaded and loaded): Look for any compensations such as weight shift towards weaker/uninvolved side, excessive posterior pelvic tilt, limited squat depth (mobility issue at ankle and/or hip), early heel rise, or forward trunk learn
Open Kinetic Chain (OKC) and Closed Kinetic Chain Ankle Dorsiflexion Range of Motion:
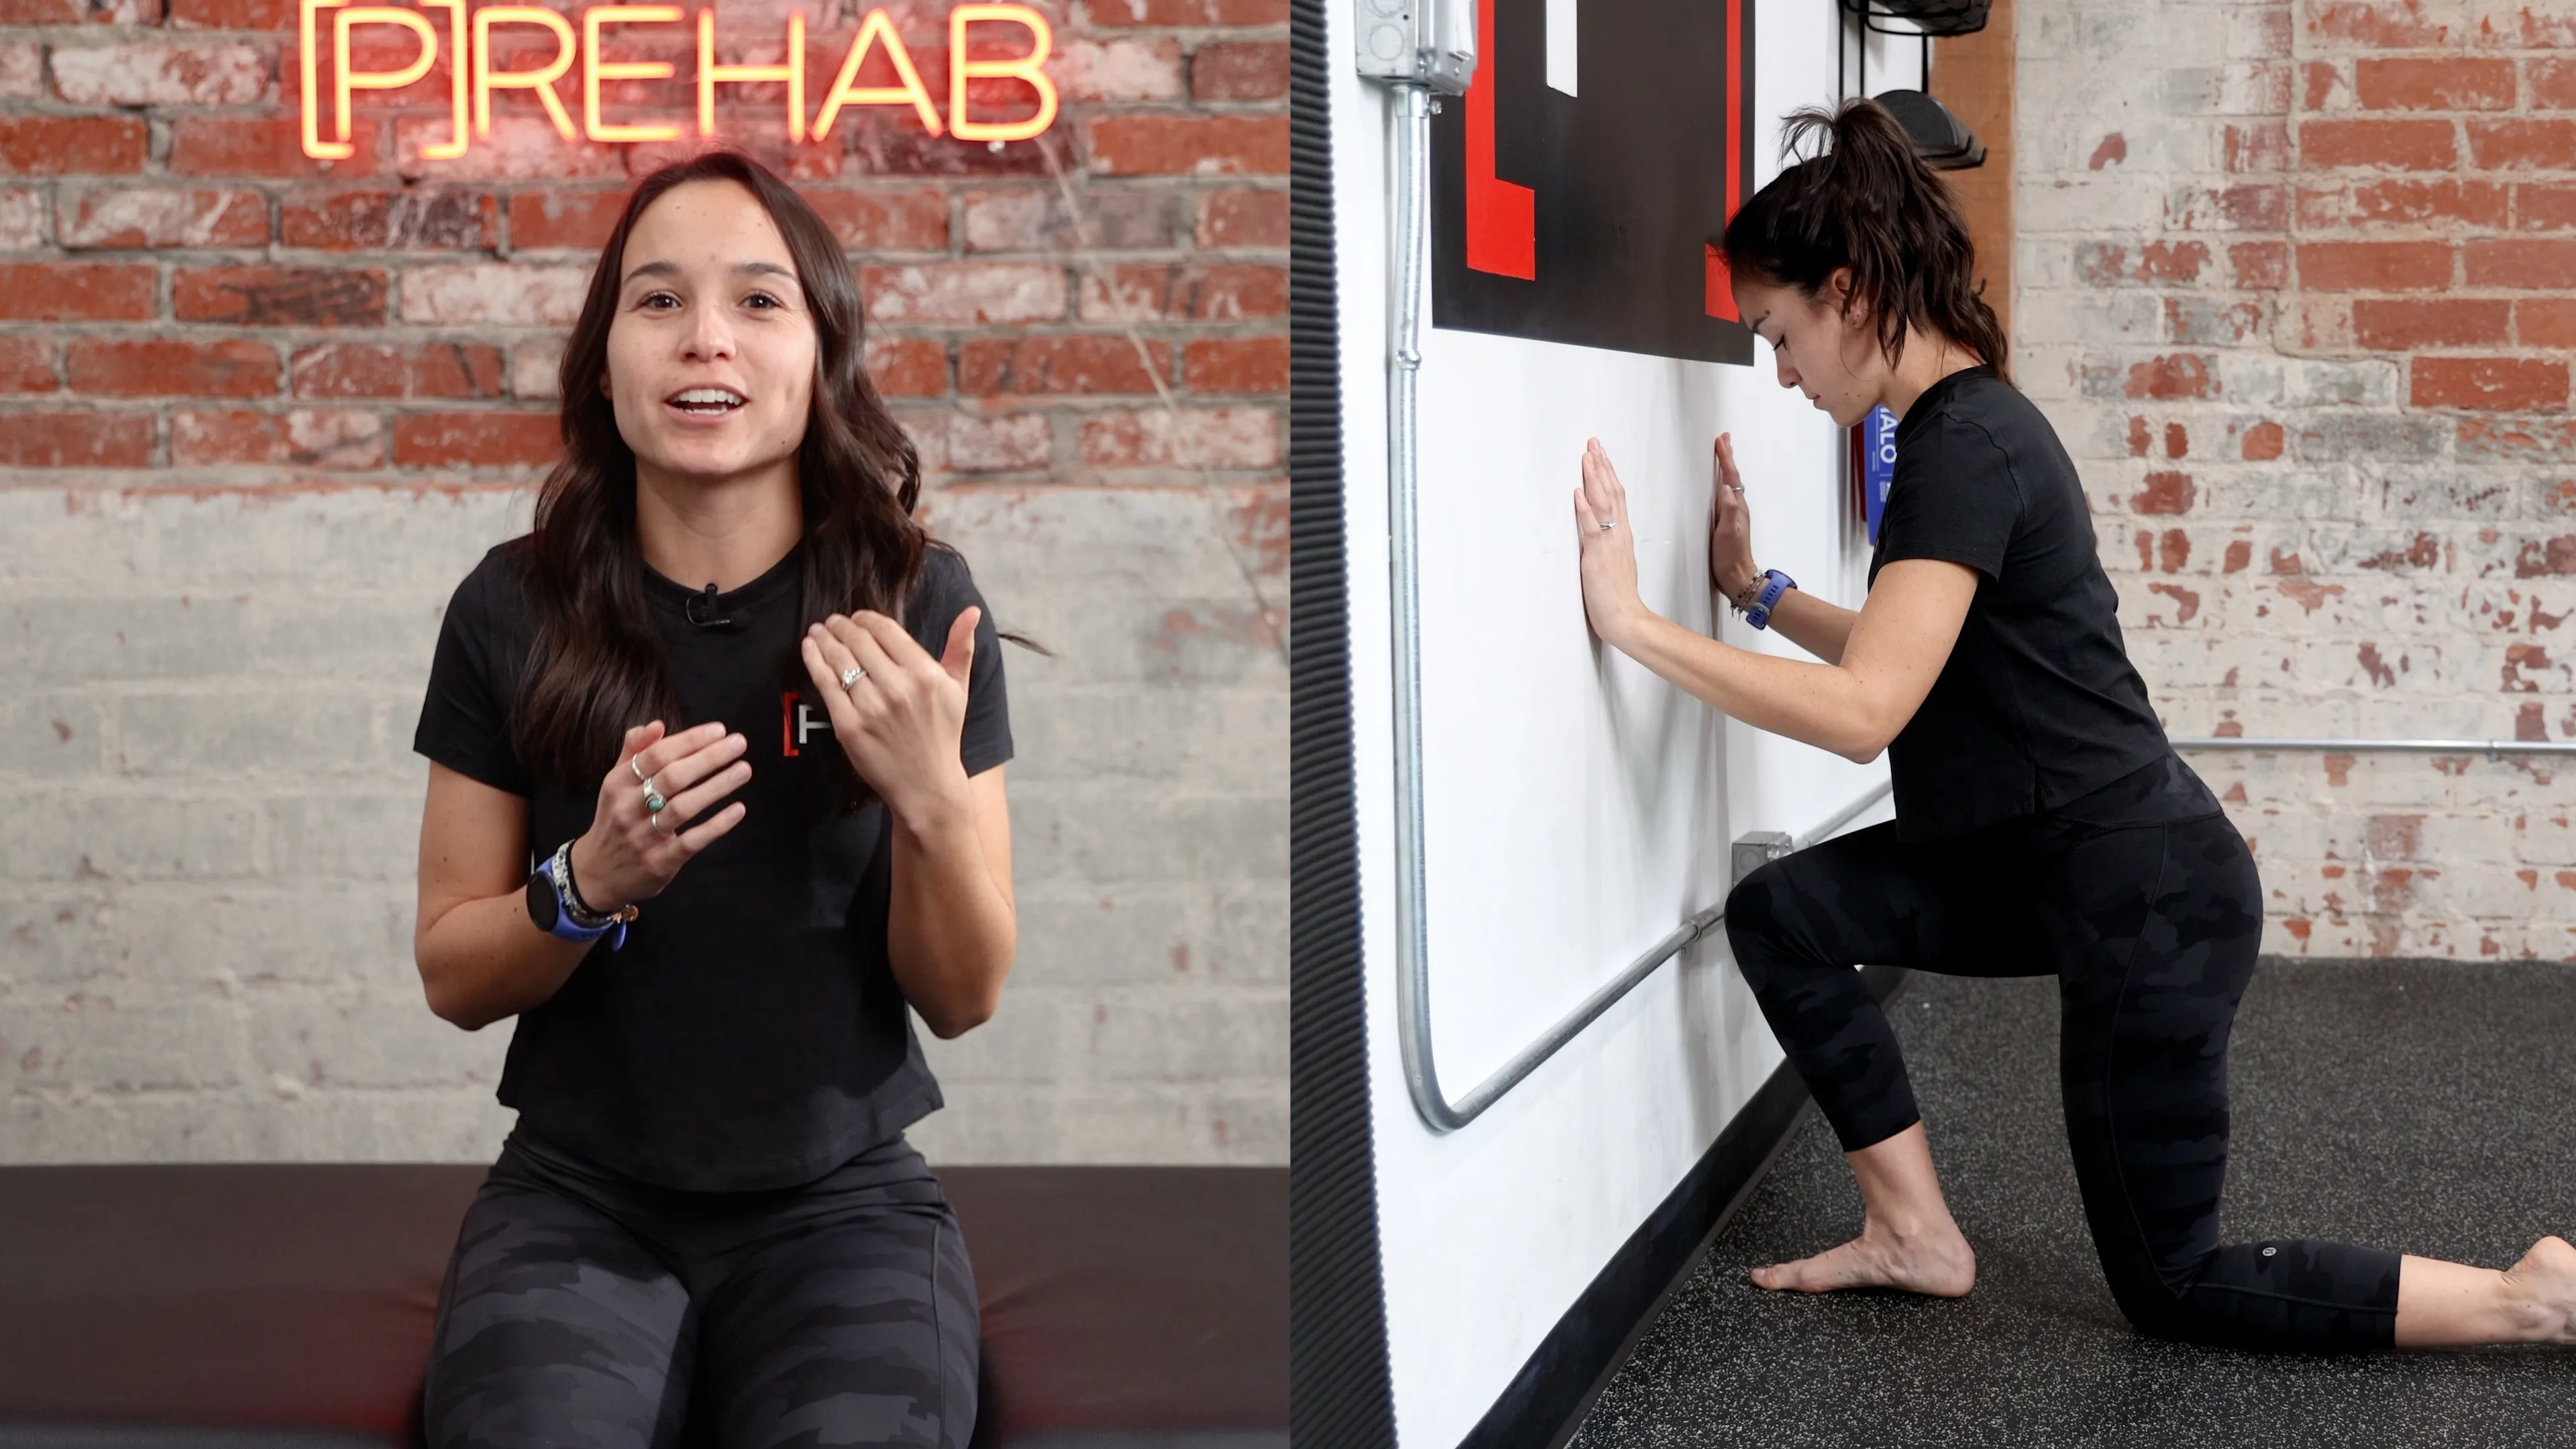
Important to assess ankle dorsiflexion and if limited it may lead to compensations in runners.
Phase 1: Put Out The Fire
The first step in rehabbing runner's knee is putting out the fire. We do not want to load the knee right away but work around it the best we can. A runner may need to stop their training entirely and purely focus on rehab in this first phase. This is a key part of your education, and ensuring the patient is fully bought in. It is perhaps the most challenging part of the rehab process. In addition to starting exercises to build strength, stability, and motor control of the core and lower extremities, there are also active release techniques that can be performed to help calm down the irritation around the knee.
Here are the Clinical Pearls of phase 1:
Dynamic Mobility: Place emphasis on addressing any flexibility deficits of the lower quarter, and if you are going to educate runners on foam rolling the IT band, make sure you teach them the RIGHT way! This is further described below.
Proximal Strengthening: Starting with some strengthening of the core stabilizers and hip musculature is great in phase 1. Mostly stick to exercises that do not place a large amount of stress on the knee joint. This will be saved for the later phases.
Don't Forget The Quad: The quadriceps as we know is a key stabilizer to our patellofemoral joint. We know strengthening the hips is the sexy thing to do in knee rehab; however, we can't neglect our quadriceps! This is especially important if you notice a runner may be having tracking issues, either when loaded or even unloaded.
Why Runners Need To Do Strength Training

Phase 1 Dynamic Mobility
If there are any mobility deficits, you definitely want to address them early. Common areas of the lower extremity that are limited in mobility for individuals with runner's knee include hip flexors (rectus femoris and iliopsoas), tensor fascia lata (TFL), hip rotators, hamstrings, and the gastrocnemius/soleus complex. In regards to stretching, research has not supported that static stretching reduces the risk of injury.
However, all runners should be educated in a dynamic movement routine prior to running. Just like any other activity, we want to prime our body for the activity we are going to do, whether that be bench pressing, Olympic weight lifting, or running.
Exercise 03 of 12
Exercise demonstration
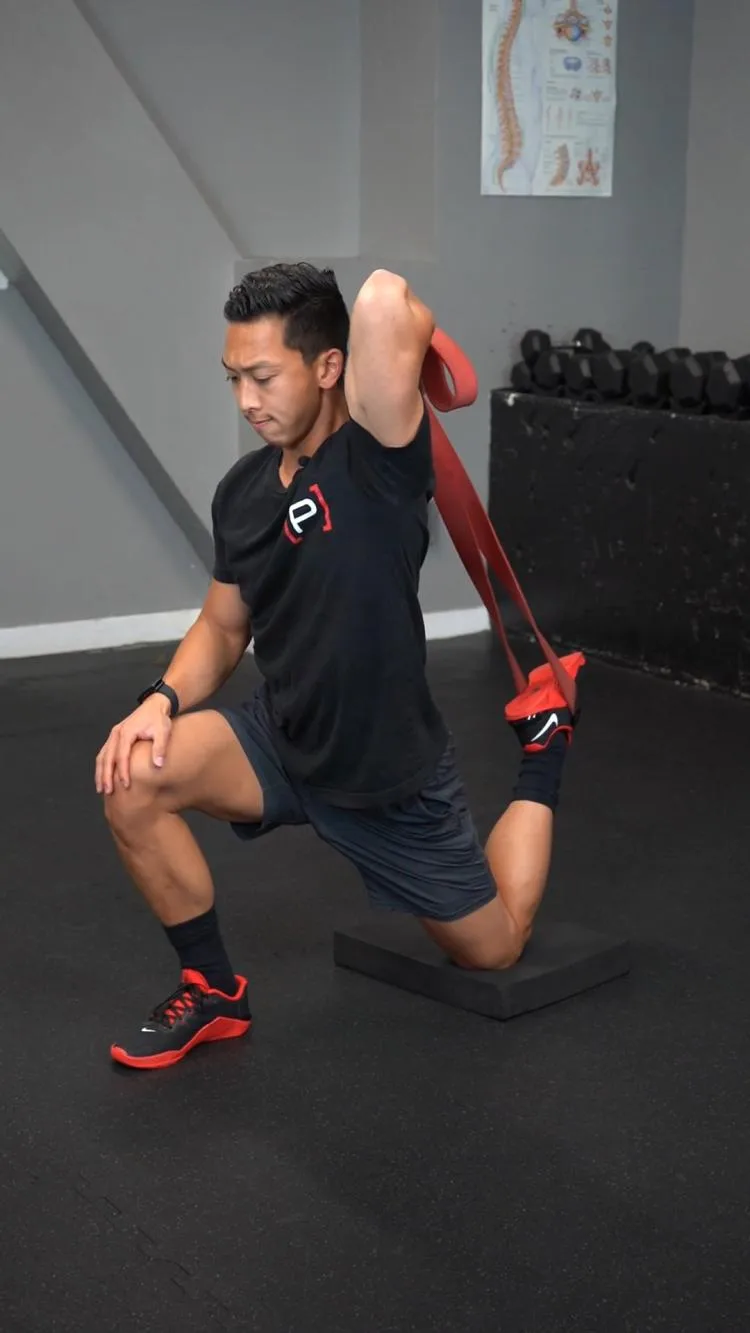
Half Kneeling Quadriceps Stretch - Dynamic, Strap
View exercise instructions
- HOW: Place a pad on the ground. Kneel on the pad with one knee and place the other foot flat on the ground with your knee bent in front of you. Wrap a band or strap around the foot that is behind you. Grab onto the strap with one hand behind your shoulder. Pull your foot up creating a stretch in your quad. Once you feel that stretch, lean forward for a few seconds and repeat.
- FEEL: You should feel a stretch in your quad and hip.
- COMPENSATION: Keep your back upright while you move your body forward.
This is one of my favorite ways to bias rectus femoris muscle length.
You can also have the patient place the back foot on a chair if they respond better to that body position versus using a strap as shown in this video.
Exercise 04 of 12
Exercise demonstration
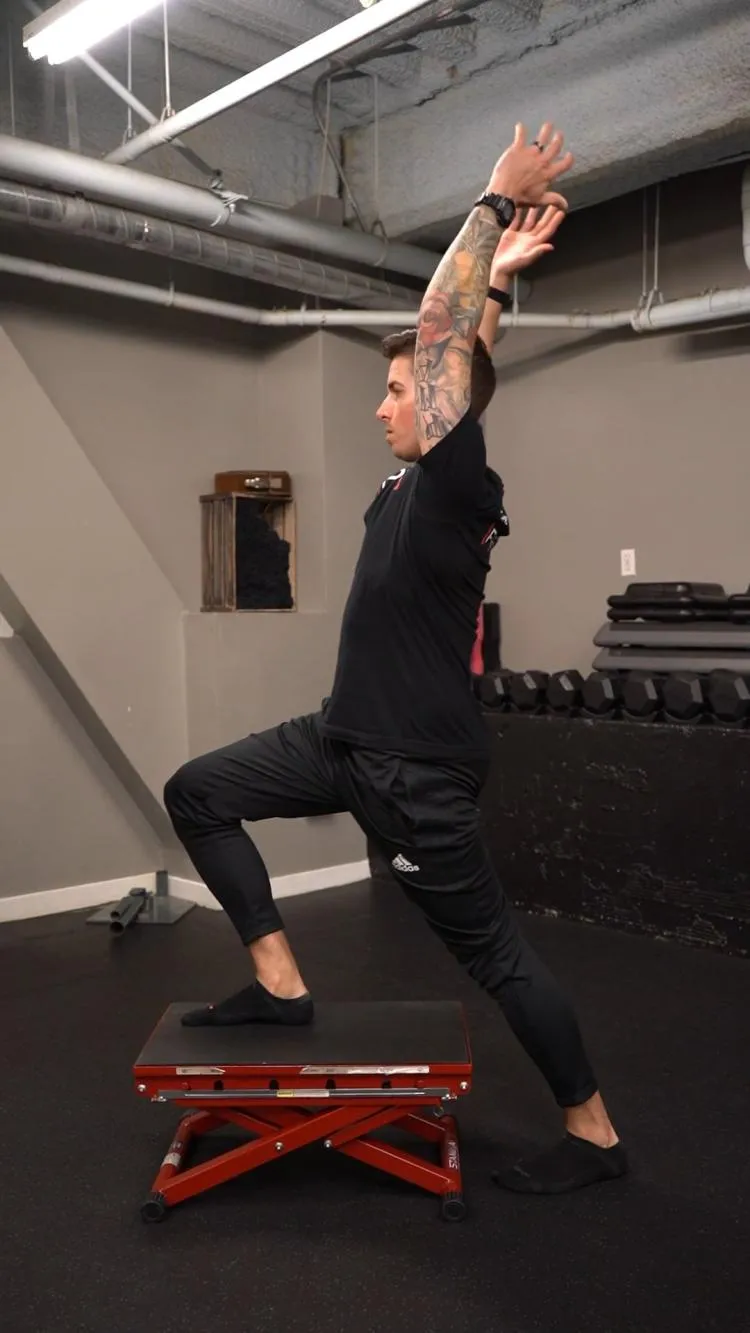
Standing Hip Flexor Stretch - Dynamic, Arm Elevation
View exercise instructions
- HOW: Get set-up standing with a box or object in front of you that you can put one foot up on. The side that remains down on the ground is the one getting the stretch. Put one foot up, perform a posterior pelvic tilt, and shift your weight forward as you simultaneously reach both arms overhead until you feel a stretch. Hold that position for a moment, back out of it and then repeat to make it dynamic. The arm reach is to help shift your weight forward into more hip extension for a greater stretch.
- FEEL: You will feel a stretch in front of your hip that you are stretching
- COMPENSATION: It is important to get into the correct position at first by shifting your weight forward while maintaining a posterior pelvic tilt and squeezing your glute on the same side. See video for tips
The iliopsoas originates on the vertebral bodies of the lumbar spine, and inserts onto the lesser trochanter of the femur.
By elevating the arms and even adding a side bend of the lumbar spine to the opposite side of the hip you are stretching will help lengthen this muscle even further.
Great cue: Think about tilting your pelvis backward as well as pulling your rib cage away from your pelvis to create more movement and mobility.
Best Stretches After Running
Phase 1 Proximal Strengthening
Starting with proximal strengthening during the initial phase when the knee is still irritated is a great start. We know that hip and core deficits play a large role in knee pain with runners.
Exercise 05 of 12
Exercise demonstration
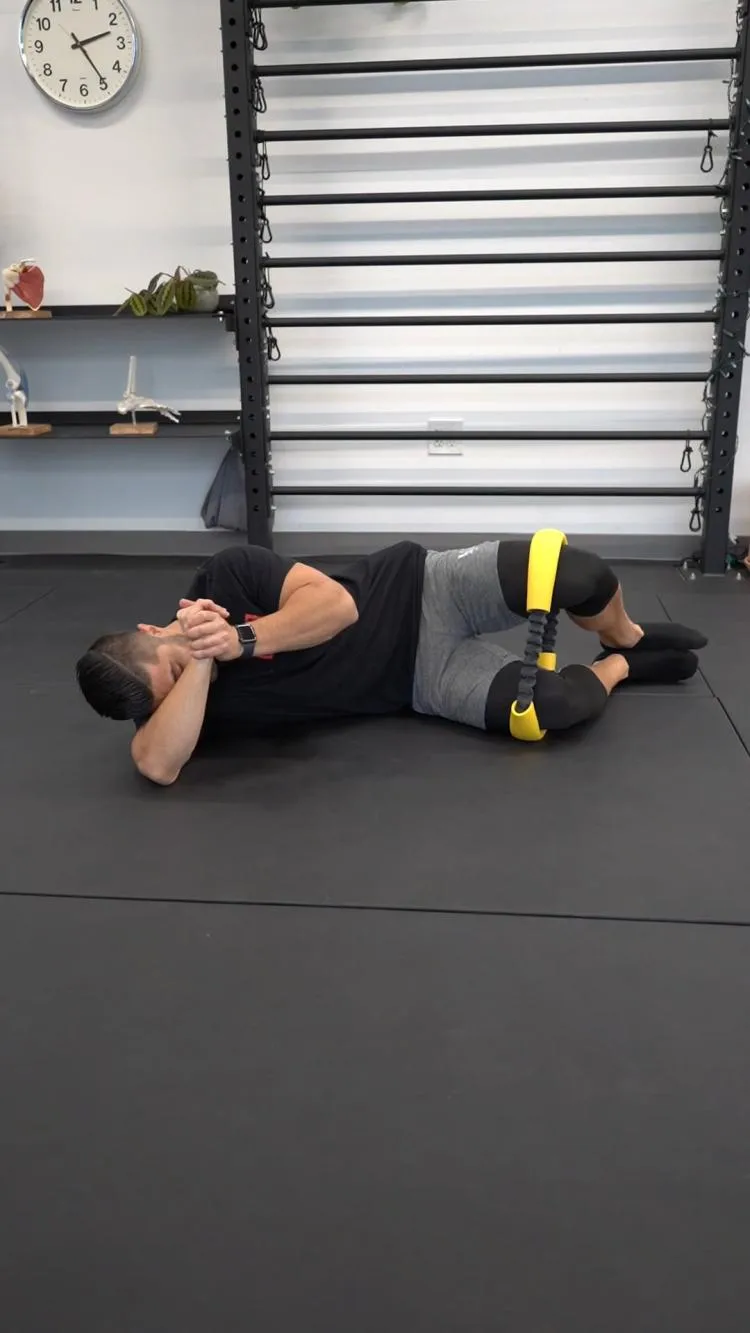
Clam - Band, Core Activation
View exercise instructions
- HOW: Begin on your side with your shoulders, hips, knees, and ankles stacked over each other. Place the resistance band just slightly above your knees. In this side lying position open your top knee up towards the ceiling as high as you can. Your feet can stay in the same position, make sure this motion is driven from the knee.
- FEEL: You should feel the outer hip, particularly the glute muscles with this exercise.
- COMPENSATION: Avoid rotating your entire trunk with this exercise. Make sure the shoulder that is facing the ceiling stay in front of the shoulder that is against the floor.
The clams exercise will promote muscle activation of our gluteus medius, as well as our gluteus maximus, which performs not only hip extension but external rotation.
Although the clamshell is a good exercise that you can start with, it is NOT the end all be all, best exercise for gluteus medius strengthening. The bigger bang for your buck glute med exercises involves more load, as we will discuss later on.
Strengthening of the gluteus maximus will help with the prevention of femoral adduction and internal rotation during mid-stance of running, which can place more unwanted stress at the knee.
Exercise 06 of 12
Exercise demonstration
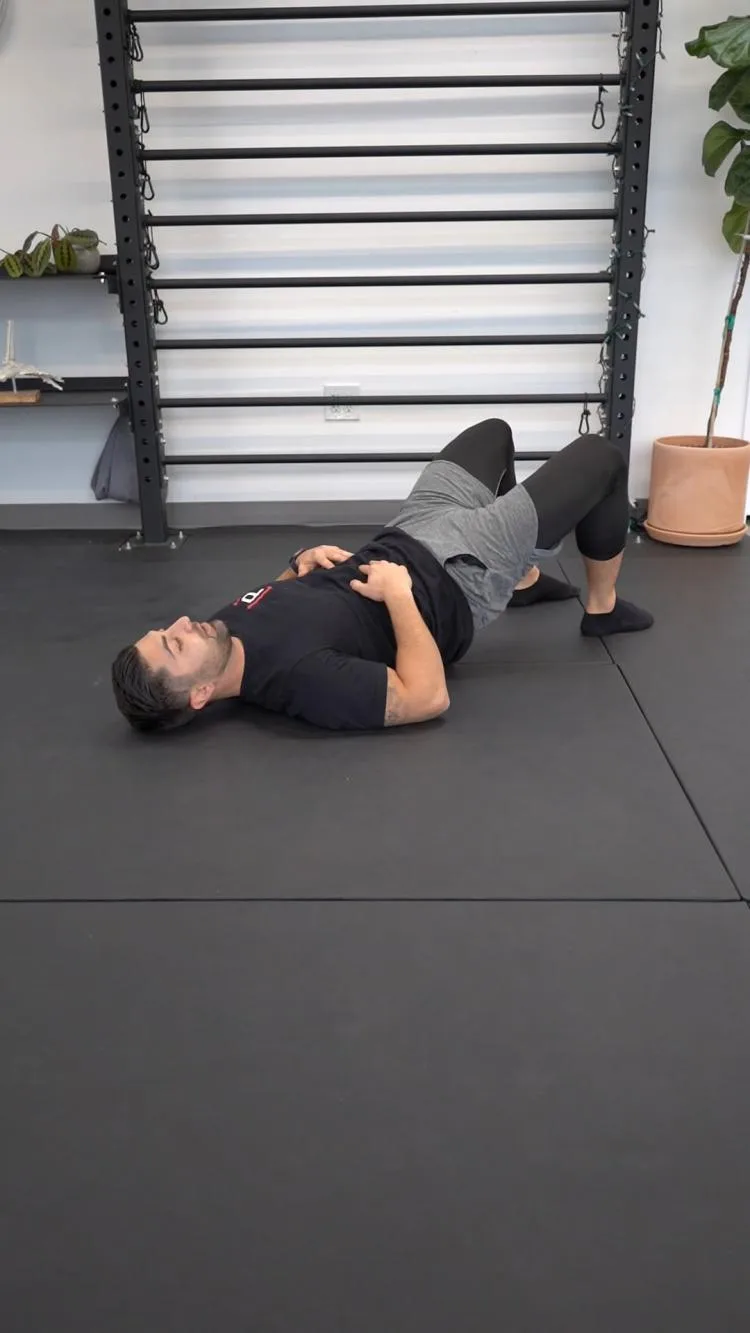
Supine Bridge
View exercise instructions
- HOW: Start on your back with your knees bend and slightly spread apart. Tighten up your stomach first, then your glutes. Next, drive your heels into the ground and lift your hips up towards the ceiling. At the end position your knee, hip, and shoulder should be in one straight line. Hold the end position and squeeze the glutes, then slowly return to starting position.
- FEEL: You should feel your glutes work to control this motion. At no point should you feel your low back muscles doing the lifting motion. If you feel it only in your hamstrings, try bending your knees a bit more and repeat.
- COMPENSATION: Avoid arching at the low back as you perform this.
The bridge exercise will also promote activation of the gluteus maximus.
We have an ENTIRE CLINICAL PEARL dedicated to Bridge Progressions, where you can learn more progressions of the bridge!
Establish their muscle firing pattern: With this movement, when you are educating a runner on how to perform this, pose the question first: "What area of your body do you feel is working the hardest?" That way before giving any cues or feedback, you can get an idea of the patient's motor control and activation responses from their musculature when performing a bridge. The response will be one of the following:
- My Back: Compensation often seen when the posterior chain is inhibited and individuals overarch at their low back to compensate
- The back of my thighs: This may be due to either inhibition of the glute max, weakness of the glute max, or an increased lever arm of the hamstrings if the heels are too far from the buttock. This can be easily fixed by having the patient move their heels closer to their butt.
- The front of my thighs: The quads are a secondary mover during the bridge, but should not be the prime mover. Usually is due to quad dominance and/or posterior chain deficits
- My Butt: This is what we want!! If the patient feels that on their first try, there will not be much cueing you have to do besides telling the patient to do a bunch more reps!
Exercise 07 of 12
Exercise demonstration
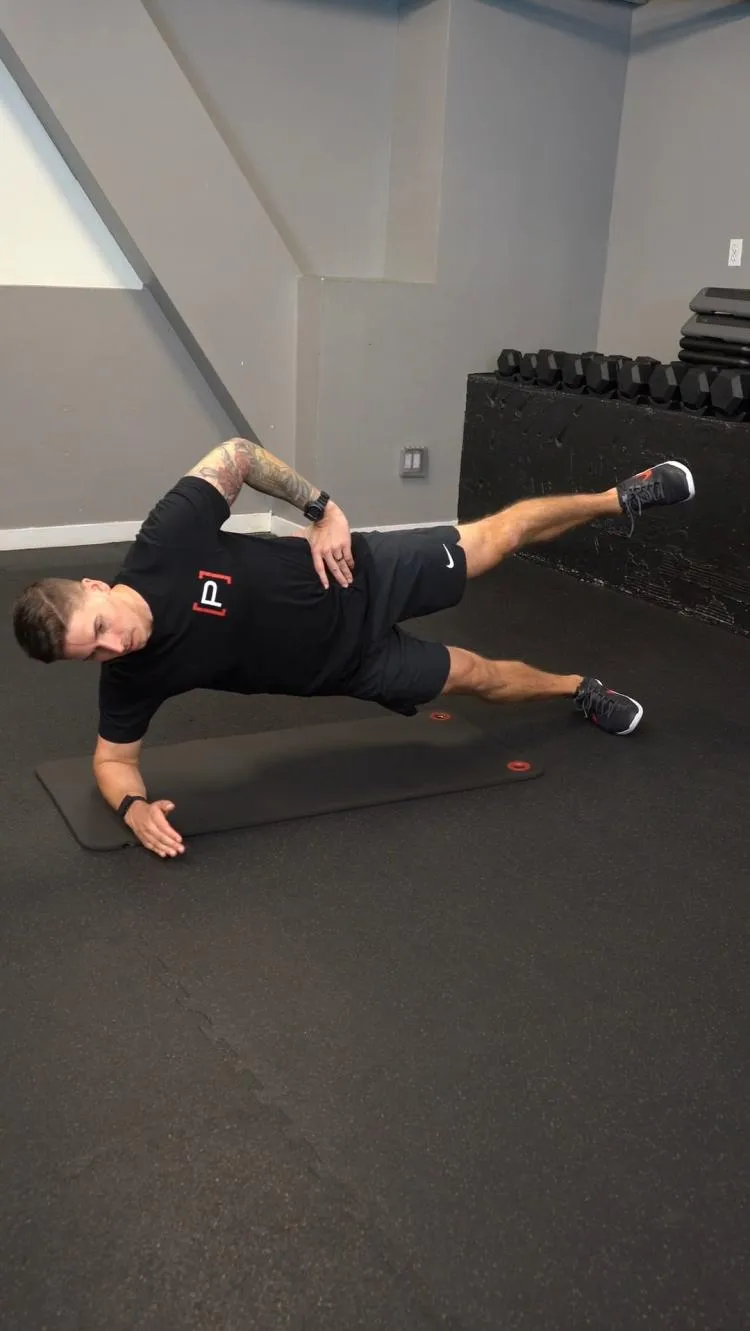
Side Plank- Isometric Hip Abduction
View exercise instructions
- HOW: Get set-up on your side with your elbow directly under your shoulder and your forearm supported on the ground. Have your feet stacked and supported on the ground with the knees straight. To begin the exercise, push your hips up and forward as high as you can and hold this position. Then lift your top leg up towards the ceiling while keeping it straight and in line with your body, hold this position.
- FEEL: This should feel like a full-body exercise. Your shoulder and shoulder blade muscles will be working as well as your hip, back, and stomach muscles. You will especially feel your right hip and core muscles working if you’re laying on your right side. Follow the video for other cues and tips.
- COMPENSATION: Do not let your hips or shoulder sag, do not let your body rotate. Do not let the leg in the air sag down.
HIGHEST GLUTE MED EMG ACTIVITY! You can read more about the best exercises for glute med activation HERE!
Exercise 08 of 12
Exercise demonstration
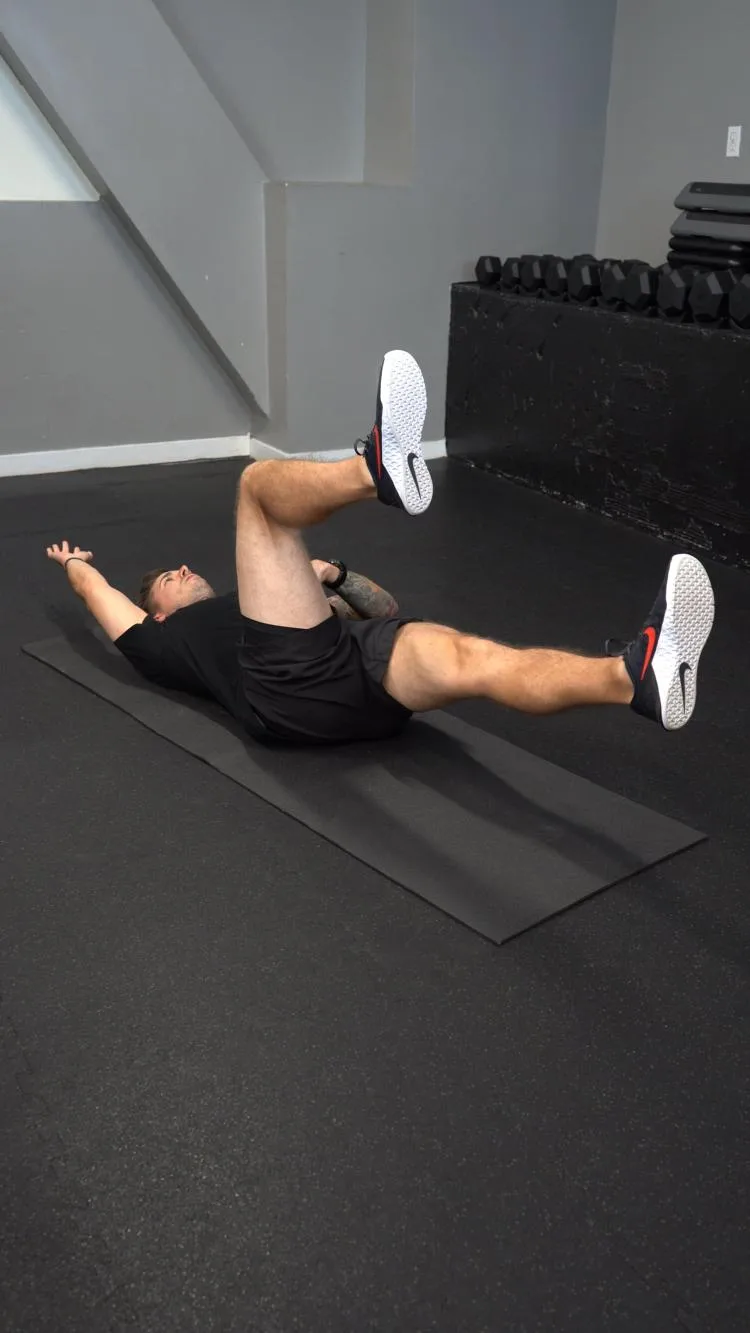
Dead Bug
View exercise instructions
- HOW: Start this exercise on your back in a 90/90 position, with your knees over your hips and your arms in front of your shoulders. Keep the small of your back pushed into the floor by activating your core. While maintaining core activation drop one leg and the opposite arm towards the floor. The closer you drop the arms and legs towards the floor the more challenging this exercise will be. Return to starting position and repeat on the opposite side.
- FEEL: You should feel the abdominal muscles engaging while you perform this exercise.
- COMPENSATION: Do not let your low back arch
Sample Prehab Exercise Library Video
Do NOT neglect core stabilization with your runners. Dead bugs are an excellent way to work on promoting stiffness throughout our spine, which is very important during running to improve economy!
Exercise 09 of 12
Exercise demonstration
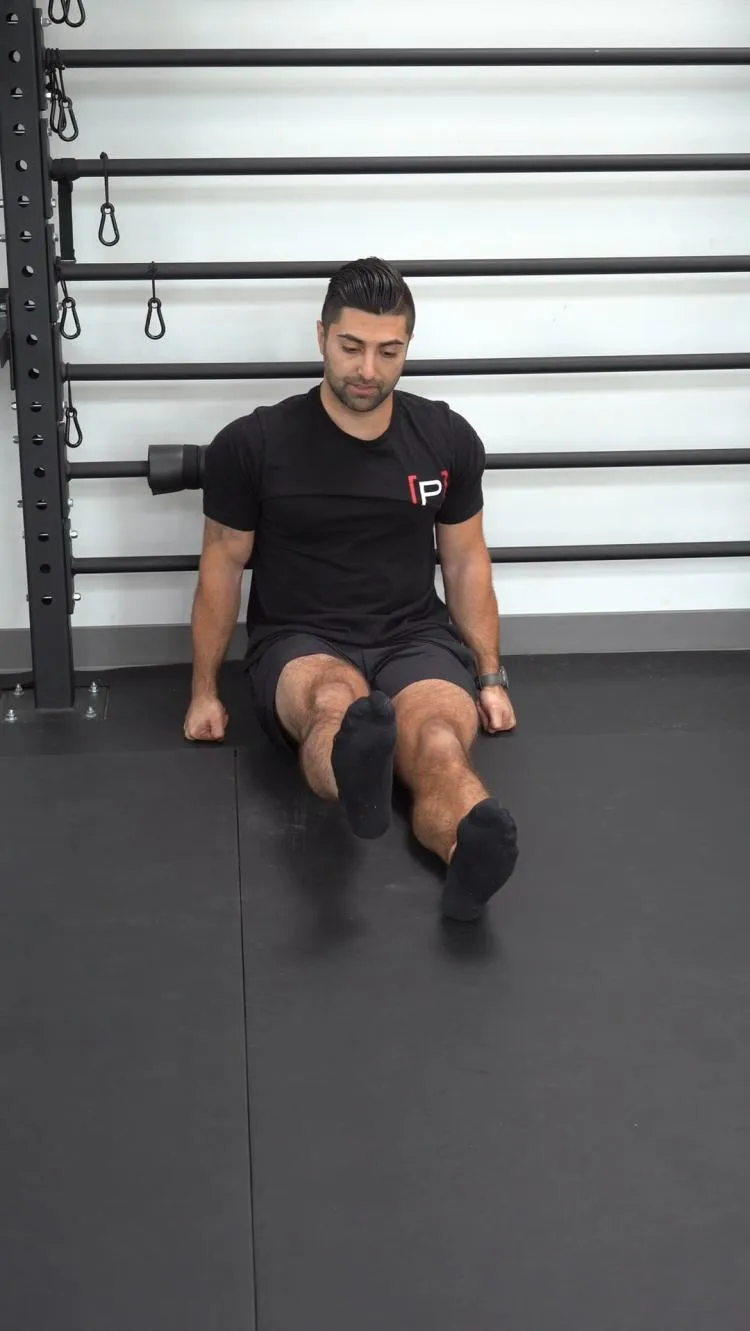
Long Sitting Straight Leg Raise
View exercise instructions
- HOW: In a seated position place your back up against the wall. While keeping your core engaged raise your leg off the floor as high as you can. Hold for as long as prescribed then return back to the floor.
- FEEL: You will feel the muscles on the front of your hip and your thigh as you perform this exercise.
- COMPENSATION: Avoid arching the back as you perform this exercise.
If a runner is suffering from ITBFS, you may need to start quad strengthening within a shorter range of motion to avoid compression and/or friction of the IT band over the lateral femoral condyle/gerdy's tubercle (its insertion point). Straight leg raises and short arc quads are a good place to start to promote quad activation within a shorter range.
Phase 2: Re-Exposure and Progressive Loading
Now that we have put the fire out, Phase 2 will consist of progressions of more stability and strengthening exercises, with a focus on single limb stability, which is essential when rehabbing runners.
Exercise 10 of 12
Exercise demonstration
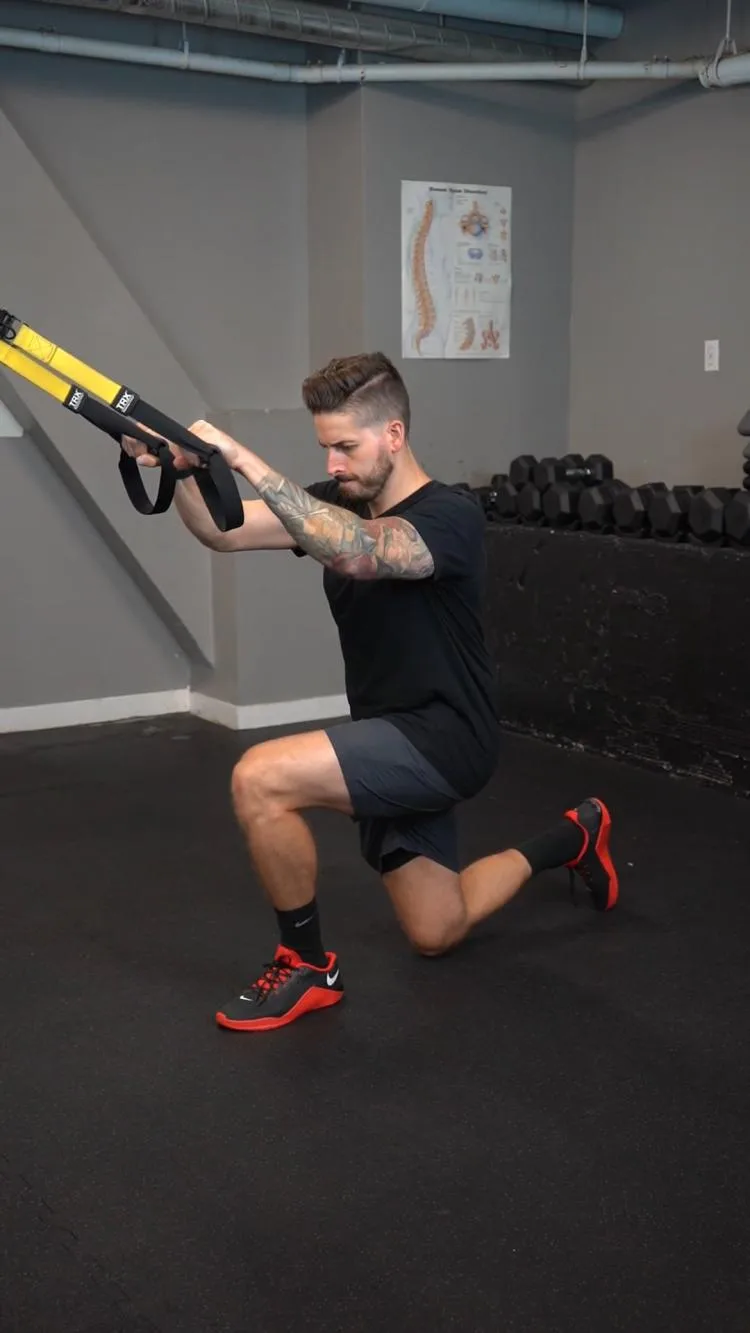
Posterior Lunge - TRX
View exercise instructions
- HOW: Begin with the anchored suspension trainer bands in both hands. Stand tall as you begin with tension in the bands. While holding your hands at chest height, step back with one foot bending and lowering the front knee. Use your arms and the leg that steps back as little as you can.
- FEEL: You should feel your leg muscles working
- COMPENSATION: Don’t use the bands to pull yourself up. Keep your back upright.
The posterior lunge is a great start for individuals with runner's knee if the knee is still irritated, as it will still put some load through the knee, but a greater emphasis on the hip musculature.
The trunk will flex forward naturally to keep your center of mass on the box, thus utilizing the glutes/hip more in addition to shortening the lever arm on the knee.
Exercise 11 of 12
Exercise demonstration
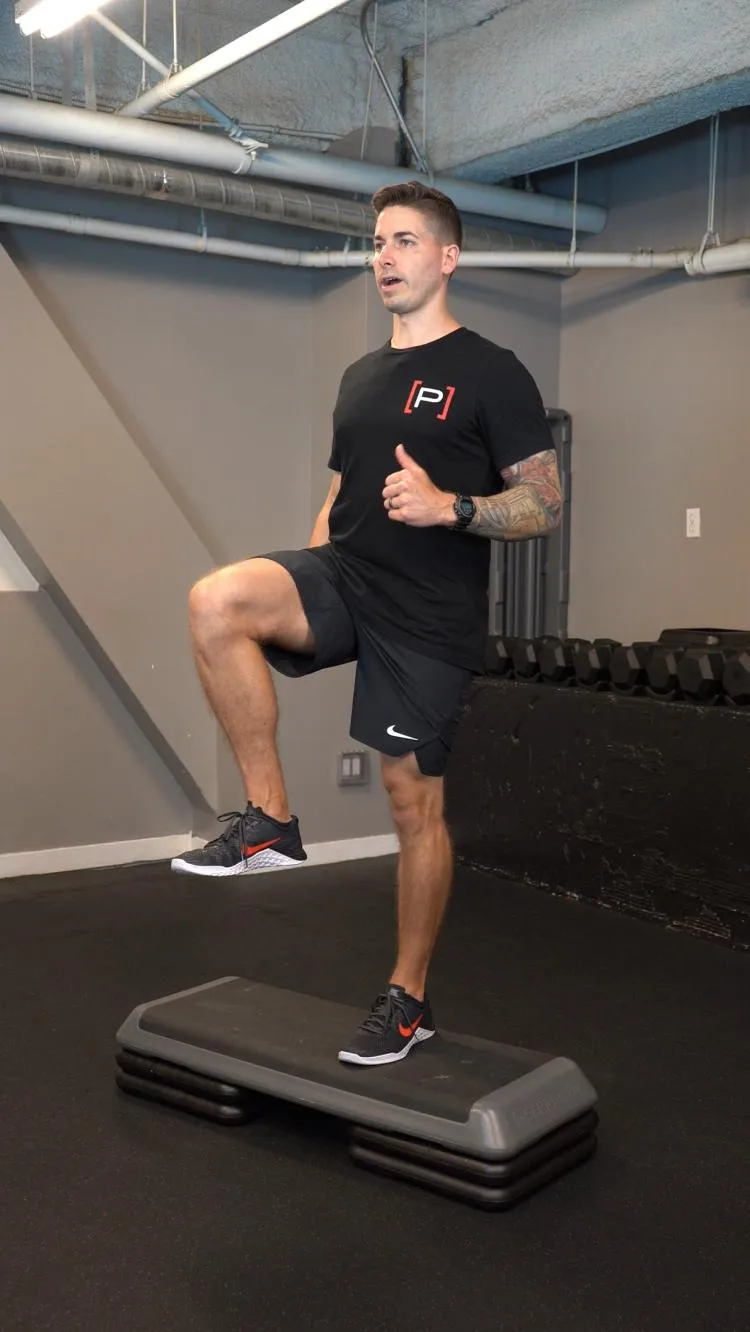
Anterior Step Up To Single Leg Balance
View exercise instructions
- HOW: Stand behind the box/step. Place the leg you want to perform the exercise with on the box/step, step up and balance on that leg. Squeeze the butt muscles in that leg as you balance, and then step back down. The leg never leaves the box/step.
- FEEL: You should feel the thigh muscles and the butt muscles working in the leg that is on the box/step.
- COMPENSATION: Avoid letting your knee cave in as you step up and step down. Make sure you have equal weight distribution throughout your whole foot the entire time. Avoid pushing off the ground with your back leg as you are stepping up. Don’t step down to fast – try to control it.
The forward step is one of the best exercises for runners. This exercise is very functional and translates to the coordination needed for running, works on both concentric and eccentric muscle contractions, and promotes unilateral weight-bearing to meet the demands of running.
When working on the forward step up, be sure your runners start with a lower step height, as compensations are often incorporated into movements with this exercise. Once they demonstrate very good single limb stability, eccentric control, joint proprioception, and strength, the following progressions can be made:
Higher Step Height: The higher height will require the lower extremity to go through a further range of motion, promoting more strength and stability benefits
Addition of weight - I am a proponent of a weighted vest if accessible to still work on arm swing while accomplishing axial loading, but if not, a barbell or dumbbells are also great
Exercise 12 of 12
Exercise demonstration
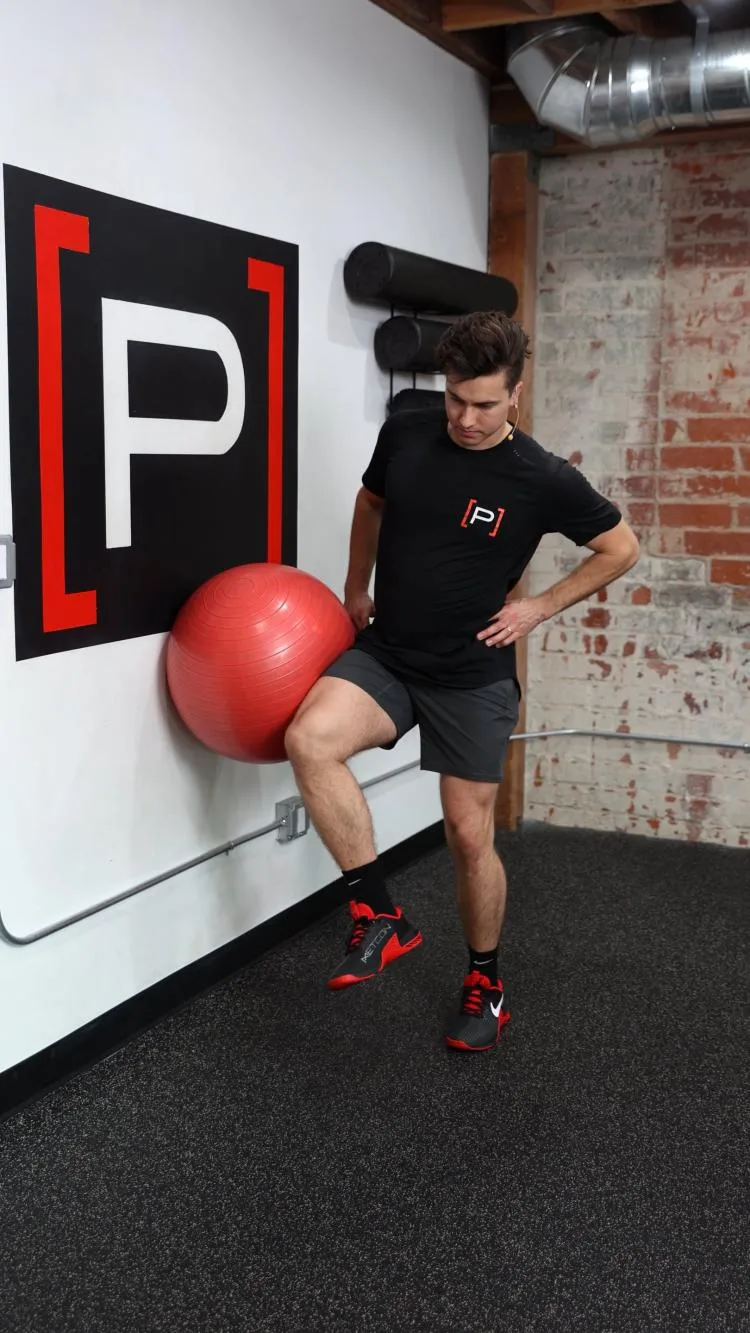
Captain Morgan - Swissball
View exercise instructions
- HOW: Get set-up near a wall, while standing on one leg (further away from the wall), hold a ball against the wall with the outside of your thigh/knee on the side that is closer to the wall. While maintaining this, let your hip/pelvis sink on the side further away from the wall followed by lifting your hip back up to push harder into the wall. Repeat.
- FEEL: You will feel your hip muscles on both sides working, especially the one that is performing hip drop/hikes. You may also feel your quads and calves working.
- COMPENSATION: Do not drop the ball, try to keep your knee relatively straight on the side that is on the ground. Try to maintain a lean towards the wall.
The captain morgan is an excellent way to target the hip abductors and external rotators with single limb loading.
The addition of the physioball will add more stabilization requirements throughout the core and lower body due to it being an uneven surface. If it is too challenging for your patient, start with a simple hip ER isometric against the wall, utilizing a fixed surface.
Running Strength Programming Low Hanging Fruits
Here are some principles to consider when programming strength training for runners:
The majority of strength training should be done during a more anaerobic focused running schedule, as strength and power are more closely associated with this system. This would include interval training, sprints, fartlek runs, and other workouts that incorporate utilizing lactate thresholds, VO2 max, and our phosphagen/glycolytic energy systems.
The myth of high reps and low resistance for runners simply is WRONG! Just like any other athlete, runners NEED LOAD!! Do NOT be afraid to load your runners.
When training endurance athletes, focus on neural adaptation training for runners with higher intensities and fewer reps. This will emphasize adaptations of our nervous system for running while not prioritizing muscle hypertrophy as the primary focus. This is more so implicated for competitive endurance runners who want to maximize their running economy by competing at a lighter body weight.
Closing Thoughts
Part one of this clinical pearl focused on gathering a detailed subjective history, establishing rapport and buy-in from your runners, and how to start rehabbing by putting out the fire. Address the impairments that you find in your initial evaluation and utilize those findings to guide your treatment plan. Work 'around the knee' by addressing proximal strength and/or core stabilization deficits as well as mobility impairments. From there, the graded exposure and beginning to load the knee is where the next progressions will be. In part 2, we will transition towards advanced rehab progressions and getting your runners back to the sport they love!
Take The Challenge Out Of Creating Programs For Your Runners
The Prehab Exercise Library is the best library available to the public that can optimize the resources you are providing for your patients and clients! Click HERE to gain access today.
Clinician
Sherif Elnaggar, PT, DPT, OCS, SCS
Prehab Head of Content
 Sherif graduated from Temple University with a Bachelor’s of Science Degree and a concentration in Kinesiology. He then received his Doctorate of Physical Therapy Degree from DeSales University, graduating with honors of the professional excellence award and research excellence award. After his graduate studies, he served as Chief Resident of the St. Luke’s Orthopedic Physical Therapy Residency Program. Sherif is a Board Certified Orthopedic Clinical Specialist. Sherif focuses on understanding how movement impairments are affecting function while also promoting lifestyle changes in order to prevent recurrences of injury. His early treatment interests include running related injuries, adolescent sports rehab, and ACL rehab in lower extremity athletes. He also has been involved in performance training for youth soccer players. Outside of working as a physical therapist, he enjoys traveling, running and cycling, following Philadelphia sports teams, and spending time with his family.
Disclaimer - The content here is designed for information & education purposes only and is not intended for medical advice.