

On this page 11 sections
Your guide
What you'll learn
Rotator cuff-related shoulder pain (RCRSP) is the third most common condition seen clinically and likely to be the number one mispronounced diagnosis! RCRSP is a complex condition surrounding a complex joint. We have over 70 orthopedic clinical tests for the shoulder joint and spend countless hours learning them and trying to identify exactly what is causing this pain. Are these tests able to give us that information? In short, no and we will explain why later. The term RCRSP was born as an umbrella term encompassing subacromial pain (impingement) syndrome, rotator cuff tendinopathy, and symptomatic partial and full thickness rotator cuff tears. As complex as the joint and condition is, we hope to help you find simple solutions! In this post we will take you through tips/assessments/progressions that you will find in the Prehab exercise library. The goal is to ensure the patients you are working with have fully prepared their shoulder complex to take on the demands of their environment!
“This blog is one of our ‘clinical pearls’, which is designed to assist clinicians in understanding exercise progressions for various clinical conditions. Throughout each of these clinical pearls, you will learn multiple ways to attack similar issues we all see when treating our patients. We also highlight many of our personal exercise library videos throughout these pearls, all of which you can gain access to as an exercise library member!”
4 Phases of RTC Rehab
Below are the phases we will break down in this clinical pearl!
Phase I - Symptom Modulation
Phase II - Restore Balance and Mobility
Phase III - Strength and Capacity Building
Phase IV - Performance
Rotator Cuff Related Shoulder Pain Patterns
This condition can really be present in all populations but tends to show up more as people age. Each year approximately 1% of adults over the age of 45 years present to their primary care provider with a new episode of shoulder pain, the most common source tends to be specific to the rotator cuff and associated structures (Fleming et al 2005). Age and hand dominance seem to play a role. The odds of an individual sustaining a Rotator Cuff Tear were 5.07 times higher for individuals >60 years old and the dominant side is 2.30 times more likely to sustain a Rotator Cuff Tear compared to the non-dominant hand (Sayampanathan et al 2017). This brings up the point of when patients refer to a “good side” and “bad side”. In a perfect world, we would have a baseline strength test to show us limb dominance prior to the injury. As much as a hand grip test can give us this answer, we can do better. The cuff is a dynamic stabilizer that allows comfortable UE movement to occur.
Exercise 01 of 12
Exercise demonstration
What Is The Job Of The Rotator Cuff
View exercise instructions
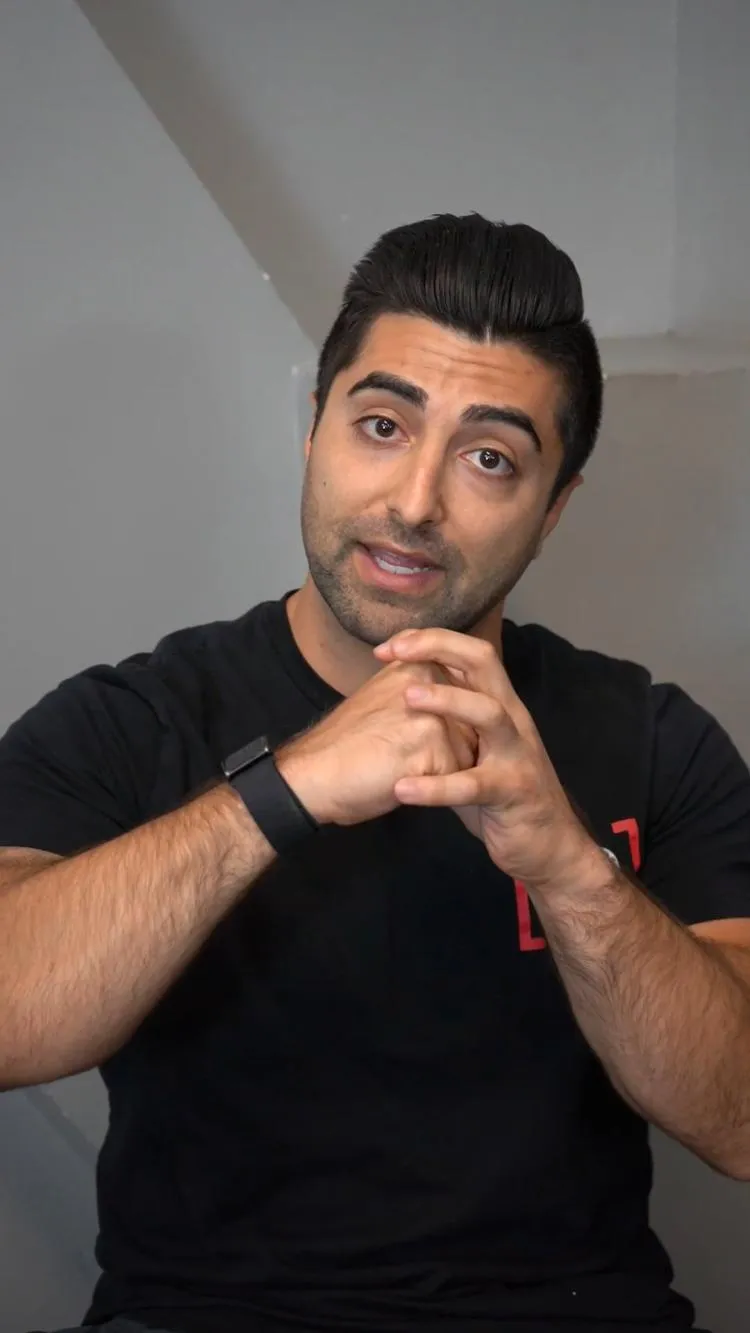
- Watch this video to learn what the rotator cuff muscles do!
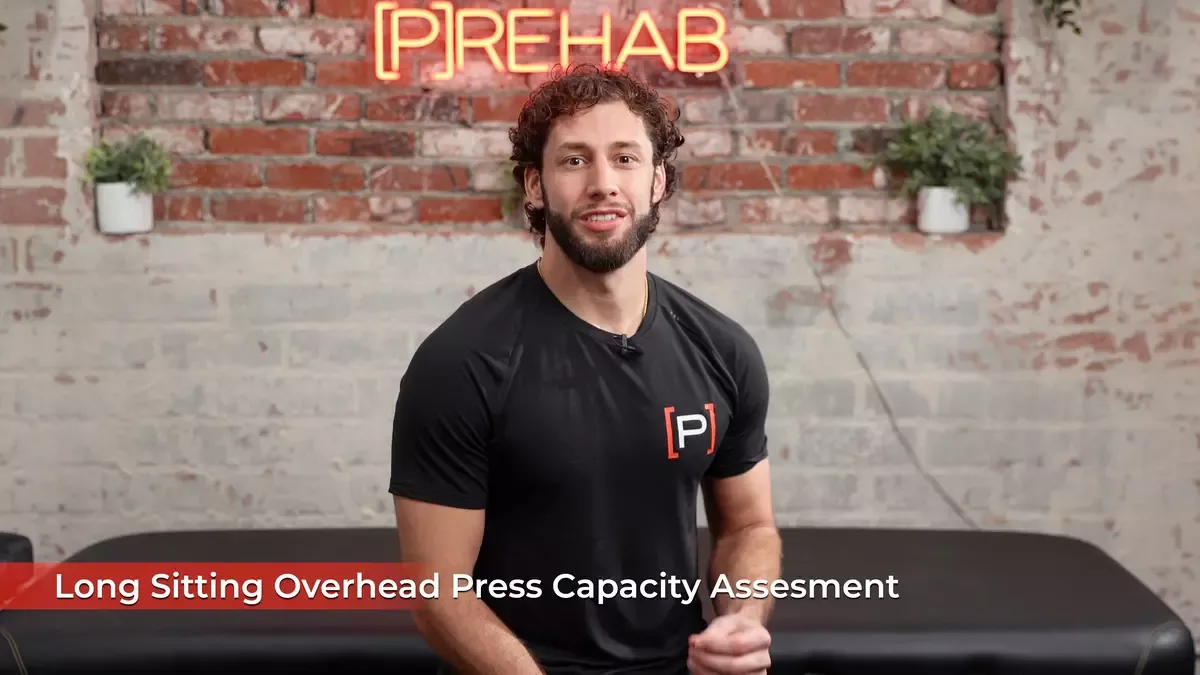
To look at dynamic stability and arm dominance, in that hypothetically perfect world, we use the Long Sitting OH Press Capacity Assessment!
Exercise 02 of 12
Exercise demonstration
Long Sitting Overhead Press Capacity Assessment
View exercise instructions
The reality of the situation is that the dominant side that the person is experiencing symptoms is probably the “good side” and the weaker or non-dominant side could use some work throughout the rehab process!
What are other factors that lead to rotator cuff-related pain? This is heavily debated and research summarized by Jeremy Lewis 2016, shows genetics, hormonal influences, lifestyle factors such as smoking and alcohol consumption, comorbidities and level of education, biochemical, pathoanatomical, peripheral, and central sensitization, sensory-motor cortex changes, and a raft of psychosocial factors! A major influence tends to be excessive and maladaptive load imposed on the tissues; meaning the demands placed upon the shoulder outweigh its capacity.
Are You In Need Of A Better Exercise Library?
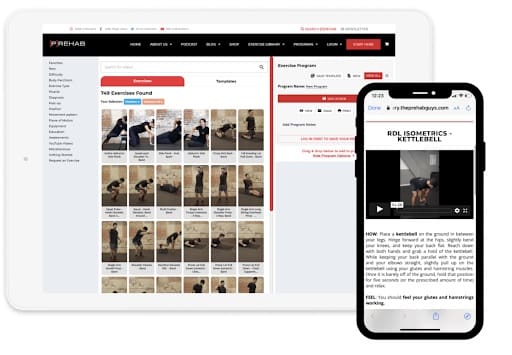
Our exercise library has thousands of exercises that can be narrowed down to any body region, ailment, movement, and more, including many for the rotator cuff! Click HERE to sign up!
What Structures Play A Role And Can We Identify Them Through Testing?
We promised in the intro we would get back to this point, so let’s dive in! Remember all those special tests we learn about the shoulder in school? This may be difficult to swallow after all the time invested but they really are not so special. For a special test to be “special” it needs to be valid. To be valid it has to be compared to a gold standard test. The gold standards for the shoulder tend to be x-ray, MRI, diagnostic ultrasound, and diagnostic arthroscopy. These tests should be able to identify structures or the structure potentially causing the pain. As research advances we learn it's more likely to have abnormal defects shown on imaging without experiencing symptoms than having defects on imaging and symptoms (Barreto et al 2019). These gold standards may actually be more of a silver or bronze level! Furthermore, we have to ask can our clinical tests actually isolate or identify one structure?
Not at all! For example, the empty can test is thought to isolate the supraspinatus. Research by Boettcher et al 2009 has shown during the empty can test, 9 muscles are near equally active as the supraspinatus! They conclude, “These tests do not primarily activate supraspinatus with minimal activation from other shoulder muscles and therefore, do not satisfy basic criteria to be valid diagnostic tools for supraspinatus pathology.” It's time to take special tests out of your clinical exam and “put them out to the pasture” as written by Salamh and Lewis 2020.
If you are using them to attempt to identify a specific structure to explain RCRSP then yes! However, these tests can provide the clinician with other valuable information such as willingness to move and ranges or particular movements causing symptom provocation. They can also help us answer if we should be treating the condition or if a referral is needed!
Rule out:
There may be some conditions in which conservative management will not be successful. This is going to depend on the patient's goal and the activities they want to return to!
If the patient is looking to get back into their sport and has a potential full cuff tear or full tear of any other muscle of the shoulder complex, we are not taking any chances, refer them to the orthopedic surgeon as soon as possible!
To identify a full rotator cuff tear we use the drop arm test. This is completed by standing at the side lifting the patient's arm to 90 degrees abduction and then having them slowly lower the arm to the side. This test has a specificity of 97.2 and a +LR of 2.79.
Lastly, let’s talk about labral tears and shoulder dislocation. Labral tears are common in athletes, research by Lesniak et al 2013 concluded, “Asymptomatic shoulder lesions in professional baseball pitchers appear to be more frequent than previously thought.” Schwartzberg et al 2016 found superior labral tears diagnosed by MRI in individuals between the ages of 45-60 years may be normal age-related findings, and lastly, De Carli et al 2012 MRI findings of gymnasts showed 100 percent of them had signal abnormalities in their shoulders making clinical decision making difficult.
Type I SLAP tears tend to be managed very well with conservative management. However type II, III and IV will likely need surgical intervention. How do you know which one you are dealing with and when do you refer? First, you need a really thorough subjective examination. Next, you can use a clinical cluster but it can still get “muddy” as this injury typically occurs with other shoulder pathology and a lack of consistent pain patterns. Ultimately, if a type II-IV SLAP lesion is expected it's worth getting an MR arthrogram, especially in overhead athletes. As for anterior shoulder dislocation, it becomes less “muddy”. If the person is under the age of 20 the rate of recurrent instability is 72-100 percent, 20-30 years 70-82 percent, and greater than 50 years old recurrence is 14-22 percent (Polyzois et al 2016). If the goal is to return to competition as a fitness athlete, mechanical shoulder stability is needed and referral for the younger athletes would be in the game plan.
The Most Common Mistakes with Shoulder Rehab
Surgery For Partial Rotator Cuff Tears
In the USA there has been a 141% increase in RC repairs between 1996 to 2006 and a 600% increase in repairs performed arthroscopically (Colvin et al 2012). As technology advances and less invasive procedures such as arthroscopes are available more invasive or open procedures are used less often. Interestingly, Carr et al 2015 report that arthroscopic surgeries for the rotator cuff have higher retear rates compared to open repairs and there tends to be no clinical difference in the outcome. More importantly, both groups showed high re-tearing rates.
Bedeur et al 2018 found risk of retearing increases with age and the size of the tear. Specifically, the relative risk increased 2.29 times with every 1 cm increase in tear size. Surgeons have attempted to combat this by changing suturing techniques from single row to double row fixation along with bridge repairs and have been somewhat successful. However, no technique is optimum in all situations making decision-making difficult.
The question we should be asking is does re-tearing matter and was surgery needed in the first place?
Fealy et al 2002 showed us a satisfactory outcome are likely not due to a fully intact rotator cuff. At a 5-year follow up they found 96 percent of patients with intact cuffs were satisfied and 87 percent without an intact cuff were satisfied, which was not clinically significant!
Another surgery offered for this condition is subacromial decompression. Paavola et al 2020 reported at 5-year follow-up, arthroscopic subacromial decompression provided no benefit compared to placebo surgery and exercise therapy group! The reported success after this surgery may actually be due to a reduction initially in activity and then graded return to movement vs the surgery itself.
Despite this trend in the evidence surgeries are still routinely offered, sometimes even before conservative management. An interesting study was completed by Torrens et al 2019. The aim was to look at patients' decision-making based on the information provided to them by the doctor. They had two groups A and B.
Group A was asked, “Your doctor informs you that you have a rotator cuff tear and states that if he/she surgically repairs your cuff tear you will improve and that the cuff remains healed at the 2-year follow-up in 71% of the cases where surgery is done” whereas group B was told, “Your doctor informs you that you have a rotator cuff tear and that if he/she surgically repairs your cuff tear you will improve and that the cuff is torn again at 2-year follow-up in 29% of the cases where surgery is done.” After those statements, they were asked if they would choose surgery or not. The findings, patients assigned to group A accept surgery significantly more frequently than those assigned to group B! This is why education is so important and both sides of the story are presented to the patient.
Nevertheless, surgery has its time and place. It may be an option if appropriate conservative management has taken place with no changes in function or symptoms.

How Long Does The Rotator Cuff Take To Heal
If surgery has been performed, communication is vital! The rehabilitative provider will make sound clinical treatment decisions on accelerated vs delayed rehab when they know the size of the tear and suture pattern used!
Alright, with all that being said, let’s get into what you came here for!
Phase I - Symptom Modulation
In the case of RCRSP, we have two groups; irritable and nonirritable. Irritable presentations may be acute vs chronic in nature and are characterized by easily aggravated and sometimes constant symptoms. In this group, we are going to identify a level of activity that reduces the amount of pain and avoid increasing the pain response further, whereas in the non-irritable group we are going to load those tendons early! For the irritable group, we will start in Phase I-Symptom Modulation. The focus is going to be on desensitization and adequate loading. For desensitization, we are going to rely on thoracic mobilizations and the beautiful design of the nervous system!
Exercise 03 of 12
Exercise demonstration
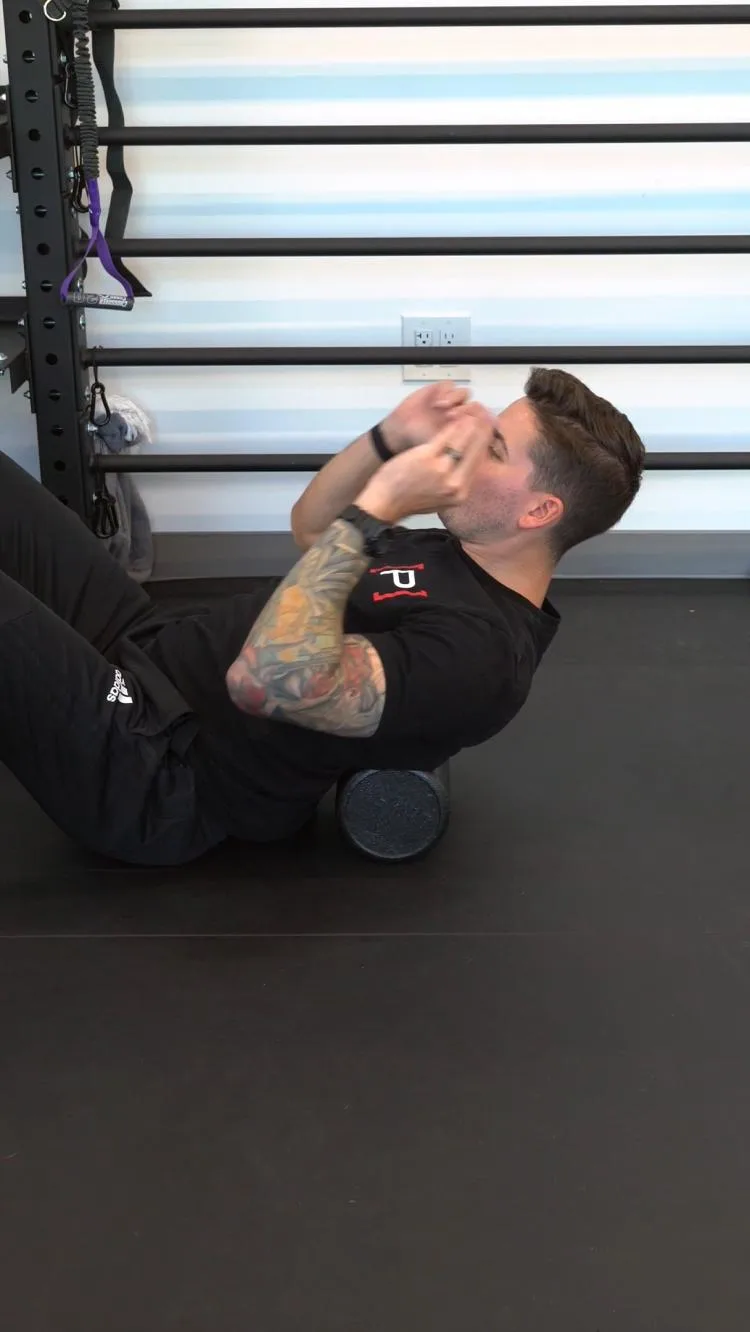
Thoracic Spine Foam Rolling
View exercise instructions
- HOW: Get set-up with your butt supported on the ground with a foam roller supporting your mid back. The goal is to make a ‘fulcrum’ that we can use to mobilize your mid back. Position the foam roller in your mid back and drive the upper half of your back “over” the foam roller while exhaling. Move the object to different areas of your mid back to mobilize multiple segments.
- FEEL: You should feel moderate amounts of pressure in your mid back. If you feel a “pop”, that is totally normal and okay.
- COMPENSATION: Do not put the foam roller on your lower back, just your upper back. Keep your core engaged and do not overly arch in your lower back.
In terms of loading the area, there is debate specific to the shoulder on concentric/eccentric vs isometrics. Parle et al 2017 found isometrics in acute rotator cuff tendinopathy to be successful at decreasing pain and creating physiological changes at the structural level. Furthermore, in other irritable tendinopathies isometrics have been shown to provide pain relieving effect for 45 minutes (Rio et al 2015). Anecdotal evidence and our clinical experience show isometrics to be the least provocative and patients feel safe performing this movement! Remember in the beginning we talked about the role of psychosocial factors leading to RCRSP? We have to make sure we are not creating further fear of movement, safety is key!
Exercise 04 of 12
Exercise demonstration
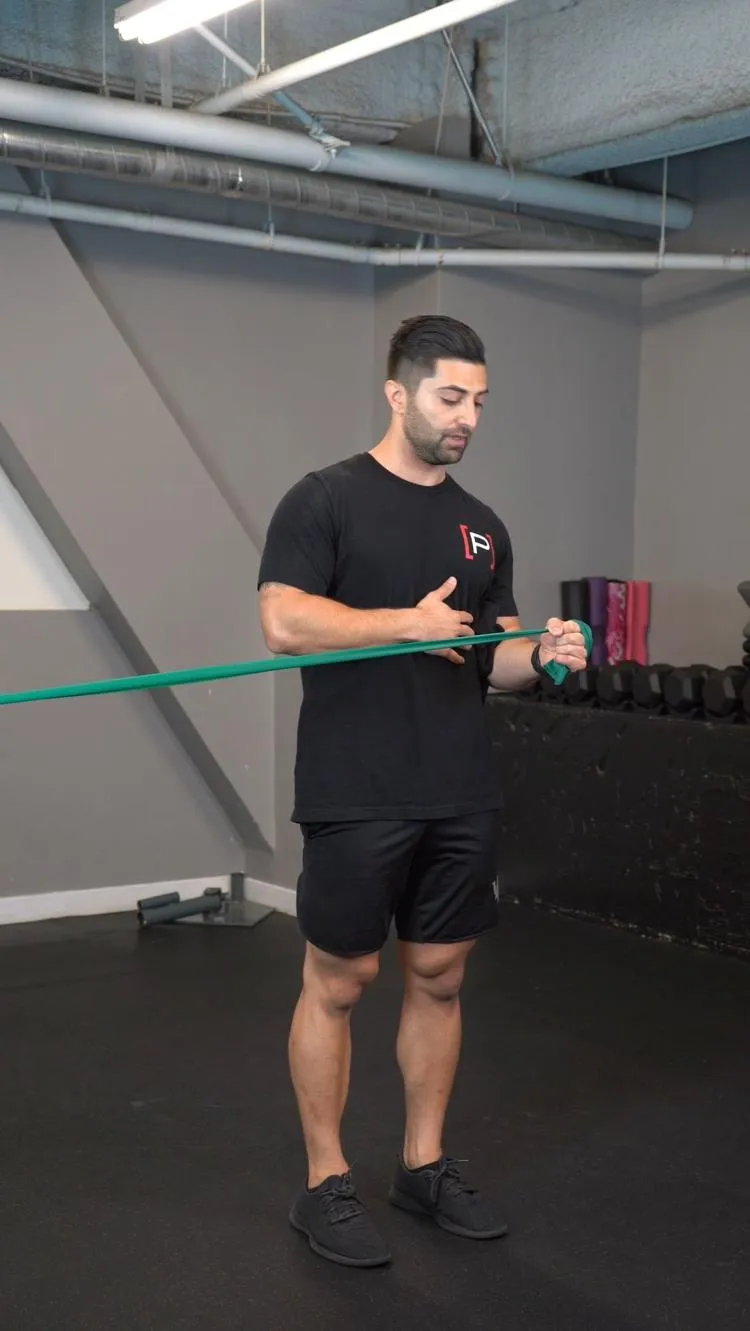
Shoulder External Rotation Walk Out
View exercise instructions
- HOW: Anchor a resistance band about wrist height onto a stable surface. Keep your hand directly in front of you, then walk out as far as you feel comfortable to create tension on the band. Keep your shoulder blade pulled back while performing this. I keep a towel under my elbow for comfort.
- FEEL: You will feel muscles on the back of the shoulder work with this exercise.
- COMPENSATION: Avoid moving the arm with this exercise, this is designed to be an isometric exercise.
Common questions from patients classified in the irritable RCRSP group are if they should get an injection or not. Corticosteroid injections have been used for over 60 years. Due to the time of use, one would conclude they are successful, right? A meta-analysis by Mohamadi et al 2017 showed it provides short-term minimal pain relief at best and the number needed to treat was 5! There is no evidence for medium or long-term results. Furthermore, studies that compared this to saline injections show no differences between to 2 groups (Mohamadi et al 2017). What are the risk vs benefits of corticosteroids? Some research has shown potentially negative effects on rotator cuff tissue but more needs to be done before we draw any conclusions. Another option is Platelet-Rich plasma. Research in this area shows negligible to small benefits and keep in mind most people will be paying out of pocket for these injections (Miller et al 2017). The takeaway here being education and active solutions are needed! Correct, ACTIVE solutions, keep the dust on that ultrasound machine in the back of the gym.
Phase II- Restore Balance and Mobility
Remember to not skip steps in the Rehab process. If mobility is limited due to tissue or joint restraints, take care of that first!
How To Assess & Improve Your Shoulder Overhead Mobility
If the posterior capsule is hypomobile then open it up with this:
Exercise 05 of 12
Exercise demonstration
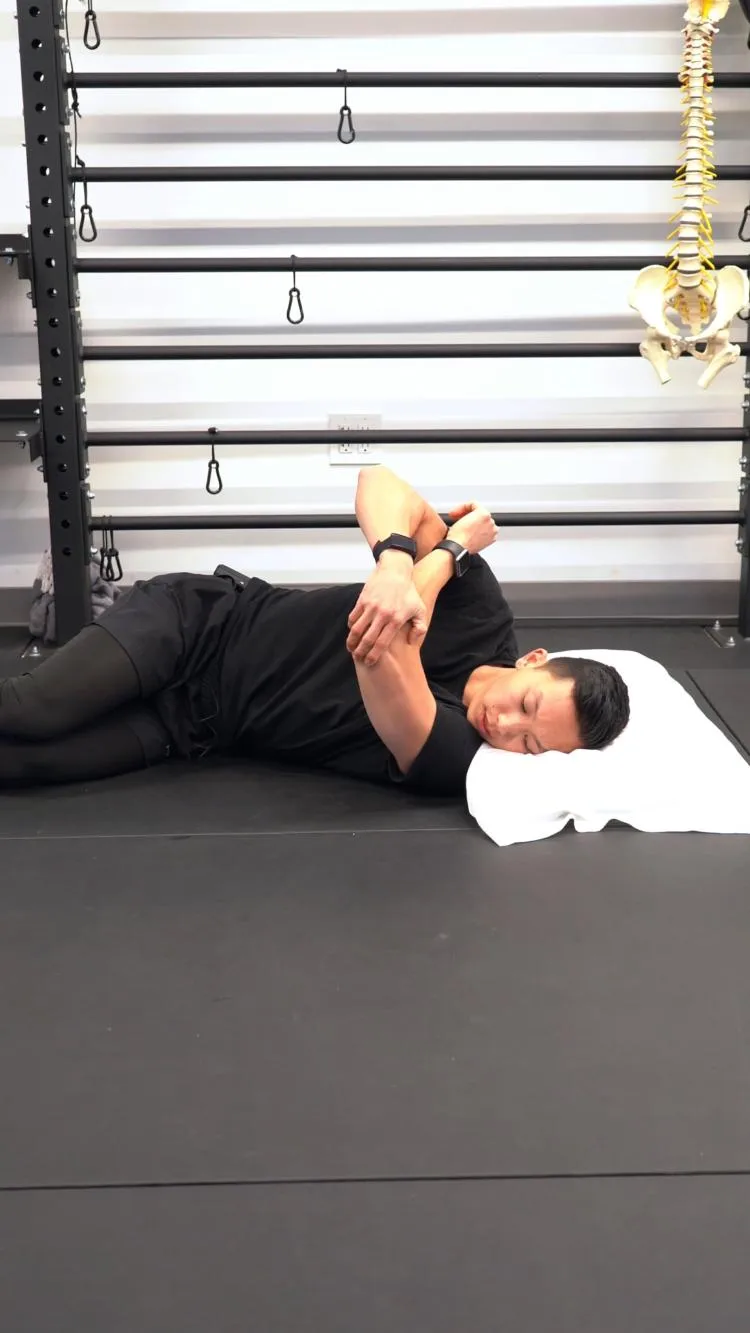
Side Lying Shoulder Cross Body Stretch
View exercise instructions
- HOW: Lie on your side with the shoulder you want to stretch closest to the ground. You can put a pillow under your head for neck support if you want but it is not necessary. Bring your elbow to your side up to shoulder height. Using your bodyweight to pin your bottom shoulder down, slowly lift your elbow straight up with your opposite hand.
- FEEL: You should feel a deep stretching sensation in back of your shoulder on the ground. You do not want to feel any pinching sensations or pain in the front of your shoulder.
- COMPENSATION: If you are not feeling the stretch in the right area, try putting your elbow slightly higher than your shoulder. You can also try rotating your body backwards just a bit.
Sample Prehab Exercise Library Videos
Another reminder is that most shoulder pain and RCRSP is due to irritation in the anterior capsule and weakness of our mid-, lower-traps, Rhomboids, and Serratus Anterior.
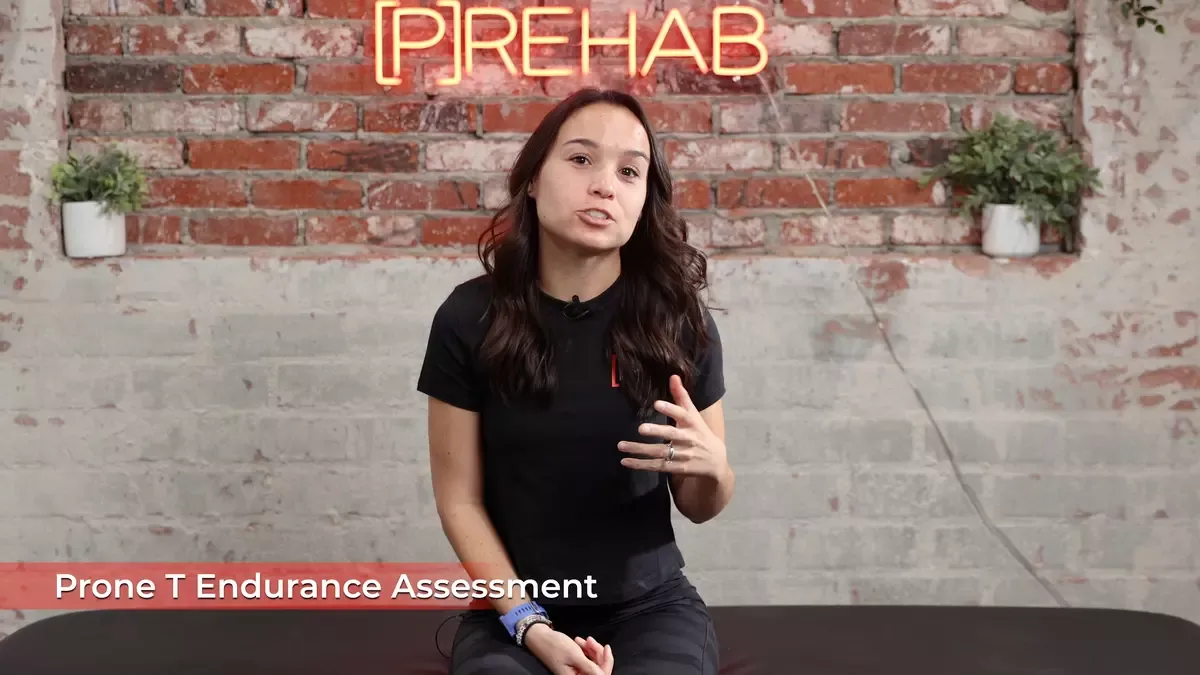
Based on research from Cools et al 2014 overhead athletes are more likely to recruit the upper trapezius muscle prior to lower or middle trapezius muscles. This can lead to a timing issue in terms of muscle recruitment. Because of this, lower and middle trapezius and serratus anterior activity may decrease, while upper trapezius, pec minor, and levator scapula activity may increase. This group of dysfunctions can lead to a decrease in scapular upward rotation, external rotation, and posterior tilt – all specific scapular motions that are imperative to try and prevent things like subacromial pain syndrome and RCRSP. Our go-to test is the prone shoulder T endurance test.
Exercise 06 of 12
Exercise demonstration
Prone T Endurance Assessment
View exercise instructions
Exercise 07 of 12
Exercise demonstration
Push-up Plus
View exercise instructions
- HOW: Start in the tall plank position. Drive your hands into the ground and also imaging driving your elbows into the ground. This is your stable base position. Keeping the core and shoulders engaged and strong, slowly let your shoulder blades come together. Then drive your hands into the ground again and separate your shoulder blades.
- FEEL: You should feel all the muscles in your shoulder working, especially in the front part of your shoulder and under your shoulder blades. You will also feel your core working.
- COMPENSATION: Do not lose your serratus engagement. Keep strong through the shoulder the entire time. Also do not let the elbows bend. This is a push up plus, not a full push up.
Sample Prehab Exercise Library Videos
While taking care of the scapulothoracic complex we still need to address the rotator cuff and balance of external to internal rotation strength! If using strength ratios the end goal is to achieve ER: IR of .66 to .75. Hopefully, the irritability of symptoms has calmed down and we can start introducing resistance training through increasing ranges. This may be a good time to introduce blood flow restriction training at lighter loads if the patient is a candidate!
One of the most recognized and simple solutions to load the cuff is side lying external rotation.
Exercise 08 of 12
Exercise demonstration
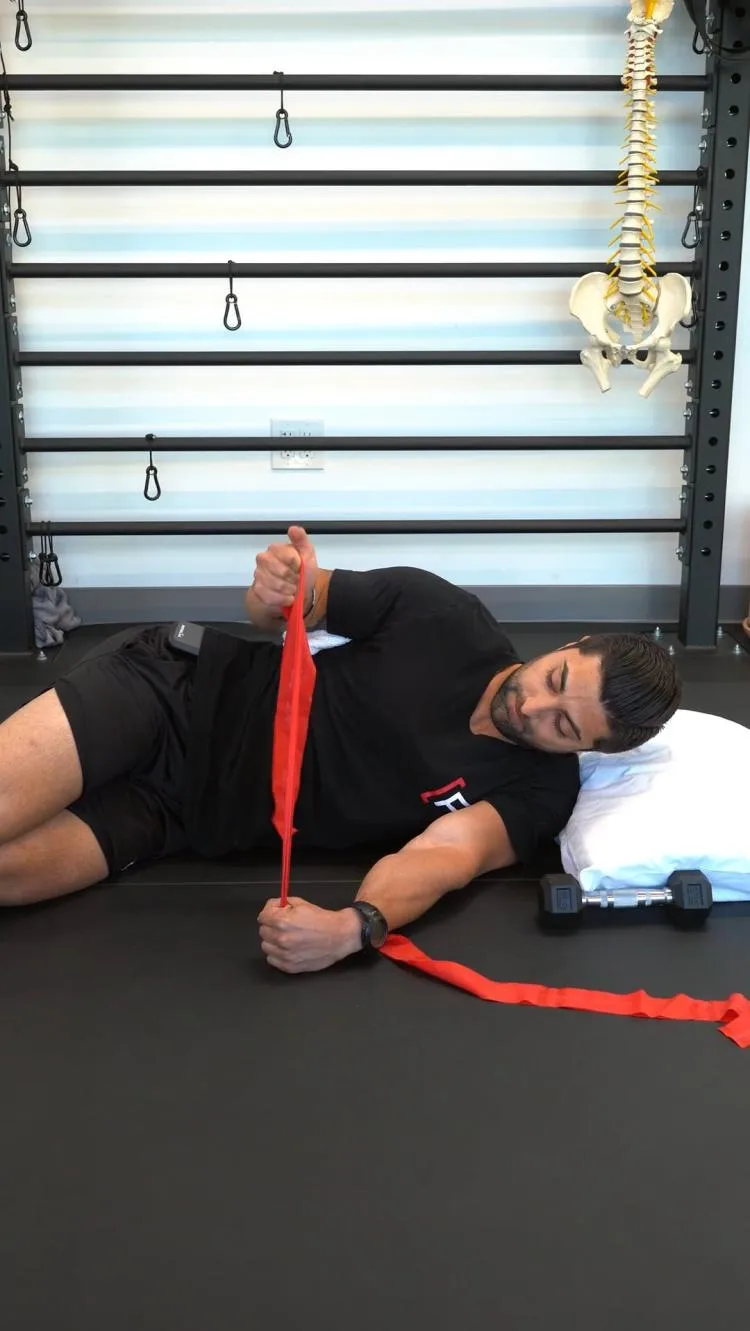
Side Lying Shoulder External Rotation - Band
View exercise instructions
- HOW: In a side-lying position place the arm facing the ceiling slightly abducted, this can be done using a pillow or towel. Now focus on purely rotating the shoulder from the hand near the stomach all the way out to where the hand is reaching towards the back will. This motion should be initiated with the shoulder blade being pulled back followed by the arm pulling back. To make this exercise more challenging, you can add a resistance band or a dumbbell.
- FEEL: The muscles in the back of the shoulder should be working here.
- COMPENSATIONS: Avoiding stabilizing at the scapula first. Many will compensate with straightening their elbow as they rotate out, keep the elbow bent to about 90 degrees for this entire exercise.
This exercise is thought to elicit the highest amount of EMG activity of the infraspinatus and teres minor but remember EMG activity does not always equate to function. Remember, the rotator cuff is a dynamic stabilizer. To create reflexive contraction utilize compression and/or distraction of the joint, such as a Tall Plank Shoulder Tap and side plank row.
Exercise 09 of 12
Exercise demonstration
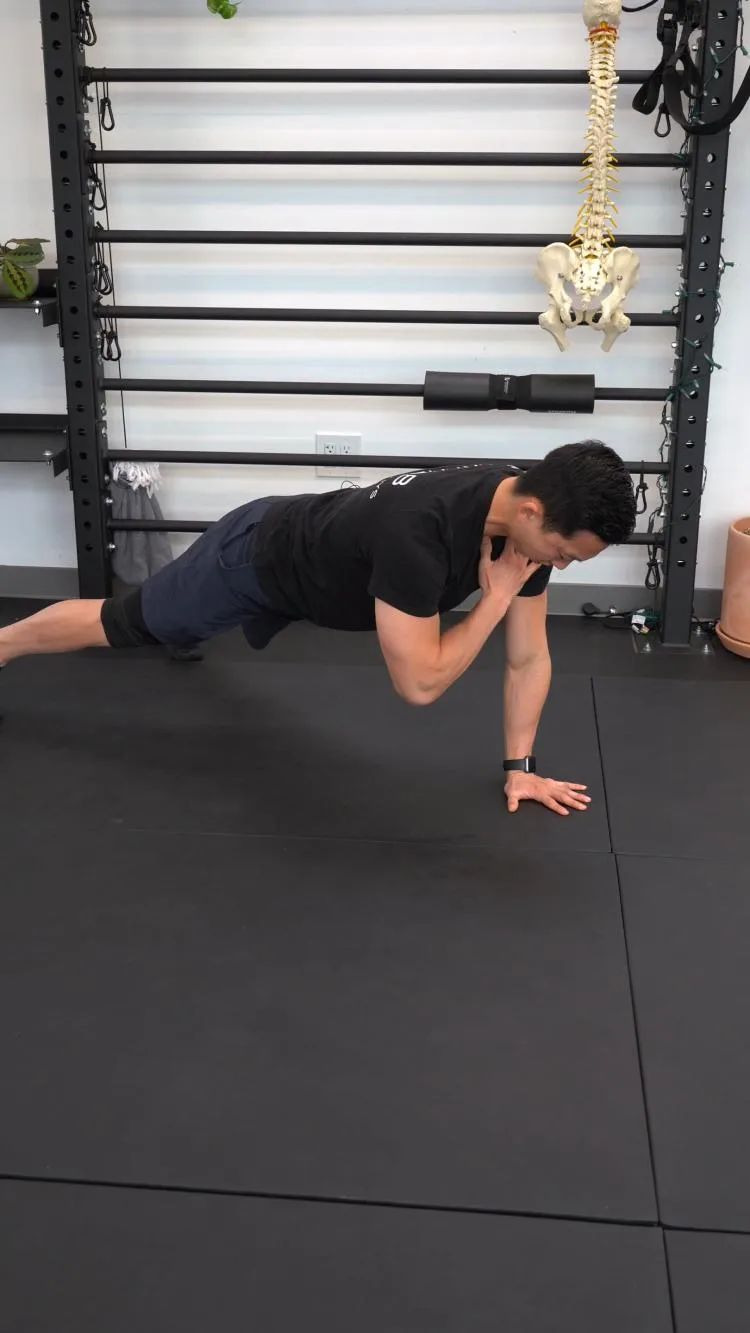
Tall Plank Shoulder Tap
View exercise instructions
- HOW: Start in the tall plank position. Drive your hands into the ground and also imaging driving your elbows into the ground. This is your stable base position. Keeping the core and shoulders engaged and strong, slowly lift one arm and tap your opposite shoulder. Repeat on the other side.
- FEEL: You should feel all the muscles in your shoulder working, especially in the front part of your shoulder and under your shoulder bladers. You will also feel your core working
- COMPENSATION: Do not lose your serratus engagement when picking up your opposite hand. Keep strong through the shoulder the entire time. If it is too hard for your core, widen your feet.
Phase III- Strength and Capacity Building
In this phase, the goal is to really hone in on strength building. Most RCRSP can be attributed to an increase in workload exceeding the current capacity of the shoulder musculature. We must build up the further capacity to better meet the exposed demands!
Exercise 10 of 12
Exercise demonstration
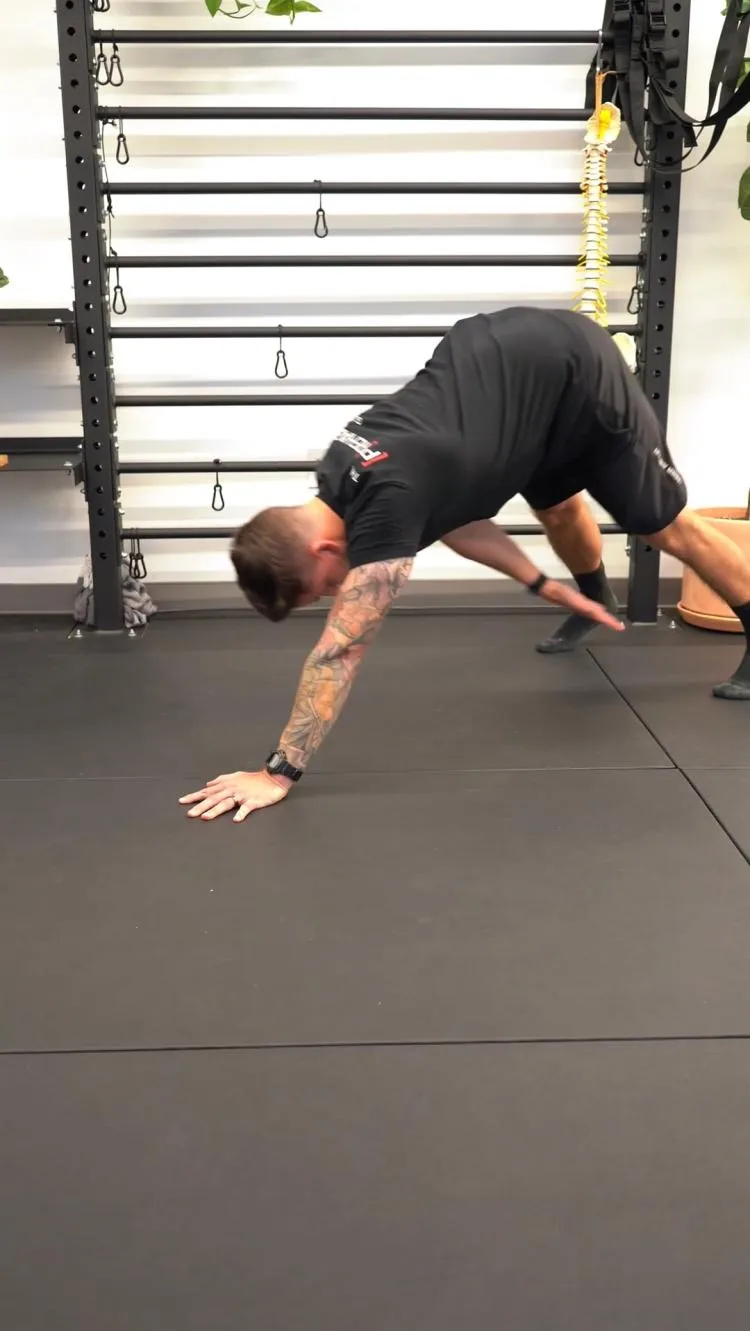
Single Arm Yoga Push Up With Knee Tap
View exercise instructions
- HOW: Start in a tall push-up position only on one arm and keep your core engaged. Then perform a yoga push-up and simultaneously reach with your free hard towards the opposite knee (i.e., left hand to right knee). Hold that position for a second, then return to starting position and repeat.
- FEEL: This should feel like a very challenging upper body exercise. The muscles around your shoulder, shoulder blade, chest, and arm that is on the ground will be working hard. It is important to stay strong in your shoulder blade and keep your chest pushed away from the ground vs. letting your shoulder blade collapse in the entire time. Think about pushing the ground away from you as you go back and reach for your knee, be sure to maintain optimal shoulder blade position as you come back to the starting position.
- COMPENSATION: Do not arch your low back or let your hips sag, do not shrug your shoulders, do not let your shoulder blades collapse in together, do not let your body rotate, do not bend your elbow.
Phase IV- Performance
Most rehabilitative providers may look at the performance phase as optional but we believe to truly have good long-term results this phase is needed! Why? We need to progress power and rate of force development exercises. This phase is crucial because it is the most specific to our common ADLs. Think of it this way, when reaching for something in a cupboard or a seat belt we do not pull our scapulae back into a perfect position, brace our core, and then slowly grab the object. Imagine how much time this would take in a day? Luckily, our natural movement does not occur that way, we move quickly, grab the object, and then onto the next task! Furthermore, stabilizing muscles are predominantly thought to be composed of Type I fibers. Lovering et al 2008 found overall only 44 percent of the muscle fibers were slow twitch or type I fibers. We need speed!
Exercise 11 of 12
Exercise demonstration
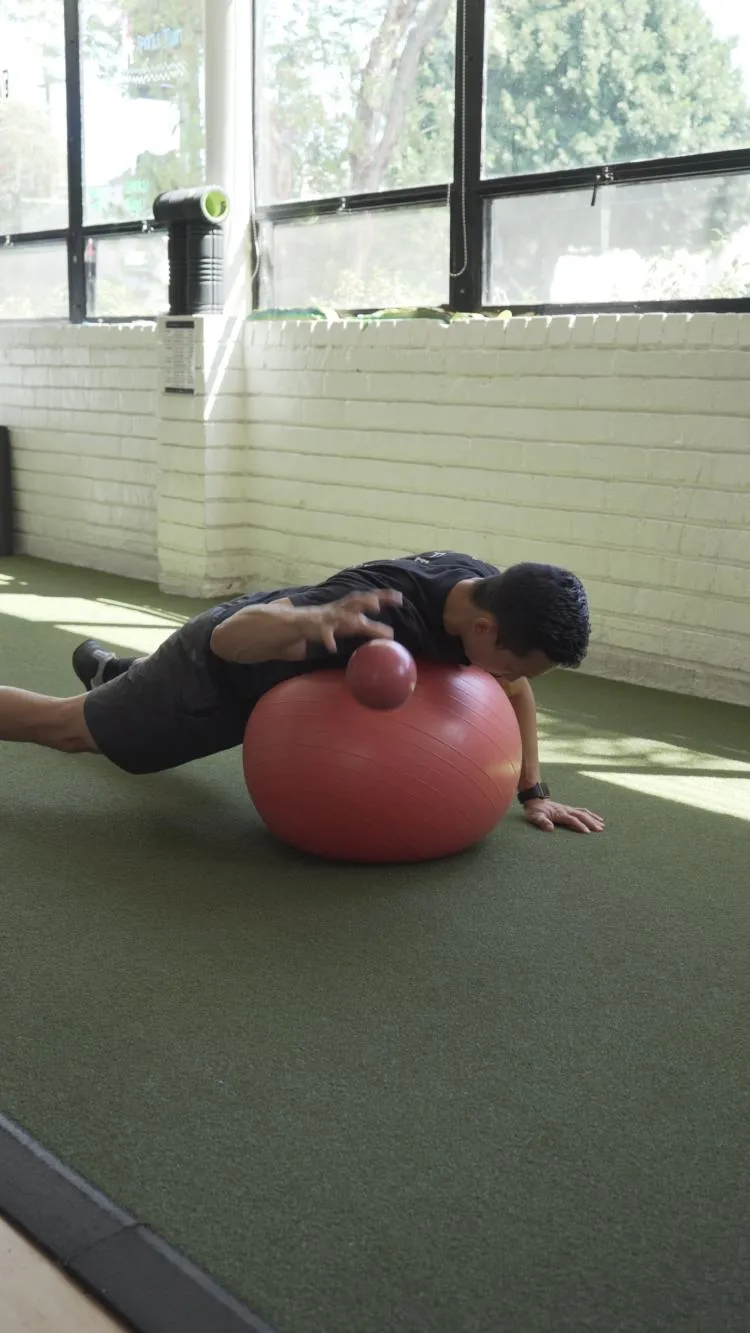
Prone Swissball 90/90 External Rotation - Plyometric
View exercise instructions
- HOW: Grab a weighted ball or object. Bring your arm into the 90/90 position with your elbow at shoulder height. Try to throw the ball straight up by rotating your shoulder towards the sky. Catch the ball and then quickly throw it back up again.
- FEEL: You should feel all the muscles in the back of your shoulder working, in particular, your shoulder blade muscles.
- COMPENSATION: Sometimes its easier to hold an equivalent weight on the other arm, even if you are not performing the exercise on that side, as it helps with balance.
Exercise 12 of 12
Exercise demonstration
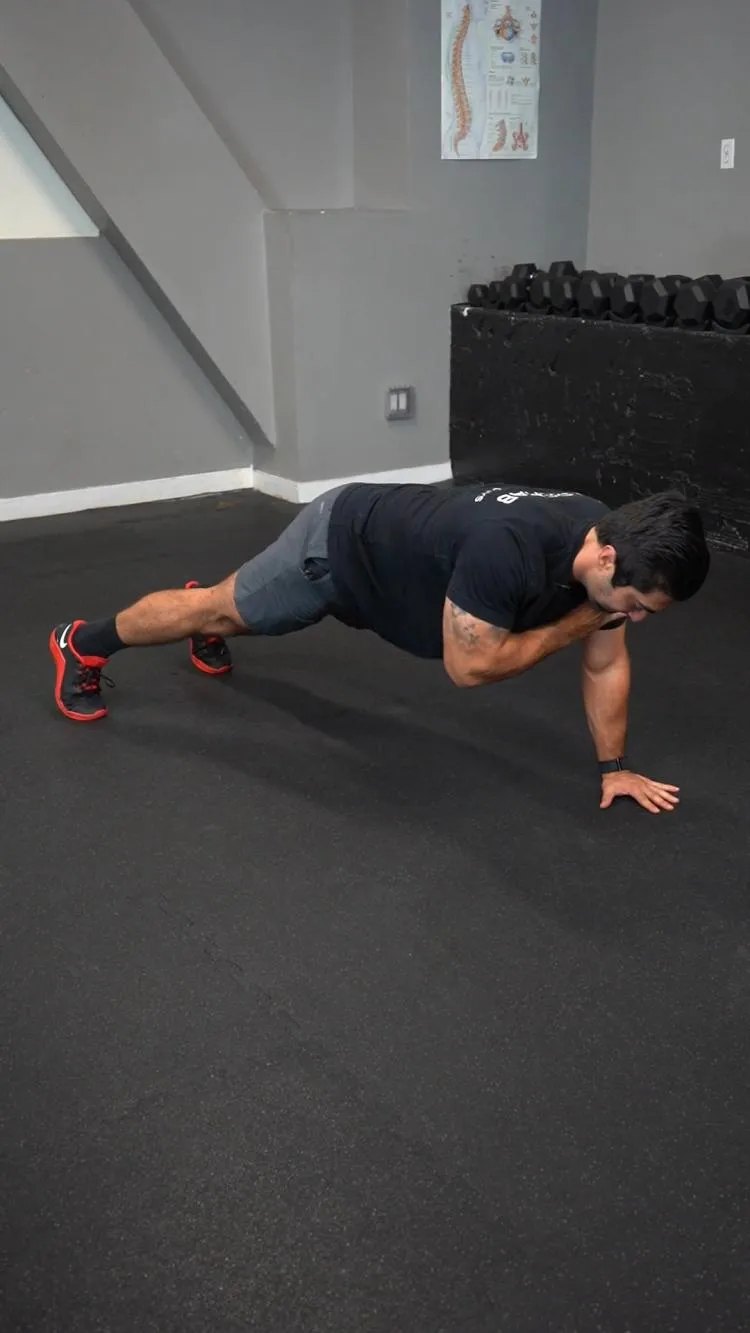
Plyometric Push Up - Single Arm Landing
View exercise instructions
- HOW: Begin in the push up position with your legs out from your hips, toes pushing into the ground, and hands on the ground with your elbows straight under your shoulders. From here, perform a push up by bending at your elbows lowering your body. When you are low enough, push up fast and land with one arm locked out holding that position for a couple of seconds before you repeat for the other arm.
- FEEL: You should feel your chest and shoulder muscles working.
- COMPENSATION: Keep your back flat, don’t twist your body as you push up and land with one arm.
The rate of force development or power-based exercise tends to be the most provocative and the patient needs to have adequate strength and capacity building in the previous phases as a prereq. If symptoms become prevalent, ask did we progress too soon or do we need to build more capacity before adding in power?

Closing Thoughts
The last recommendation we have for you is to keep the rest of the body moving! Although this is specific to the rotator cuff, the way the rest of our body moves plays a role in how much stress the rotator cuff is undergoing. Also by using compound movements we are likely to get a greater release of growth hormone circulating throughout the body to help tendons and muscles recover! Speaking of recovery, don’t forget, that quality sleep is crucial for the healing process!
In Need Of A More Comprehensive Exercise Library To Use?
Are you tired of scrolling for minutes on end for a specific exercise, ultimately leaving you without your desired intervention? Descriptions of movements not up to par? Time to end your exercise library struggles and gain access to the BEST exercise library there is to be offered! Click HERE to gain access today.
Clinician
Dillon Caswell, PT, DPT, SCS
Prehab Audio Experience Host & Head of Programs
 Dillon is a Sports Physical Therapist, performance coach, and adjunct professor residing in Syracuse, NY whose passion is providing holistic solutions to improve all aspects of human performance. Along with working with clinical athletes across the lifespan, he provides on field coverage for youth and semi-professional teams. After his undergraduate studies at Syracuse University, he earned his Doctorate in Physical Therapy from SUNY Upstate Medical University. He practices wellness, prevention, and solution-based health care out of Goldwyn & Boyland, PT, and Core Fitness. In his free time, he enjoys family dinners, playing with his dog, and competing as a fitness athlete. Dillon honors the opportunity to join the Prehab guys to influence and educate in a people first system!