


On this page 13 sections
Your guide
What you'll learn
We’ve all been there before, rehab is going really well for your patient and every session builds off the previous, you’re happy and your patient is happy! You find yourself progressing every single movement and increasing the challenge because your rationale is the patient is getting better so why not push the limits? Next thing you know reality checks in and your patient has experienced a setback with increased pain, decreased load tolerance, and reports of stiffness with greater ranges of motion.“I think we overdid it doc…I guess my ankle isn’t ready still” What went wrong?! How are you even supposed to know that could happen? Was it the exercise, was it too much too soon, what did my patient do that they’re not telling me!? Let's take you through a systematic approach for lateral ankle sprain rehab.
“This blog is one of our ‘clinical pearls’, which is designed to assist clinicians in understanding exercise progressions for various clinical conditions. Throughout each of these clinical pearls, you will learn multiple ways to attack similar issues we all see when treating our patients. We also highlight many of our personal exercise library videos throughout these pearls, all of which you can gain access to as an exercise library member!”
Progressing Optimally Through Lateral Ankle Rehab
Valid questions indeed, our goal is to help shed light on some potential answers. In this post, we will refer to three different phases of ankle sprain rehab & education that you can find in Prehab Exercise Library. Also, what are the necessary considerations you have to think about as a clinician when choosing an exercise or an intervention for a lateral ankle sprain, but more importantly, how do you safely progress your patient dealing with this injury?
Are You Looking For More Of These Exercises You Can Prescribe For Your Patients?
 Our unique and physical therapist-designed library will give you access to a plethora of exercises that are specified by body region, type of movement, and much, MUCH more! This is the best exercise library out there, and the last one you will need. Click HERE to gain access today!
Lateral Ankle Sprain Etiology
A lateral ankle sprain refers to a ligament injury of either the anterior talofibular and/or posterior talofibular ligament and/or the calcaneofibular ligament. These ligaments collectively provide stability to the lateral aspect of the ankle. It is much easier to sprain the lateral ankle ligaments versus the medial ankle ligaments or the structures involved in high ankle sprains because of the common mechanism of injury (rolling the ankle) and the lateral ligaments are simply inferior in comparison when it comes to their quantity and design. Up to 70% of the general population have or will experience a lateral ankle sprain in their lifetime, that's crazy! What is even scarier is how high the reinjury rate is for lateral ankle sprains, especially within the first year (two-fold reinjury risk) making it the highest reinjury rate among all lower body injuries. As clinicians, it is our job to change the narrative and decrease this extremely high reinjury rate!
Before Discussing Exercise Progressions: CYA & Rule Out A Fracture
Not all that common, but foot & ankle fractures can and do happen with ankle sprains. It is extremely important you rule out a fracture or refer out if you suspect a fracture to do no harm to your patients. Below is a great video Mike put together to refresh you on the Ottawa Ankle Rules, but the video and the short description below should do the trick!
-
- Can your patient take 4 steps (it’s okay if they need to limp)? NO? –> REFER FOR IMAGING
- Do you have tenderness/pain around your medial or lateral malleoli (the little bone bumps on either side of your ankle)? Specifically the backside of the bones? YES? –> REFER FOR IMAGING
- Do you have tenderness/pain around the base of the 5th metatarsal (bump on the lateral/outside portion of your foot; halfway between your heel and your little toe)? YES? –> REFER FOR IMAGING
- Do you have tenderness/pain around the navicular bone (bump on the medial/inside portion of your foot?) YES –> REFER FOR IMAGING
Phase 1: Acute Lateral Ankle Sprain Management - Put The Fire Out
We will consider phase 1 as our acute phase (day 0 to day 14). This is where our role as educators & guiders is so important. If you’re not car savvy and your car breaks down, the red alert signal goes off in your brain and you scramble to get assistance. When you’re seeking that assistance, you’re really looking for answers that will reassure you everything is going to be ok so that your brain no longer sounds the alarm. Well guess what, this is what happens to the average person who is not savvy with the human body and physical rehab! That's why I like to say put the fire out, calm things down not only physically, which we will get into in a moment, but calm things down mentally and get patient buy-in. Trust is essential for the healing process!

Lateral Ankle Sprain Education: How To Break It Down For Your Patients
Let's face it, most patients want to know what happened and how bad the injury is (as clinicians we do the same thing don’t lie to yourself!). Below are some great education pieces you can use a refresher if you like telling your patients, but you can also include these in your patient’s program in case they tend to forget and ask the same questions :)
Exercise 01 of 16
Exercise demonstration
Understanding Ligament Sprains

View exercise instructions
Being able to confidently define and break down the differences between ligament sprains versus other injuries such as muscle strains can go a long way and will make your patients trust you!
Exercise 02 of 16
Exercise demonstration
Understanding Lateral Ankle Sprain Grades

View exercise instructions
Remember most ankle ligament injuries are classified into three grades representing increasing severity.
- Grade I = mild ankle sprain, 2-4 week recovery
- Grade II = moderate ankle sprain, 1-2 month recovery
- Grade III = severe ankle sprain; full ligament tear, 3+ month recovery
Therapeutic Exercises Are Better Than RICE!
The old adage of Rest, Ice, Compression, and Elevation (RICE) for ankle sprain rehab is far outdated. Complete rest is one of the worst things you can do following an ankle sprain, and instead, P.O.L.I.C.E is now the recommendation. Rest is replaced by Protection, and Optimal Loading. This means that early on, we need to protect the injured areas by not over-stressing the tissues, but still applying healthy submaximal loads to the tissues that actually stimulate the healing process, which we will chat about in a bit!
Exercise 03 of 16
Exercise demonstration
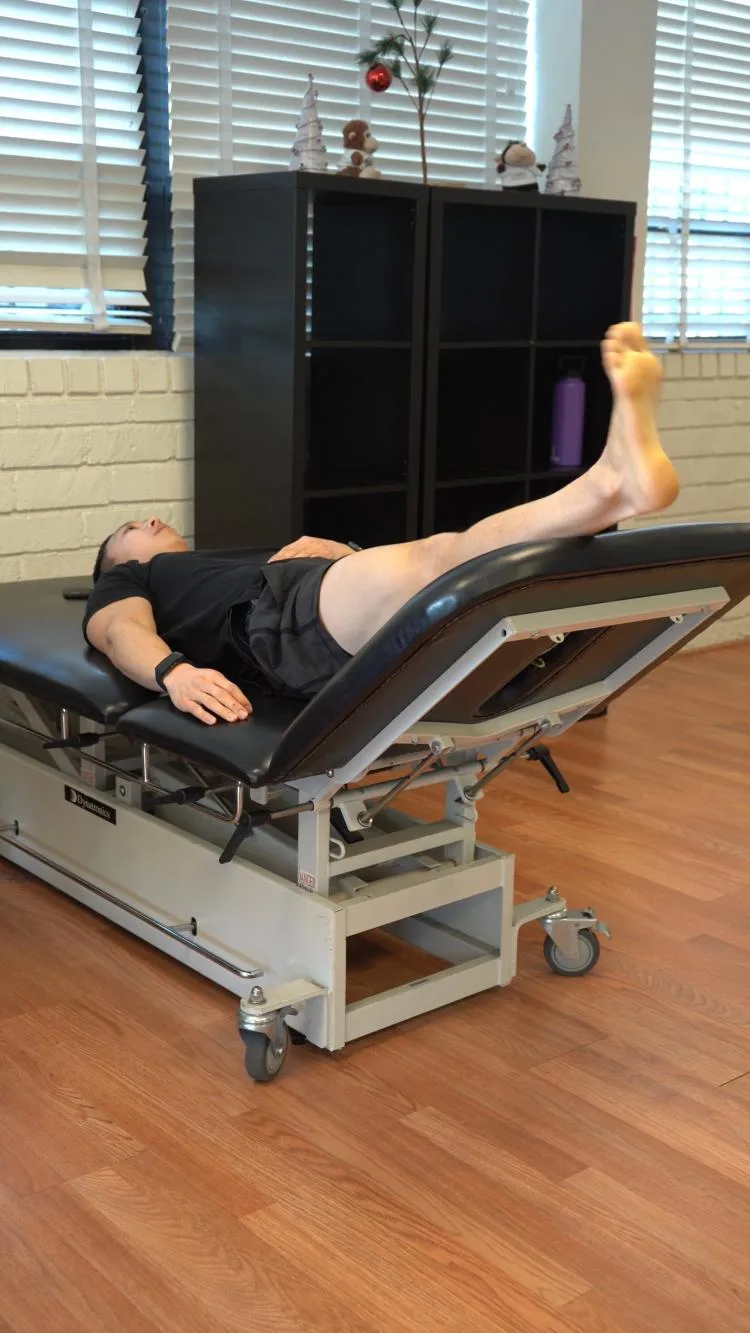
Ankle Pump - Elevated
View exercise instructions
- HOW: Get set up laying flat on your back with your legs elevated above heart level. To begin the exercise, move your ankle forward and backward in a pumping motion. The goal is to get comfortable with this forward and backward ankle range of motion.
- FEEL: You should feel all different parts of your ankle stretching and activating.
- COMPENSATION: Move just from the ankle, not the toes.
Furthermore, recent research has shown that the individual elements of RICE alone are not effective, apart from icing immediately after the injury for the first few days, if given along with exercise. This means that the most important part of ankle sprain rehab is providing protection and optimal loading through exercise, not the rest/icing/compression/elevation that is typically recommended! We know elevation can still be beneficial though, that's why we like to program ankle pumps elevated but also seated ankle pumps if people have to go back to their sitting job, constant motion is key! That is why we also like to program the gentle range of motion exercises you’ll find below focused on restoring range of motion while protecting the healing tissue!
Submaximal Loads - Isometrics
What submaximal loads can we feel comfortable with giving to our patients dealing with an acute lateral ankle sprain? Isometrics of course! Giving patients ankle isometrics exercises to perform at home multiple times a day is a great way to wake up the muscles that provide active stability to the ankle to make up for the compromised passive stability. The best part is, that prescribing hand-held resistance provided by the patient is safe because they can control the intensity and their brain is going to limit overdoing it due to pain being a very strong, noxious stimulus to providing more resistance with your own hands.
Exercise 04 of 16
Exercise demonstration
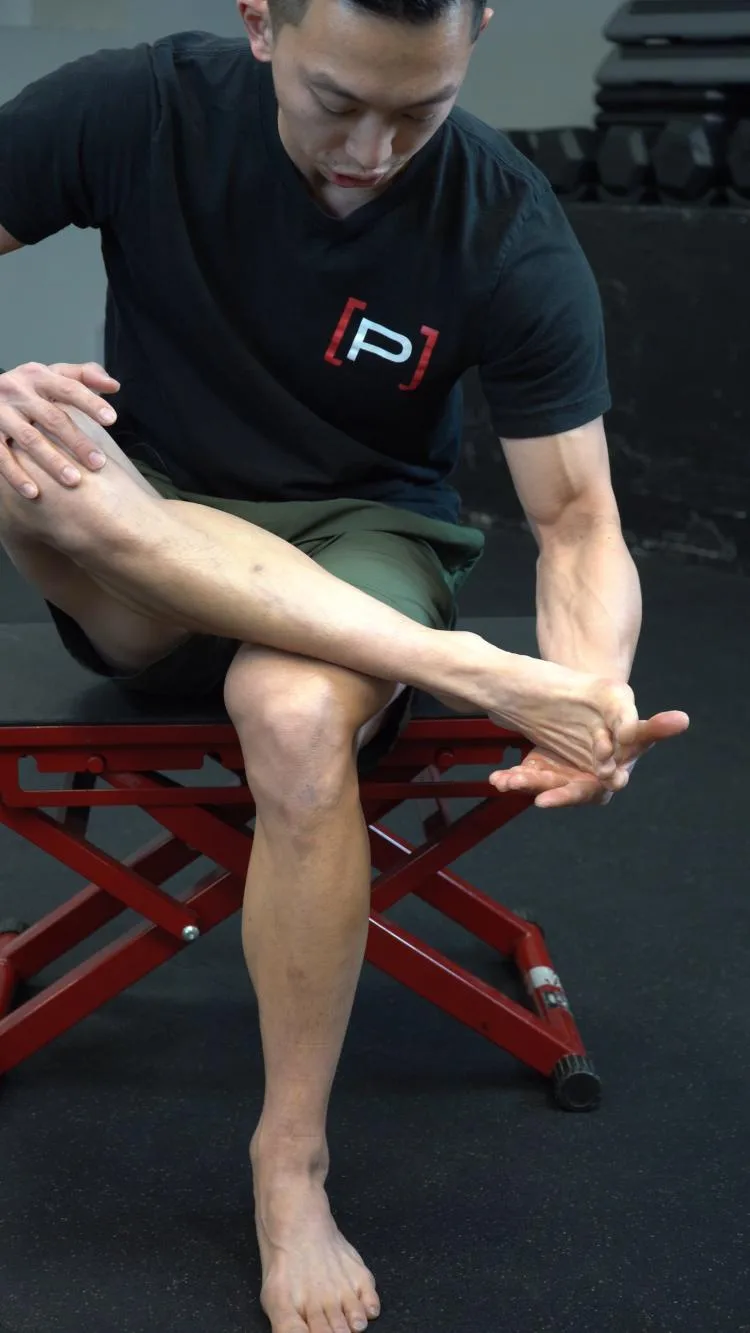
Isometric Ankle Eversion - Hand Resistance
View exercise instructions
- HOW: Get set up in a seated position with your leg crossed over the other. The leg that is crossed is the foot/ankle you are going to be working on. With your foot/ankle in a neutral position, try to push your foot inward using your hand (see video for demonstration), however don't let it move.
- FEEL: You should feel the muscles in the front of your shin and the front/top of your foot/ankle working with this exercise.
- COMPENSATION: Maintain the starting foot/ankle position, don't let your foot move. If it does, do not push as hard.
Along with mobility and activation exercises you’ll find in our phase 1 template, now is the time to restore functional weight-bearing capacity and tackle any compensatory strategies and significant impairments observed with walking and weight-bearing positions.
Exercise 05 of 16
Exercise demonstration
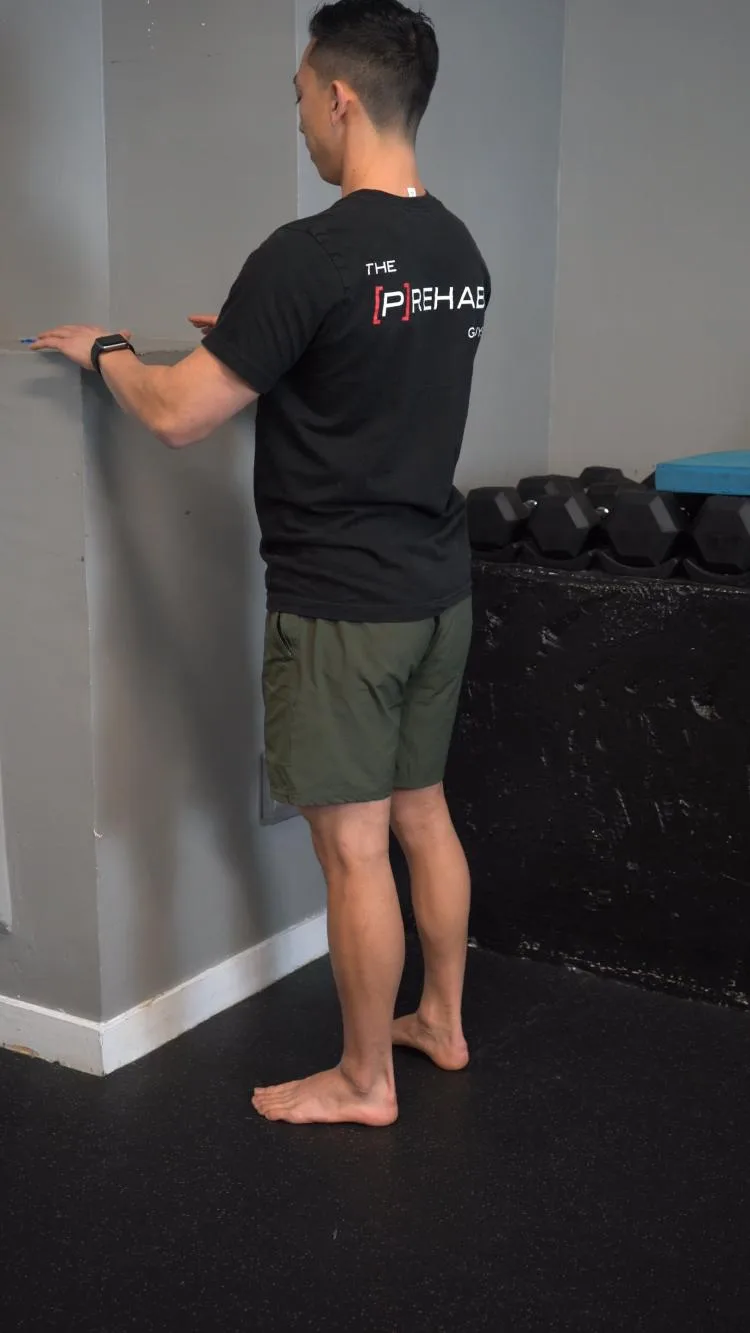
Standing Weight Shifts
View exercise instructions
- HOW: Get set up near a wall or an object such as a chair to ensure safety if you were to lose your balance. Slowly shift your weight laterally all the way to one side trying to put 100% of your weight onto one leg, then shift your weight towards the opposite side, repeat.
- FEEL: This should feel like you're transferring your weight from one leg to the other. If anything, you should feel your calf, quad, and the outside of your hip muscles working with this exercise.
- COMPENSATION: Be sure not to compensate at your hips or trunk and lean over side-to-side. Try to keep your body nice and tall in a straight line
Not only do we want to address and improve weight-bearing movements in the sagittal plane, but also triplanar movement. Unique exercises like the double leg weight shift circle and foot pronation and supination are excellent exercises to include towards the later part of this phase as they promote moving your center of mass around your base of support limitations. This can help with improving confidence and feeling comfortable putting load focused through different locations of the foot & ankle complex!
Phase 2 Exercises: Treat the entire person, not just the foot & ankle!
Swelling is down, the pain has improved, patient satisfaction is on the rise, and your expectations for your plan of care are spot on. However, why are ankle sprain reinjury rates so high? How can we be better as clinicians to change the narrative? This is where it can be helpful to zoom out from the foot & ankle complex and consider reevaluating the person’s movement system. Are there any other impairments that we are not exposing and addressing? Is there any fault in the foundations this person needs to establish before moving on so they’re set up for success?
Exercise 06 of 16
Exercise demonstration
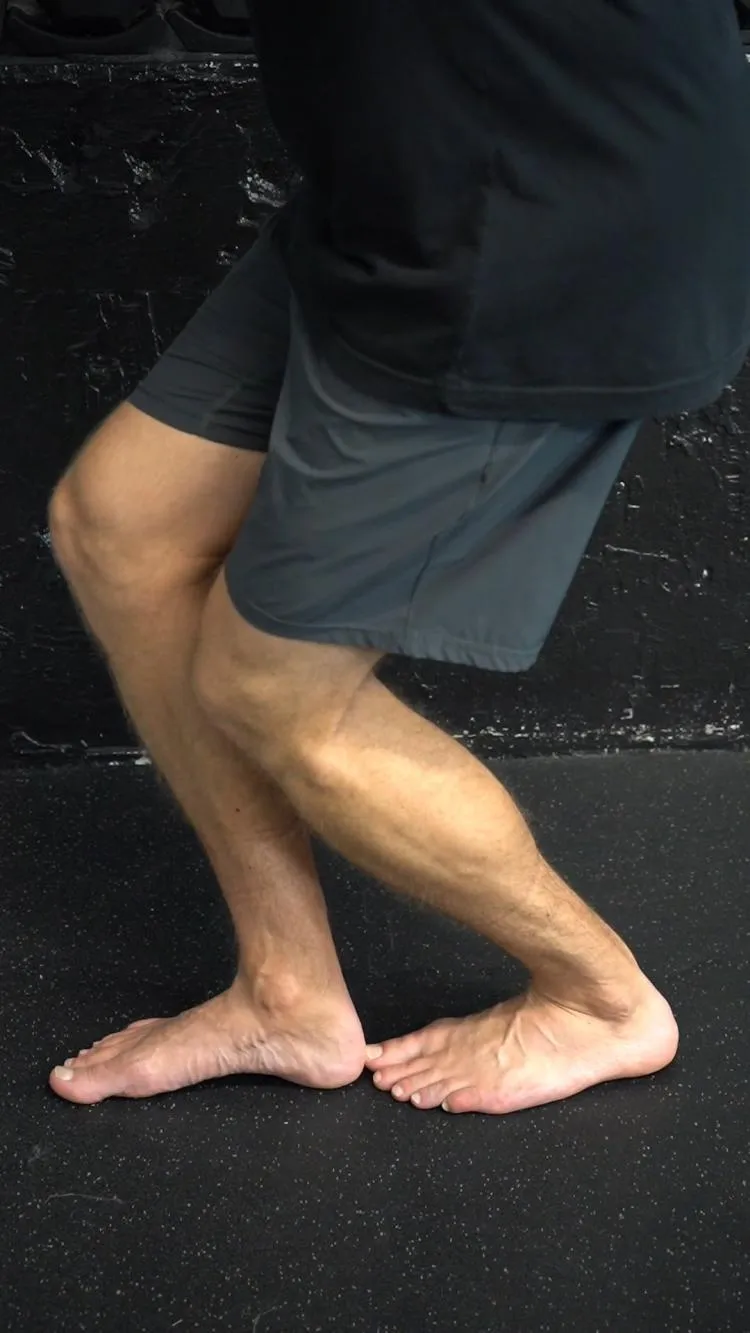
Weight Bearing Ankle Dorsiflexion Assessment
View exercise instructions
- Watch this video on how to assess ankle dorsiflexion.
Sample Prehab Exercise Library Assessment Video
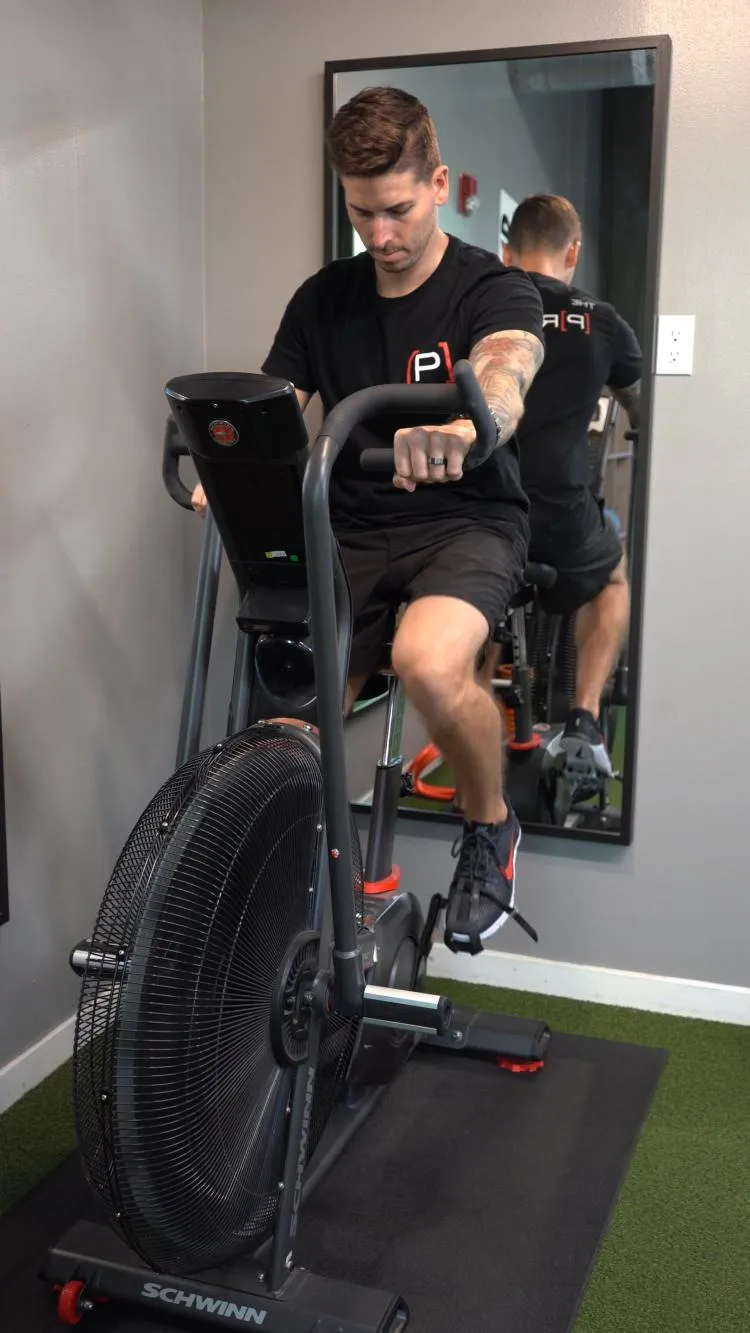
If we are talking about modifiable risk factors for an ankle sprain, limited ankle dorsiflexion, reduced proprioception and poor single leg balance, and strength deficits are more or less easy to identify. However, we also know coordination and cardiovascular fitness deficits are also risk factors, yet we don’t think of these with our typical lateral ankle sprain evaluation. That's why in phase 2 we recommend some sort of non-impact aerobic exercises such as a stationary bike or rower so that cardiovascular fitness is being addressed and maintained.

Exercise 07 of 16
Exercise demonstration
Single Leg Heel Raise Strength Test

View exercise instructions
Exercise 08 of 16
Exercise demonstration
Stationary Bike
View exercise instructions
- HOW: Follow along with the video to learn tips and tricks with how to use a stationary bike optimally!
Using Anti-Rotation External Resistance Cues To Challenge Coordination
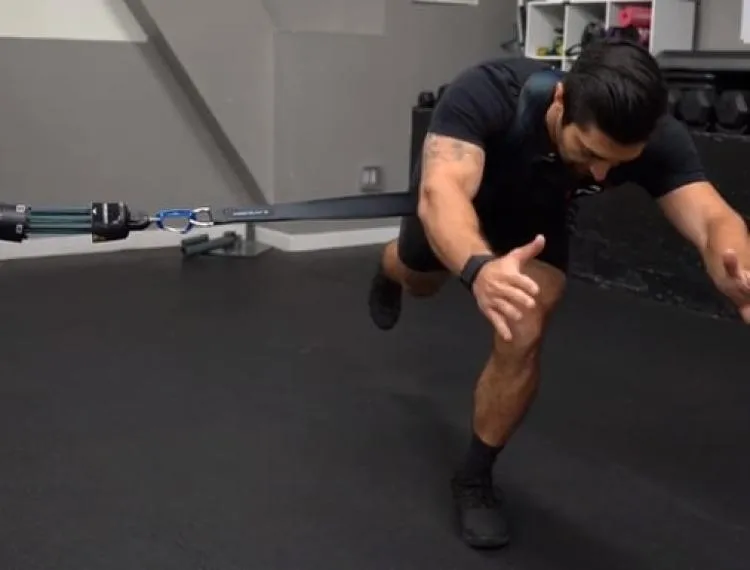
What about coordination? We will dive into this more in phase 3 because if we can challenge coordination and stability further, we can improve dynamic ankle stability. If you think about the typical lateral ankle sprain demographics, it is a very common youth sports injury. Growing teens are the epitome of poor coordination due to their evolving bodies, especially trunk coordination (which we know can influence ankle position). However, we have some great external resistance cues you can use with various exercises to achieve that stability you’re looking for!
Exercise 09 of 16
Exercise demonstration
Single Leg RDL - Anti-rotation
View exercise instructions
- HOW: Begin by placing a strap looped through one shoulder as shown in the video. While balancing on one leg, hinge at your hips. This is achieved by bring your torso forward and pushing your butt back. Kicking out the back leg may make it easier for you to counterbalance your trunk forward. Lower yourself as far as comfortable, then pull yourself upright by using the muscles in the back of the leg. Squeeze your butt once you are upright to ensure that you stand fully erect. This exercise required a lot of stability, make sure you are staying engaged with the foot muscles.
- FEEL: You will the muscles in the back of the leg work with this exercise. As you hinge over you will feel a pull in the hamstrings. This variation will challenge your outer hip muscles.
- COMPENSATION: Avoiding rounding the back as your lean your torso forward. Movement should primarily be at the hips. Don’t allow the knee to go forward past your toes with this exercise. Also avoid your knee caving inward, make sure to keep your ankle, knee, and hip in alignment. One other common compensation is rotating your body open towards the leg that is kicking back, keep your chest facing the floor with this exercise.a
Phase 3 Exercises: Under-looked muscles & directional preference
Inefficient warm-ups and fatigue count for a lot of sports-related injuries. We all know and use hip activation drills for athletes, “put a band on it and side step!” But, how can we take it a step further and apply an isolated warm-up to the foot & ankle region?!
Exercise 10 of 16
Exercise demonstration
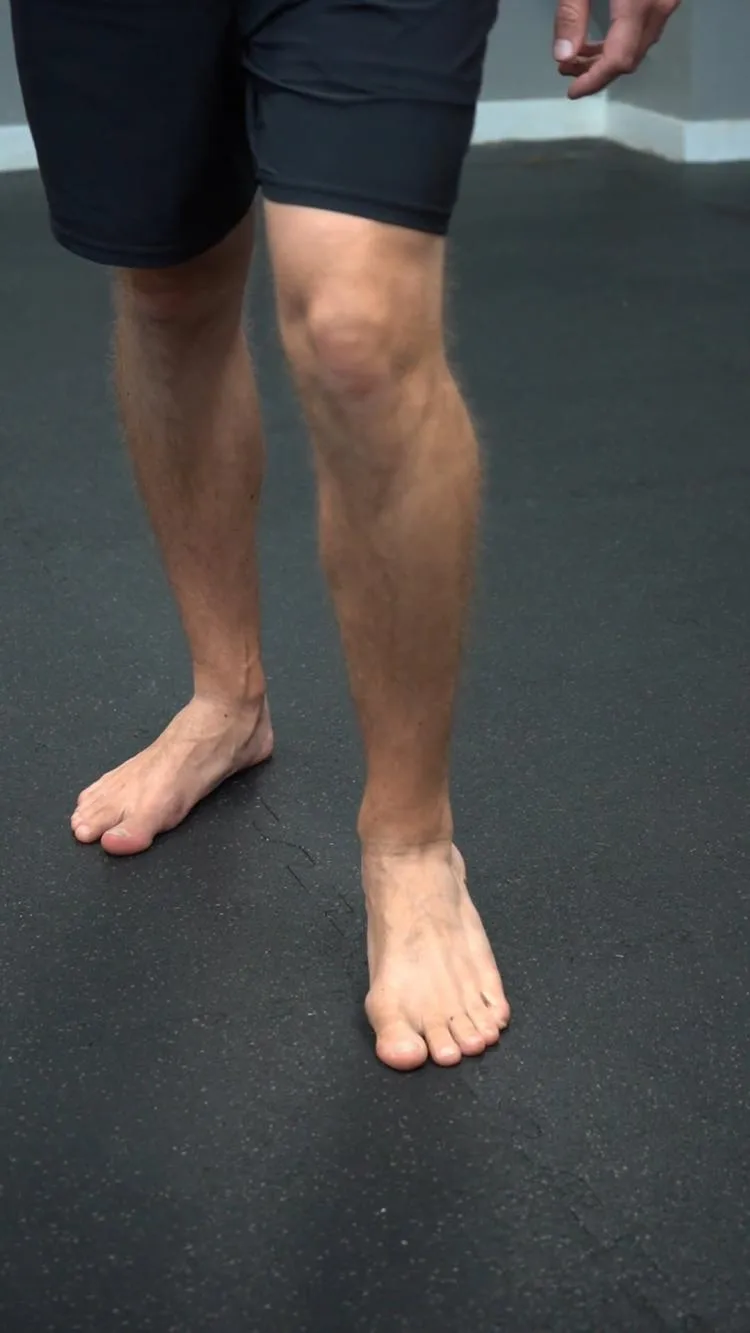
Foot Circles
View exercise instructions
- HOW: While standing, bring one foot forward. Trace the outside edge of your foot, ankle, and toes on the ground using as much body weight as you can tolerate in a circular motion.
- FEEL: You should feel the muscles in your foot and ankle working.
- COMPENSATION: Keep your foot on the ground other than the edge that is being applied pressure to make the circular motion.
This is hands down one of my favorite movements to give to athletes recovering from a lateral ankle sprain as it allows the person to explore foot & ankle movements in a closed-chain environment and it increases confidence to bear weight through all potential contact surfaces of the foot.
Exercise 11 of 16
Exercise demonstration
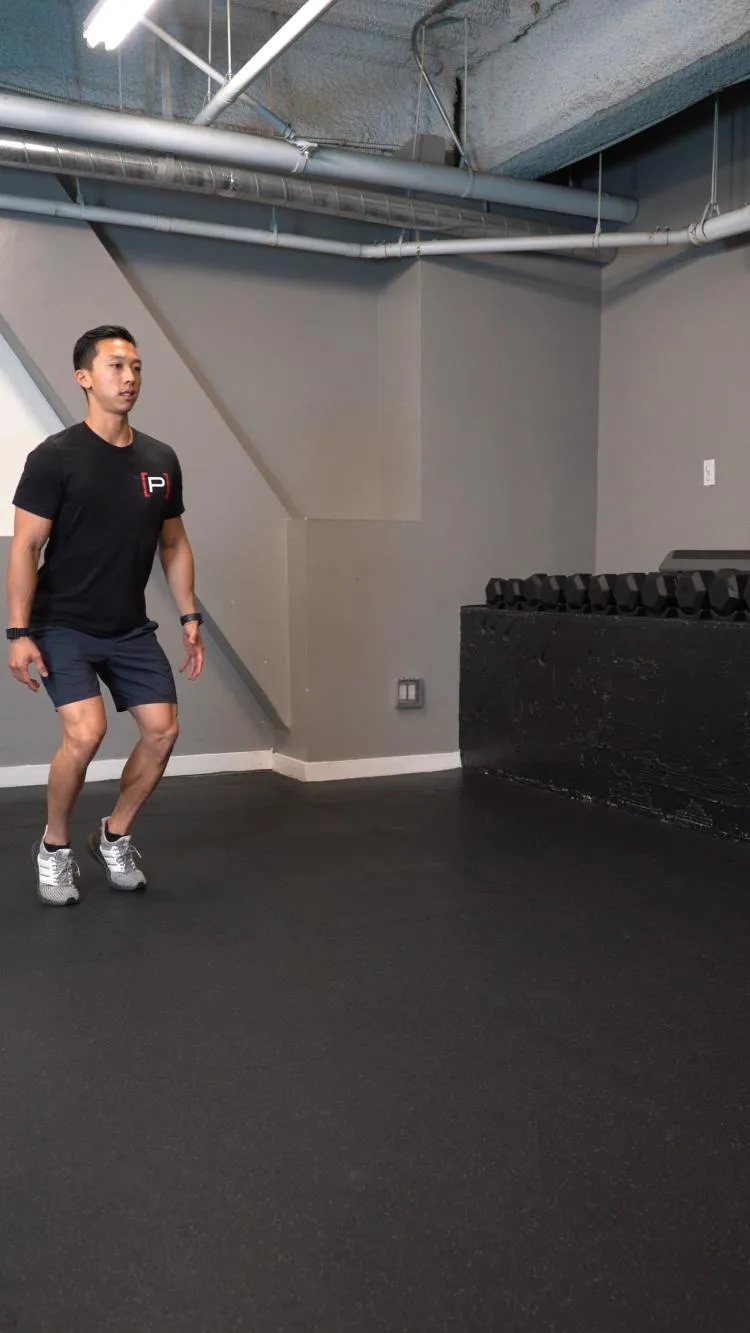
Creeper March
View exercise instructions
- HOW: Stand up tall on your tip toes. Then bend both of your knees slightly. Maintaining that slight amount of knee bend, slowly take one step forward. As you put weight on your leg, do no let your heel drop. Really push the balls of your feet into the ground. Slowly transition all your weight to that leg, then pick up your other leg and repeat. Pretend you are wearing high heel shoes.
- FEEL: You should feel your calf muscles and quads working hard to maintain the position.
- COMPENSATION: Do not let your heel drop as you put weight on it.
Don’t forget about the soleus! We repeat, don’t forget about the soleus, this powerhouse muscle is responsible for strength and power contributions from the foot & ankle complex.
Exercise 12 of 16
Exercise demonstration
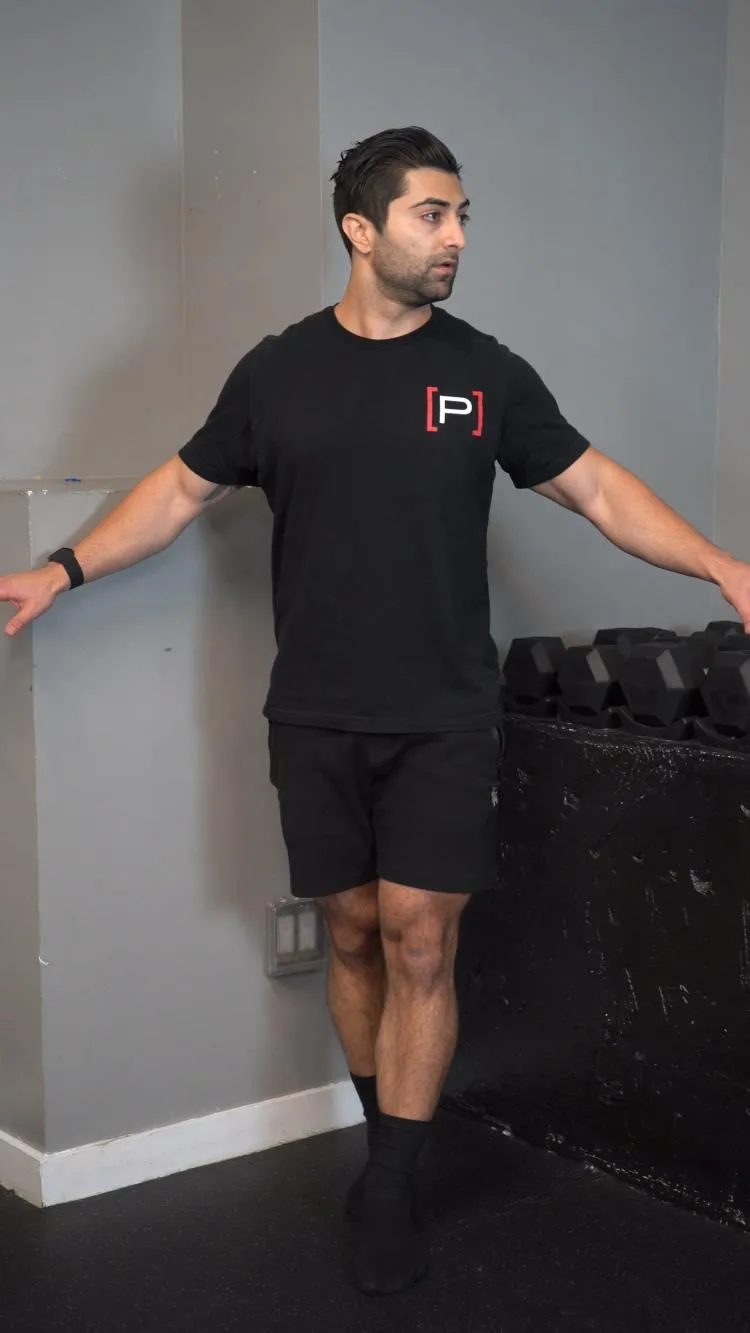
Tandem Balance - Horizontal Head Turns
View exercise instructions
- HOW: Get set-up standing with your feet in a heel-to-toe position. Stand an arms distance away from a stable surface for balance as needed. While maintaining your balance, slowly rotate your head from one side to the other.
- FEEL: You should feel like your balance is being challenged.
- COMPENSATION: Try not to losing your posture and excessively leaning forward/backward or side to side. If you lose your balance it is ok, take a step and get back to starting position. Do not allow yourself to fall or take the risk of injuring yourself.
Sample Prehab Balance Exercise Library Video
Depending on the severity and grade of the ankle sprain, the extent of sensorimotor and/or mechanical stability deficits will vary. With that being said, these are two of the primary reasons for high reinjury rates, leave no stone unturned! Get creative with your balance drills and think outside the box, look further than just eyes closed or a foam pad. Include multi-tasking and challenge balance in a triplanar fashion.
Exercise 13 of 16
Exercise demonstration
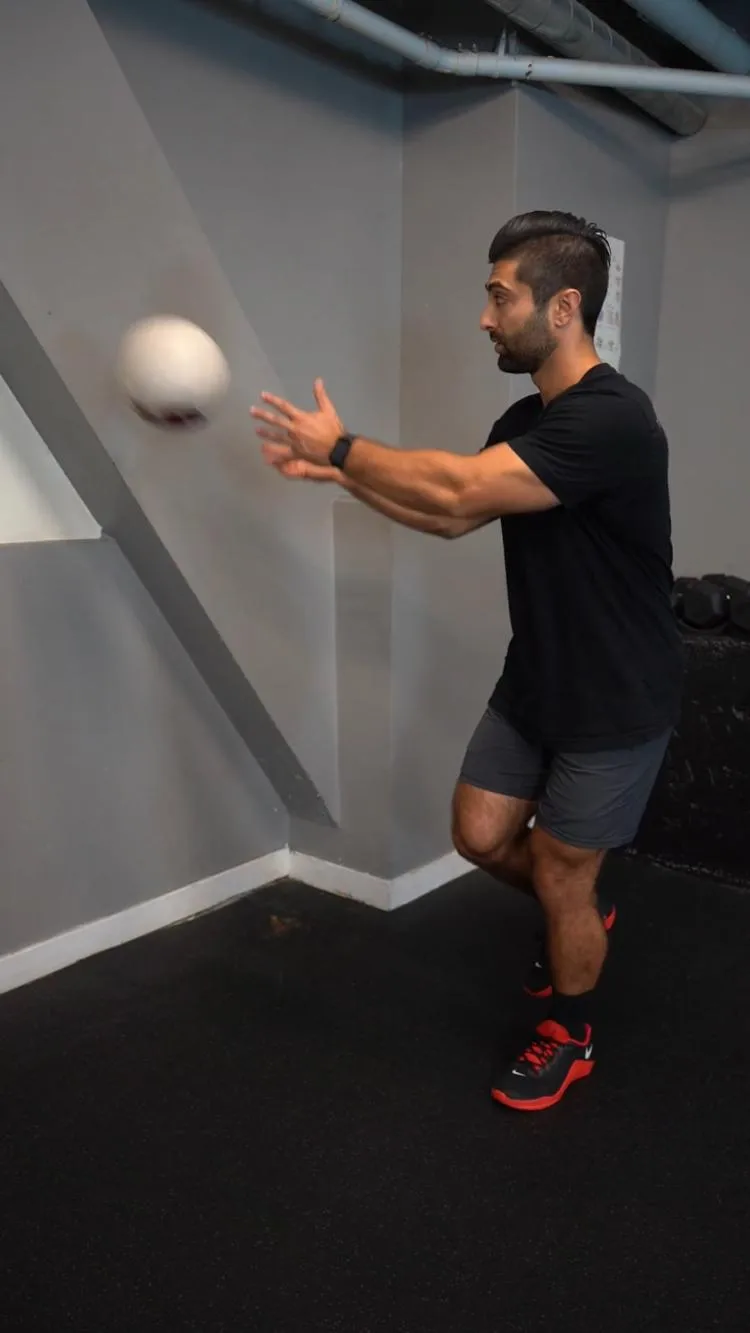
Single Leg Balance - Ball Toss Medial
View exercise instructions
- HOW: Stand near a wall on the one leg that is furthest from the wall. While balancing on that leg with a slight bend in your knee, toss the ball into the wall and play catch with it. Keep your hips facing forward as you throw the ball. The farther you are away from the wall the harder it will be.
- FEEL: You should feel your lower leg and foot muscles working.
- COMPENSATION: Keep your hips facing forward, don’t rotate your whole body while throwing the ball.
With that being said, understanding directional preferences is very important to understand with a lateral ankle sprain! Progressing rehab exercises successfully is easier to do when you understand the injury. For instance, an anterior knee injury like patellar tendonitis is going to have difficulty with being exposed to sagittal plane dominant movements with the tibia translating forward. With a lateral ankle sprain, the frontal plane is going to be more difficult to manage. So what direction do you expose the ankle to first, medial or lateral? Hint, it's opposite to an ACL!
Exercise 14 of 16
Exercise demonstration
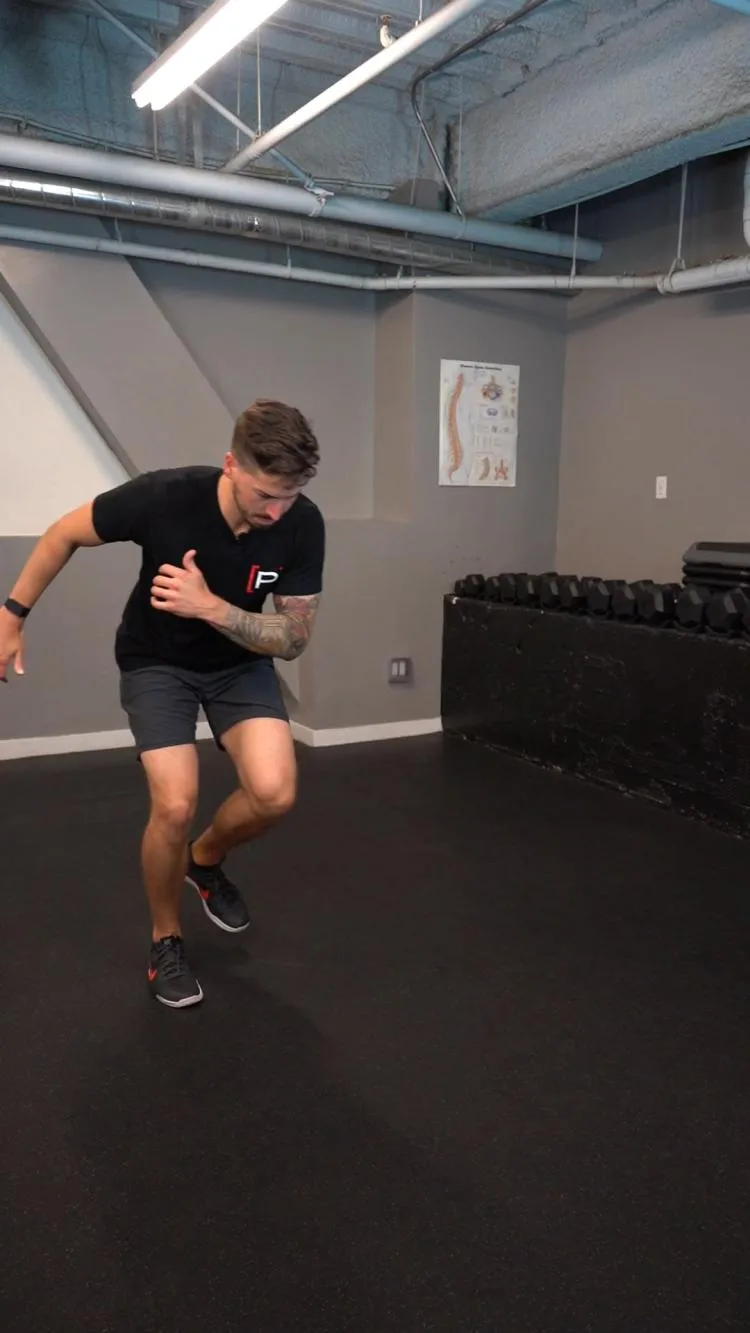
Lateral Bound
View exercise instructions
- HOW: Shift your weight to one leg with your knee slightly bent and the other leg off of the ground. Slightly bend down and push into the ground, jump to the side landing on the opposite leg. Get your balance, pause, and jump back to the other leg going back into the starting position.
- FEEL: You will feel all the muscles in your legs working.
- COMPENSATION: Landing Position. Make sure your knees are aligned over your toes. They should not dive inwards on the landing. Your goal is to absorb as much of the landing forces as you can and land softly. That means that you want your hips and knees to bend as much as they need to, to absorb the force. If you do not let them bend much, you will land "stiff" and hard. Let your hips go back and while keeping your chest up to help absorb the forces. Your toes should touch the ground first when you land and quickly your heels will follow. You should land in a "ready position" like you would if you were playing sports, with your weight ever so slightly forward on the balls of your feet. You should not fall forward or backwards after landing.
- For a detailed video on landing mechanics on one leg, click here: https://www.youtube.com/watch?v=6RCOGM5tZRM
If you understand the directional forces that the ATFL resists, you work reverse engineer your exercise selection and progressions. We want to save challenging ankle plantarflexion and inversion deceleration drills for last, so you may not want to start with a lateral bound. In contrast, as a clinician, you can feel more comfortable with a margin of error if the ankle is decelerating into dorsiflexion and eversion. Above is a nice progression of bounding drills working from sagittal to frontal plane dominant movements. Last but not least, you can want to expose the athlete to rotational deceleration drills! Same rules apply, graduate from medial deceleration to lateral deceleration!
Exercise 15 of 16
Exercise demonstration
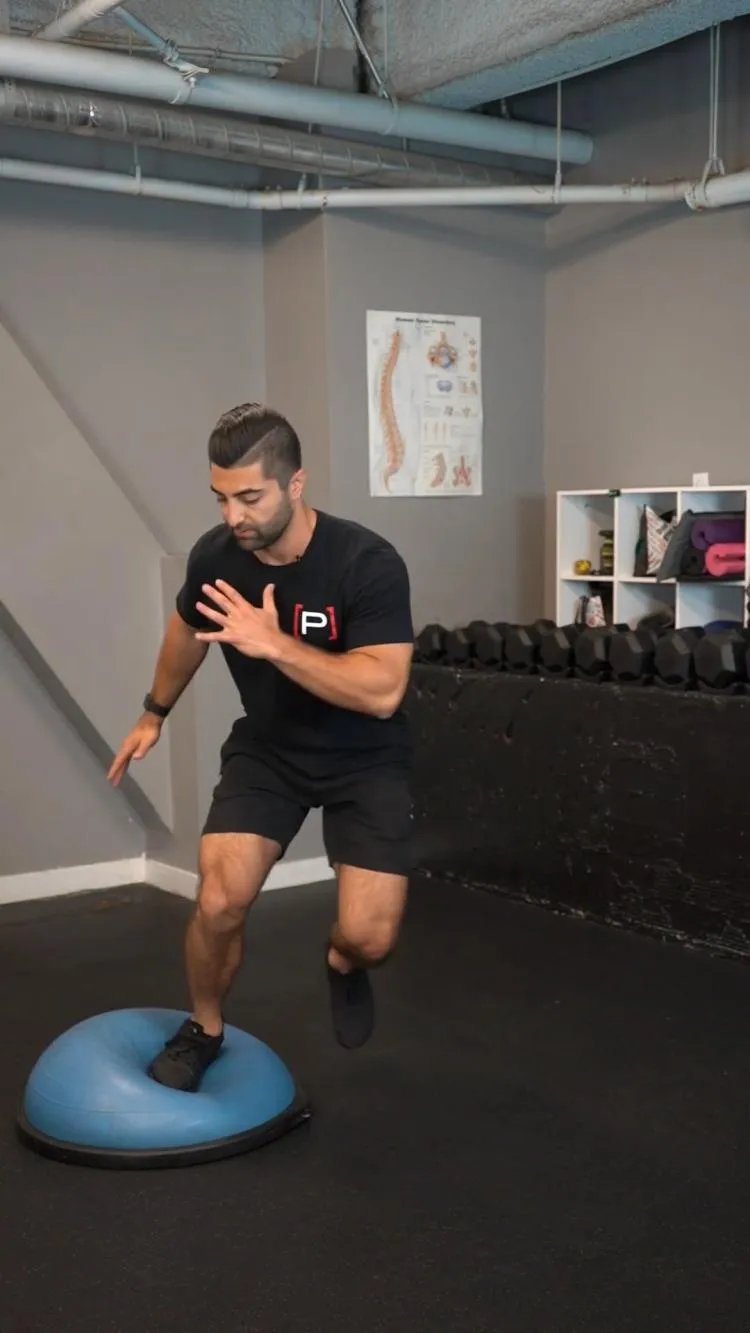
Lateral Bound On Bosu
View exercise instructions
- HOW: Place a bosu ball a few feet to the side of you with the ball side up. Shift all of your weight to the outside leg and bend the knee up that is closest to the bosu ball. With the leg balancing on the ground, slightly bend the knee and hinge forward at the hips. Push off to the side with that leg and land on the bosu ball with your other leg. Immediately push into the ball and return to the starting position.
- FEEL: You should feel the muscles in your hip and thigh working.
- COMPENSATION: Land softly on the bosu ball and also with the returning leg.
Additionally, leave no sensorimotor and/or mechanical stability deficit unaddressed - take advantage of triplanar challenging balance exercises (static, dynamic, multi-task, eyes open/closed, compliment surfaces, etc.)
Exercise 16 of 16
Exercise demonstration
Rotational Hop In Place - Outside, Quarter Turn
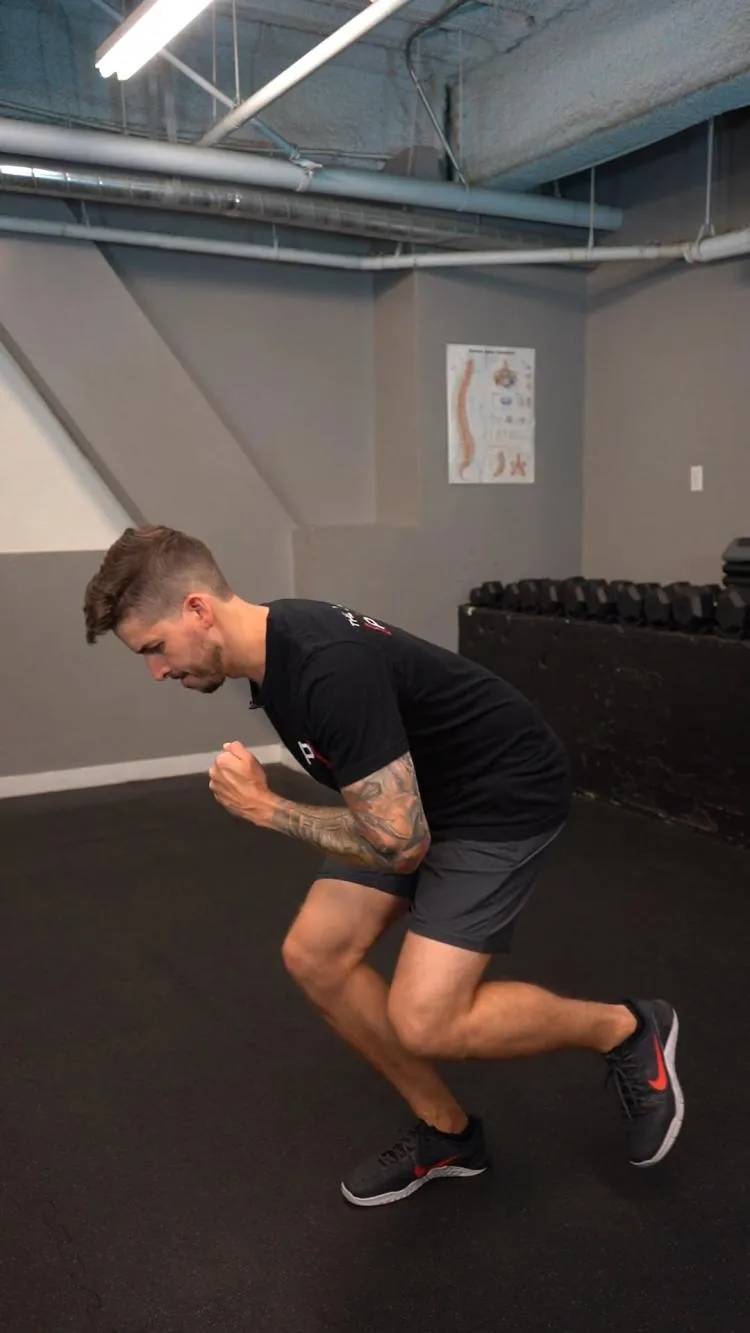
View exercise instructions
- HOW: Shift your weight to one leg with your knee slightly bent and the other leg off of the ground. All in one motion, bend down and push into the ground and jump straight up. As you are jumping up rotate your body in the air towards the outside and land with the same foot facing the direction you turned.
- FEEL: You will feel all the muscles in your legs working.
- COMPENSATION: Landing Position. Make sure your knees are aligned over your toes. They should not dive inwards on the landing. Your goal is to absorb as much of the landing forces as you can and land softly. That means that you want your hips and knees to bend as much as they need to, to absorb the force. If you do not let them bend much, you will land "stiff" and hard. Let your hips go back and while keeping your chest up to help absorb the forces. Your toes should touch the ground first when you land and quickly your heels will follow. You should land in a "ready position" like you would if you were playing sports, with your weight ever so slightly forward on the balls of your feet. You should not fall forward or backwards after landing.
- For a detailed video on landing mechanics on one leg, click here: https://www.youtube.com/watch?v=6RCOGM5tZRM
Closing Thoughts
Don’t have much time on your hands but you want a refresher on what to consider with lateral ankle sprain injuries and rehab progressions? If you quickly scrolled down and found yourself overwhelmed with the amount of content to digest for a quick read, don’t worry we got you covered! No need to read, just grab a coffee and tune in to this long-from video we put together to summarize a lot of points mentioned in this post!
The Most Comprehensive Movement Library At Your Fingertips!
With thousands of exercises to choose from, video demonstrations, education, assessments, and more, this is the best exercise library that you can utilize for your clients! Gain access HERE.
REFERENCES
- Delahunt E, Bleakley CM, Bossard DS, et al. Clinical assessment of acute lateral ankle sprain injuries (ROAST): 2019 consensus statement and recommendations of the International Ankle Consortium. Br J Sports Med. 2018;52(20):1304–1310.
Clinician
Craig Lindell, PT, DPT, CSCS
Prehab Co-Founder & Chief Content Officer
 Craig was born and raised in Blackwood, New Jersey and grew up with a passion for sports. Craig played soccer at a competitive level through high school. Craig found interest in physical therapy as a career after experiencing it first-hand due to a quadriceps injury. Because of this exposure, Craig went on to college at Pennsylvania State University to pursue his Bachelor of Science degree in Kinesiology with a focus in Movement Science. Craig has experience with athletes at the D1 level as he worked with Penn State Women’s soccer team. After undergrad, Craig packed his bags and drove to California to pursue his Doctor of Physical Therapy at the University of Southern California. With his spare time, Craig enjoys golfing, hiking, traveling, and spending time with his wife and dog. Craig has a special interest in helping younger athletes with adolescent athletic development and working with soccer players, golfers, and individuals going through ACL rehab.