


On this page 7 sections
Your guide
What you'll learn
Have you had the opportunity to work with Fitness Athletes clinically? This population may be the most dedicated, disciplined, and willing to learn. They go all-in on their training, nutrition, recovery, and Rehab! If they are bringing their best to you each day in Rehab, you must reciprocate that effort and give them your absolute best! The demands of being a fitness athlete are like no other. For example, CrossFit athletes are tested on gymnastics, Olympic lifts, overall strength, power, capacity, etc. How do you make sure the athlete you are working with is ready to face all these demands placed upon the shoulder joint? In this post, we will take you through tips/assessments/progressions that you will find in the Prehab exercise library. The goal is to ensure the Fitness Athletes you are working with are ready to FULLY take on their sport again. Let's discuss all there is to know about overhead stability in fitness athletes.
“This blog is one of our ‘clinical pearls’, which is designed to assist clinicians in understanding exercise progressions for various clinical conditions. Throughout each of these clinical pearls, you will learn multiple ways to attack similar issues we all see when treating our patients. We also highlight many of our personal exercise library videos throughout these pearls, all of which you can gain access to as an exercise library member!”
Injury Patterns in Fitness Athletes
Due to the demands, intensities, and training domains fitness athletes face one would expect them to have a high injury rate compared to other sports but what does the research say? It’s typically calculated from surveys and both prospective and retrospective cohort studies. Moran et al 2017 followed 117 CrossFit Participants for 12 weeks and found an overall injury rate of 2.10 per 1,000 training hours. How does this compare to other sports?
Compared to other forms of activity such as running whose injury incidence rate ranges from 2.5-33.0 per 1,000 hours (Videbaek et al 2015) and contact sports such as rugby, basketball, and soccer, the range of rates is 6.2-18 per 1,000 hours, fitness sports such as; CrossFit, Olympic Lifting, power-lifting, and Obstacle course racing have less of an injury rate ranging from .24-5.50 injuries per 1,000 hours.
Nonetheless, injuries will still occur in this population and tend to be the lower back and shoulders. Furthermore, at least ⅓ of these injuries are caused by improper form, whereas the remaining ⅔ are likely attributable to training load error. Whilst most Fitness Athletes get the advice from their providers to stop competing in their sport, we want to keep them doing the things they love as we know the benefit is much greater than the risk of not participating! Thinking of it this way, the 5x CrossFit Games Champ, Mat Fraser, was once told he would probably never lift again after sustaining a lower back injury while training as an Olympic lifter. Thankfully, the 5x fittest man on the Earth decided to not hang it up!
Rule out
Most injury patterns seen in fitness athletes are musculoskeletal in nature. We want to be able to make sure we have the skill set to treat them and get them back to their sport or to refer them if surgical intervention is needed. A few cases where this becomes true with shoulder injuries in fitness athletes include; full tearing of the rotator cuff and/or any muscle of the scapulothoracic or glenohumeral complex, specific types of labral tears, fractures, and shoulder dislocation.
To identify a full rotator cuff tear we use the drop arm test. This is completed by standing at the side lifting the patient's arm to 90 degrees abduction and then having them slowly lower the arm to the side. This test has a specificity of 97.2 and a +LR of 2.79. If it is a fitness athlete looking to get back into their sport with a potential full cuff tear or full tear of any other muscle of the shoulder complex, we are not taking any chances, refer them to the orthopedic surgeon as soon as possible. Similarly, if the person has had a lower back injury with bowel/bladder and/or reflex changes do not take any chances, refer them to appropriate professionals!
Lastly, let’s talk about labral tears and shoulder dislocation. Labral tears are common in athletes, research by Lesniak et al 2013 concluded, “Asymptomatic shoulder lesions in professional baseball pitchers appear to be more frequent than previously thought.” Schwartzberg et al 2016 found superior labral tears diagnosed by MRI in individuals between the ages of 45-60 years may be normal age-related findings, and lastly, De Carli et al 2012 MRI findings of gymnasts showed 100 percent of them had signal abnormalities in their shoulders making clinical decision making difficult.
Type I SLAP tears tend to be managed very well with conservative management. However type II, III and IV will likely need surgical intervention. How do you know which one you are dealing with and when do you refer? First, you need a really thorough subjective examination. Next, you can use a clinical cluster but it can still get “muddy” as this injury typically occurs with other shoulder pathology and lack of consistent pain patterns. Ultimately, if a type II-IV SLAP lesion is expected it's worth getting MR arthrogram, especially in overhead athletes. Arthrograms are more sensitive for labral pathology both in shoulders and the hips. As for anterior shoulder dislocation, it becomes less “muddy”. If the person is under the age of 20 the rate of recurrent instability is 72-100 percent, 20-30 years 70-82 percent, and greater than 50 years old recurrence is 14-22 percent (Polyzois et al 2016). If the goal is to return to competition as a fitness athlete, mechanical shoulder stability is needed and referral for the younger athletes would be in the game plan.
Alright, let’s get out of the mud and start talking about the phases of rehab!
Are You Looking For An Easier, More Comprehensive Way To Build Programs?

What Does our Library offer that differentiates us from other platforms?
Phase I: Address The Movement System and Rebuild The Foundation
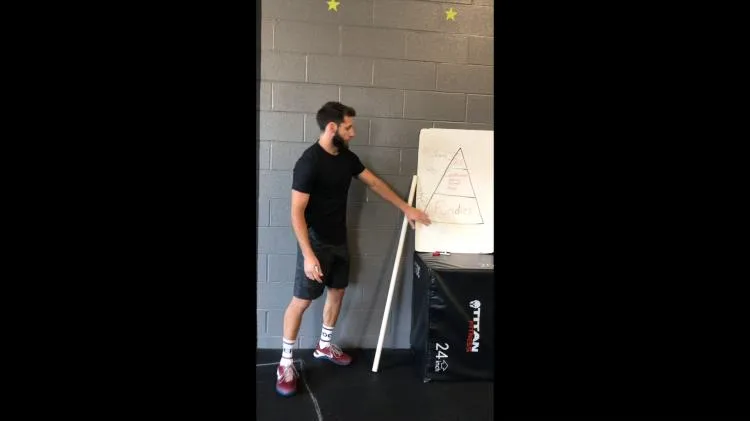
As stated above most injuries are due to improper form and training load error. Education needs to take place on appropriate spikes in workload to ensure long-term success. Next, before looking specifically at the shoulder we need to take a look at the entire movement system in an organized manner.
Exercise 01 of 17
Exercise demonstration
Importance Of The Foundation
View exercise instructions
Exercise 02 of 17
Exercise demonstration
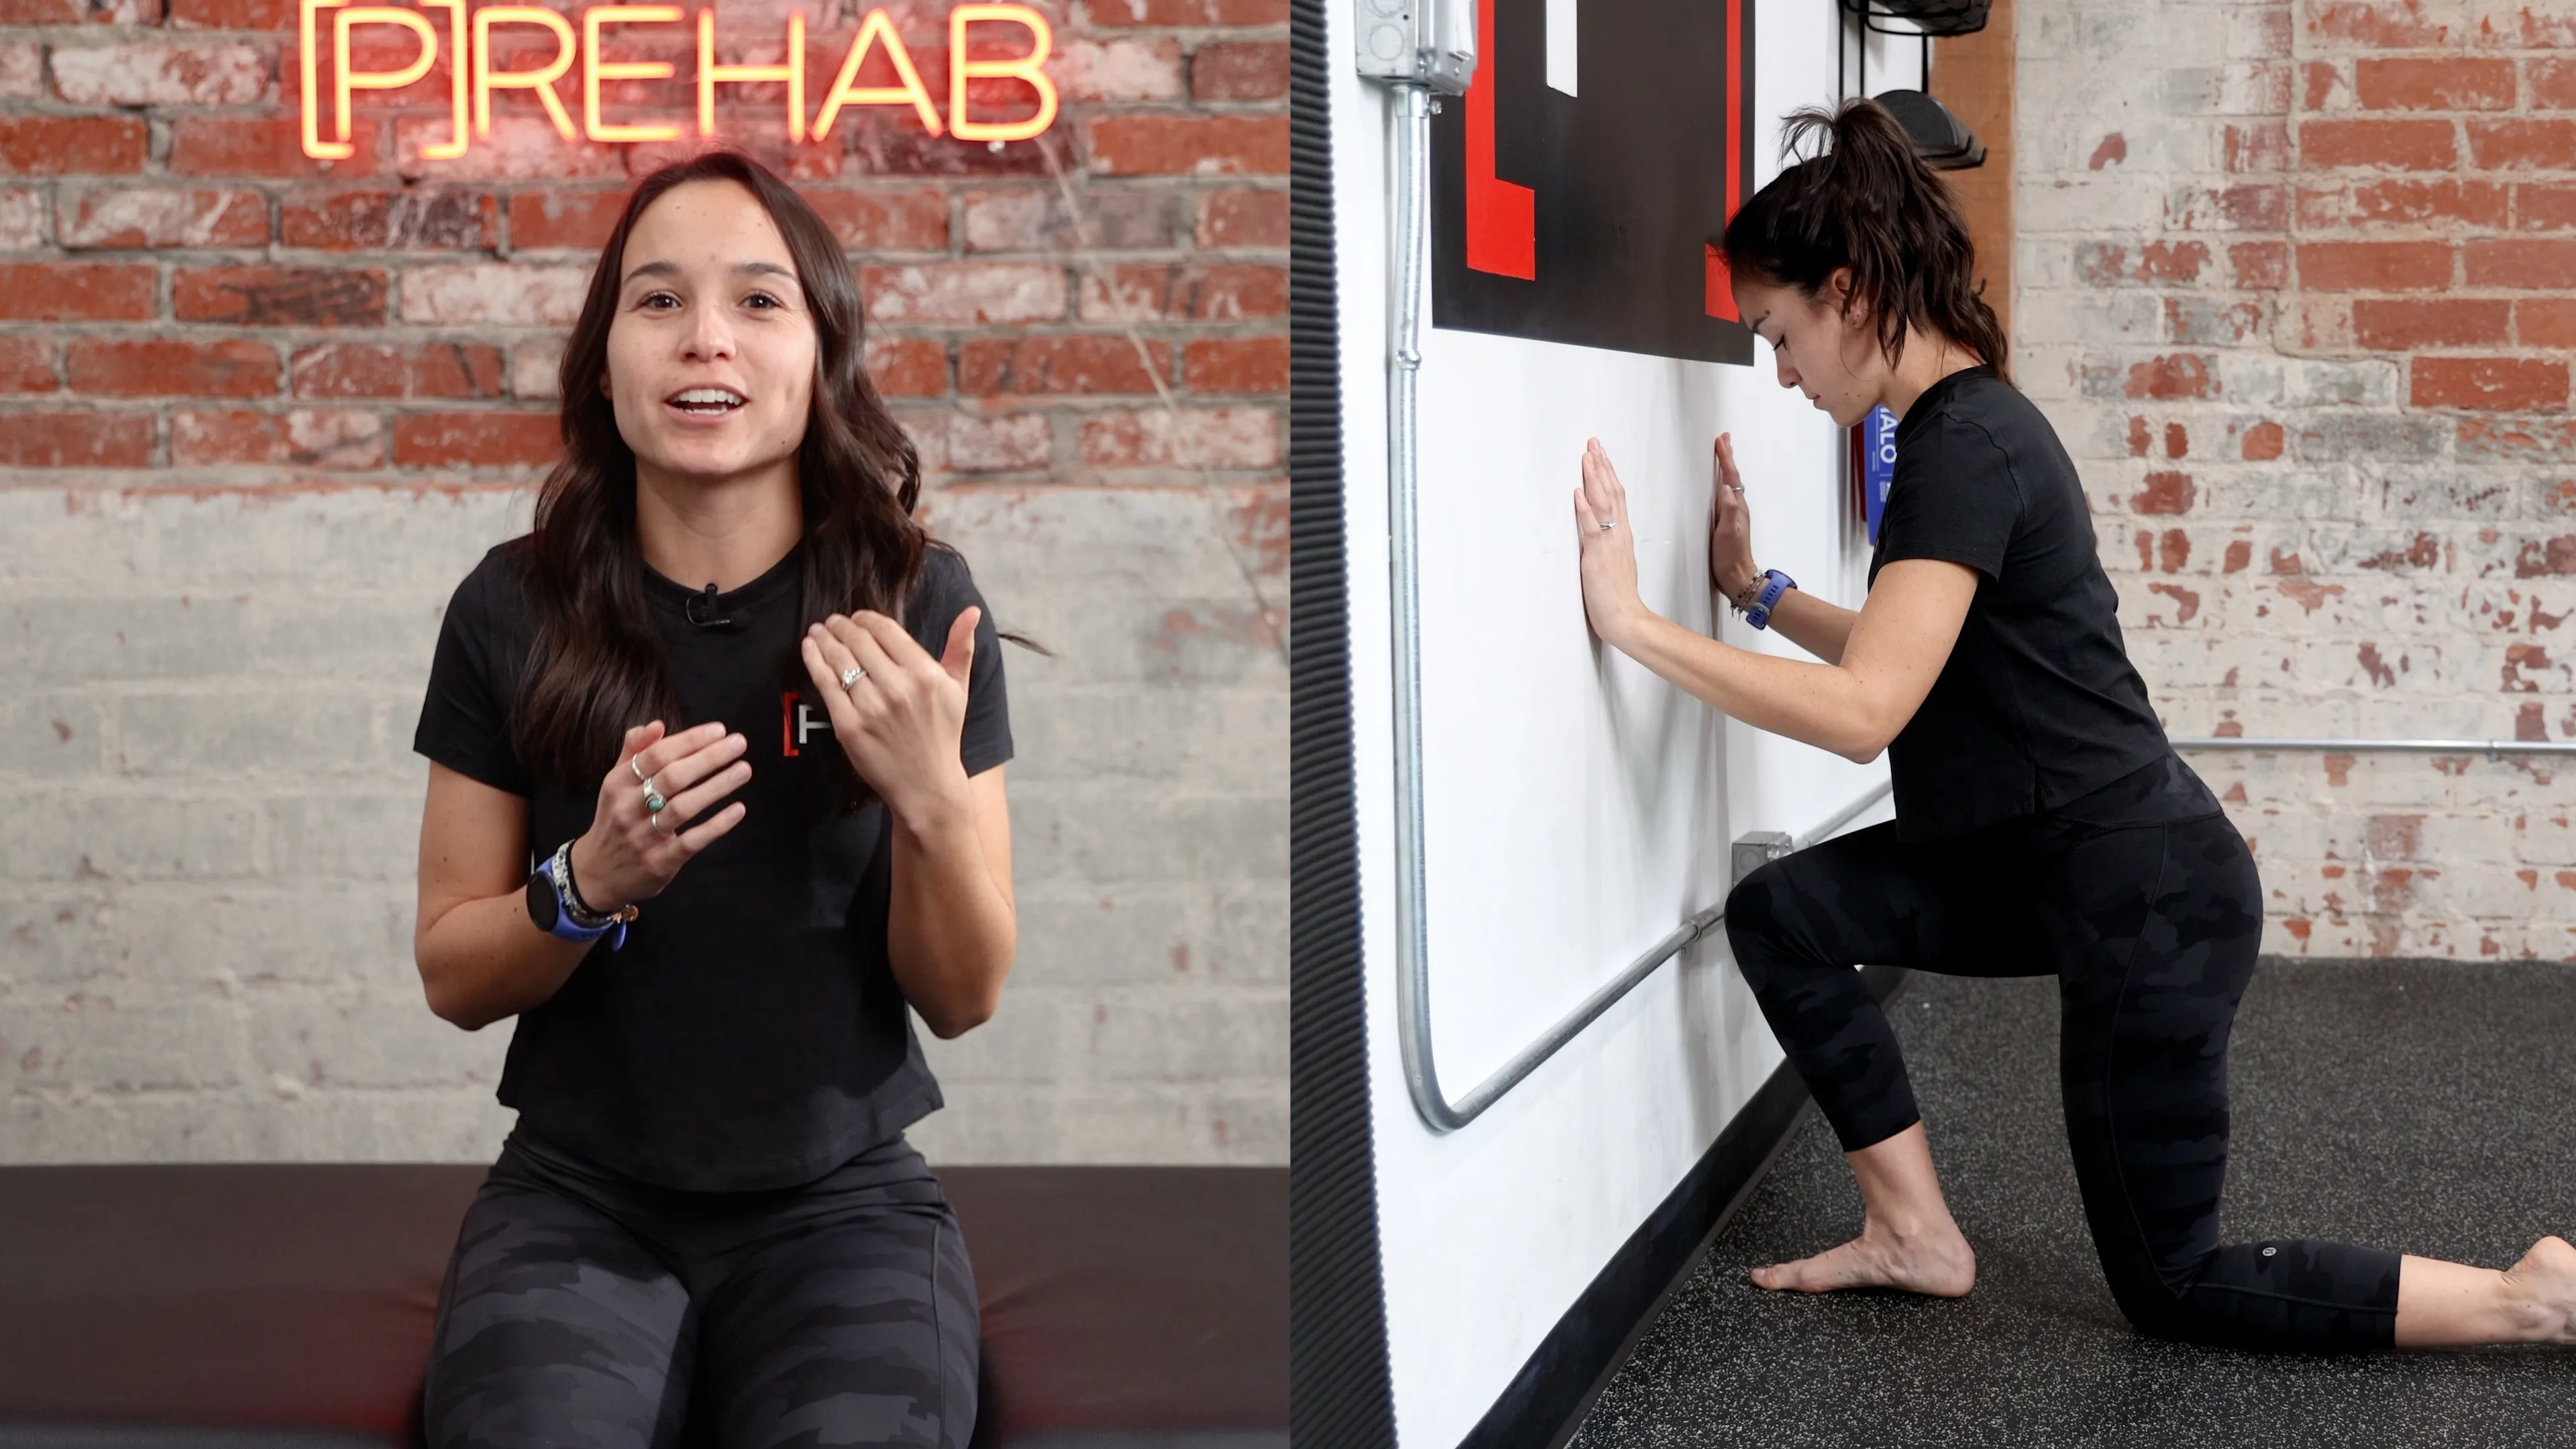
Knee To Wall Ankle Dorsiflexion Assessment
View exercise instructions
Exercise 03 of 17
Exercise demonstration
Thoracic Rotation Mobility
View exercise instructions
- Description: Are you dealing with a nagging discomfort in between your shoulder blade and your spine? No matter how many stretches you do, or how much time you spend foam rolling it, does it still persist? Pain in this area often gets labeled as a rhomboid issue because it is a relatively superficial muscle that you can appreciate from any anatomy chart. However, how to fix rhomboid pain sometimes may actually have little to do with the rhomboids. In this video, you'll learn the ultimate secret of how to fix rhomboid pain by taking a look at a very specific movement...thoracic rotation!
- If there was only one movement assessment I had to pick when it comes to evaluating interscapular pain, I'm going to look at thoracic rotation mobility. Poor thoracic rotation mobility can wreak havoc on the body and can definitely refer pain and discomfort to the rhomboid region. Poor thoracic rotation mobility is often coupled with poor scapular mobility/stability, which only contributes to the issue more! I have found that simply improving thoracic rotation mobility can improve interscapular discomfort. Be sure to watch the full video to learn not just how to assess, but also how to improve thoracic rotation mobility and potentially fix rhomboid pain!
- To learn more about how to fix rhomboid pain - check out this article featuring more education, exercises, and stretches! https://theprehabguys.com/how-to-fix-...
For example, Cope et al 2019 in a systematic review found, that “improved lumbopelvic control relates to improved athletic performance and decreased shoulder injury.” Cope et al 2019 also suggests high-quality research needs to be done on this topic and an established measure for lumbopelvic stability needs to be created. We are in complete agreement with that statement! However, from our clinical experience with Fitness Athletes, we observe compensation by utilizing anterior pelvic tilt and arching the back to achieve overhead positions with weight training and gymnastic movements (especially under fatigued conditions). The important reminder here is that just because the athlete has a 6 pack does not mean they have adequate stability! You will see in phase I, we typically hammer the foundation home to achieve a stable foundation.

Exercise 04 of 17
Exercise demonstration
Anti-Rotation Deadbugs

View exercise instructions
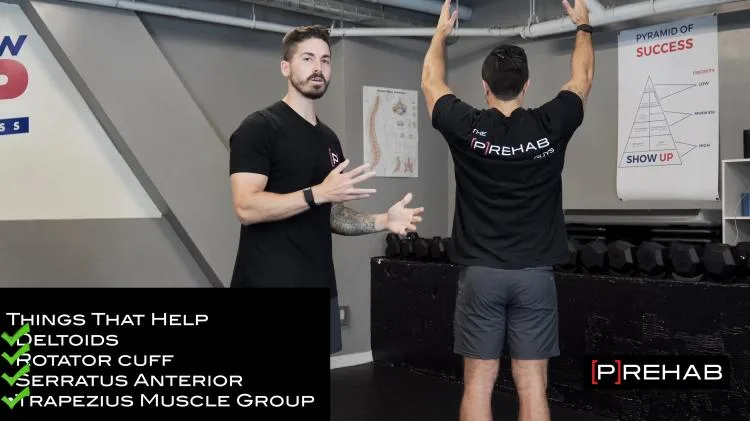
Once the movement system and any faulty patterns have been addressed then we will move on to addressing the shoulder complex. First, let’s make sure they have enough mobility to get into an overhead position.
Exercise 05 of 17
Exercise demonstration
How To Assess & Improve Shoulder Overhead Mobility | Episode 28
View exercise instructions
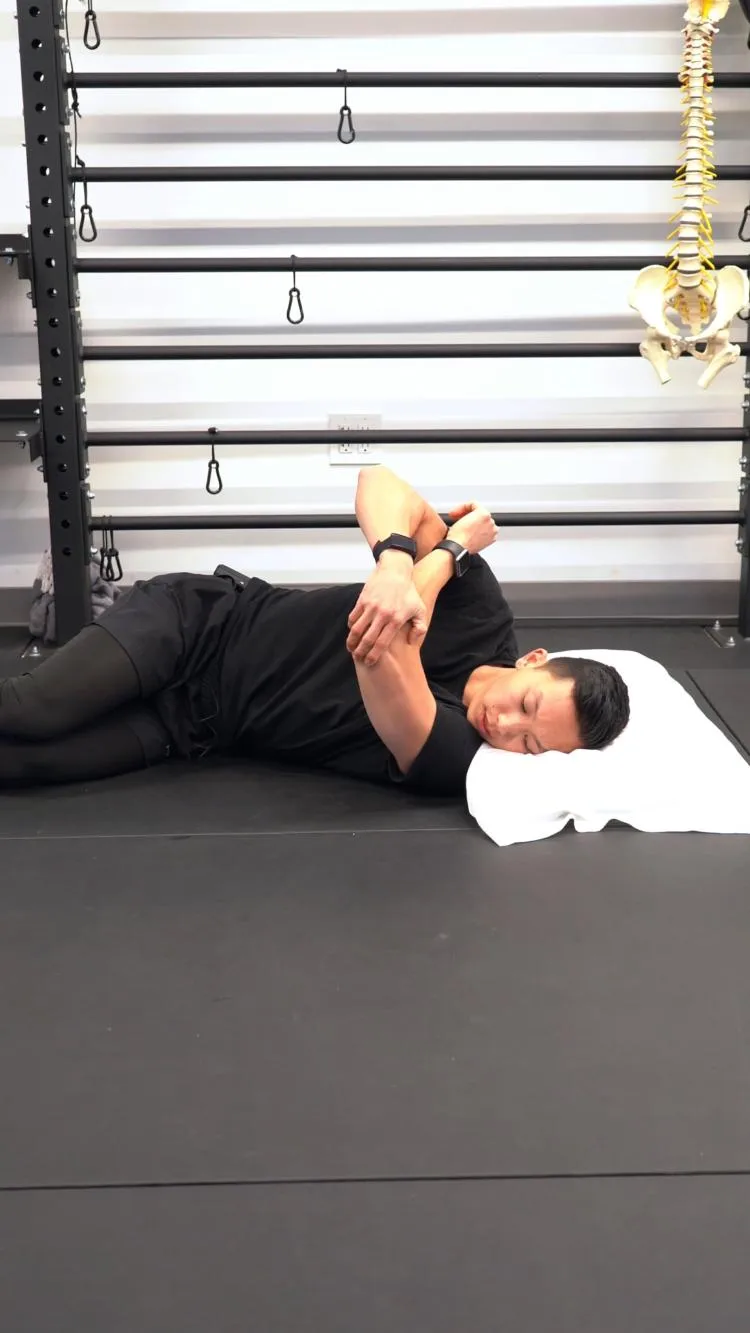
Now, if there is a true tissue limitation causing mobility dysfunction then we have to answer is it joint-related or soft tissue? If the range overhead changes when you change the position of their hips or back then it is more likely to be soft tissue, on the other hand, if you change body position and the range is the same then it is more likely to be the joint capsule limiting mobility! If that is the case, thanks to McClure et al 2007, here is the go-to exercise!!!
Exercise 06 of 17
Exercise demonstration
Side Lying Shoulder Cross Body Stretch
View exercise instructions
- HOW: Lie on your side with the shoulder you want to stretch closest to the ground. You can put a pillow under your head for neck support if you want but it is not necessary. Bring your elbow to your side up to shoulder height. Using your bodyweight to pin your bottom shoulder down, slowly lift your elbow straight up with your opposite hand.
- FEEL: You should feel a deep stretching sensation in back of your shoulder on the ground. You do not want to feel any pinching sensations or pain in the front of your shoulder.
- COMPENSATION: If you are not feeling the stretch in the right area, try putting your elbow slightly higher than your shoulder. You can also try rotating your body backwards just a bit.
Sample Shoulder Stretching Exercise From Prehab Library
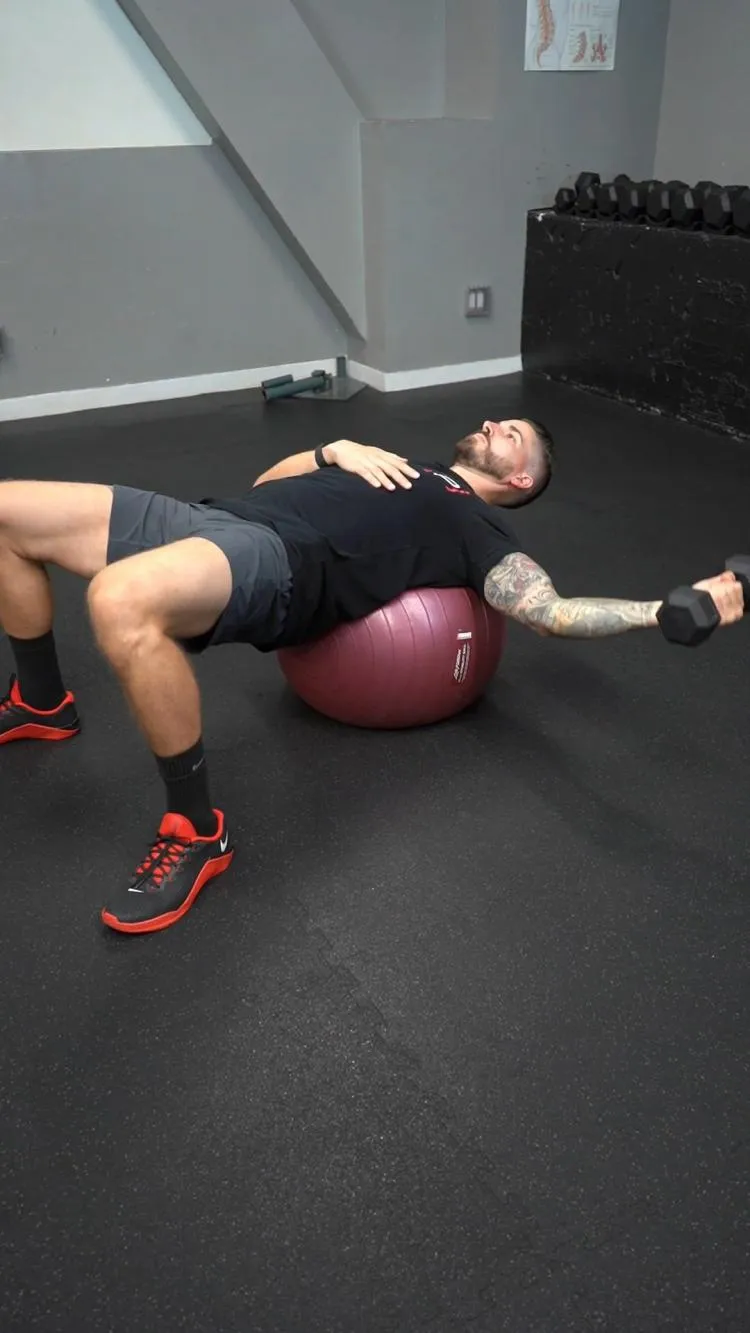
If the athlete has adequate passive mobility but is limited actively then we know this is a stability problem likely due to imbalances surrounding the shoulder joint. Restoring muscle balance of the scapulothoracic complex is crucial. If you want to lengthen out the pec while giving your athlete an awesome rotatory stability challenge, check out this exercise.
Exercise 07 of 17
Exercise demonstration
Single Arm Pec Fly - Swissball, Dumbbell
View exercise instructions
- HOW: Start by lying on your back on a swissball with your feet on the ground. Have a dumbbell in one hand and press it up straight up over your chest with your knuckles facing the sky. Have a slight bend in your elbow as you lower the weight out to the side. Once you feel enough of a stretch in your pec muscle, pull it back into the starting position.
- FEEL: You should feel your chest muscles working.
- COMPENSATION: Don’t have your elbow straight, keep a slight bend.
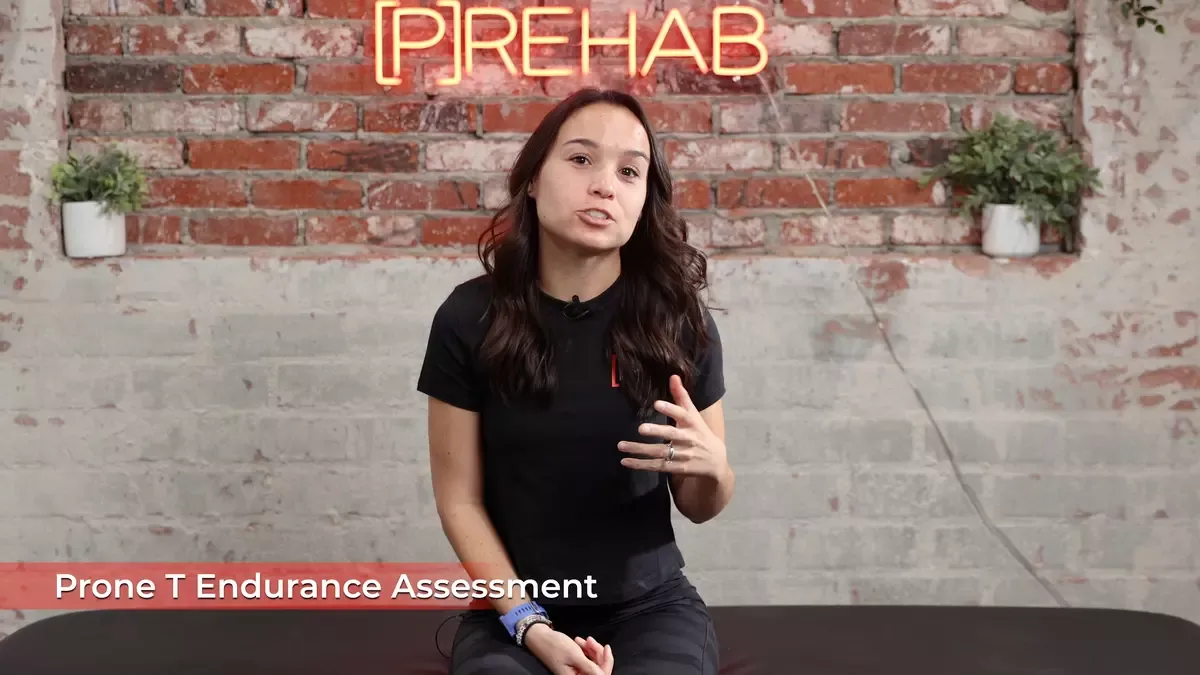
The common pattern we see in Fitness Athletes is they are pectoralis major, latissimus dorsi, and upper trap dominant with resultant mid-lower trap and serratus anterior weak/deconditioned. This imbalance leads to a scapular position of downward rotation and anterior tilting without adequate opposing forces for upward rotation and posterior tilting. To get overhead comfortably we need to restore the natural force coupling of this complex! Prone shoulder endurance testing is our go-to for identifying mid and lower trap deconditioning.
Exercise 08 of 17
Exercise demonstration
Prone T Endurance Assessment
View exercise instructions
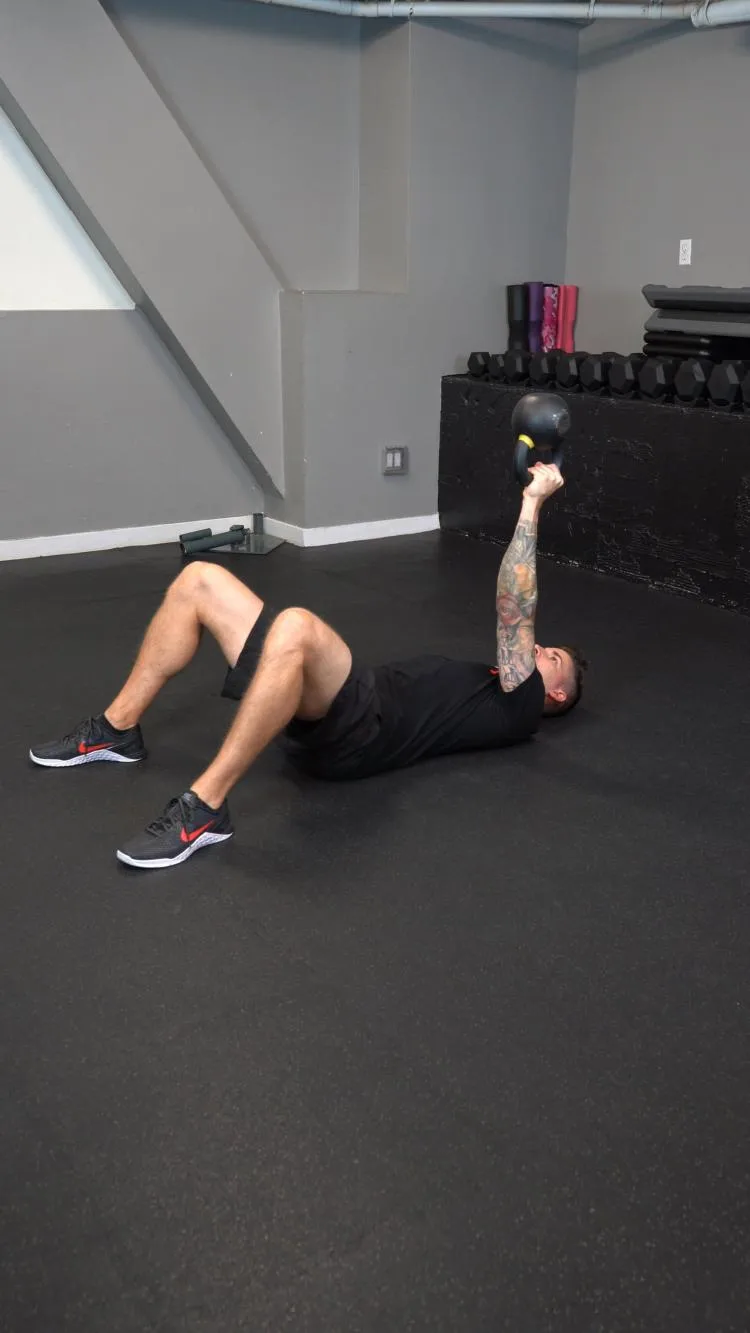
Lastly, if the athlete's symptoms are hot in this phase we need to calm them down and isometrics are a good way to do so! Also if you want to have some fun with it, use a bottoms-up kettlebell vs pushing into a wall, the fitness athlete will LOVE this challenge!
Exercise 09 of 17
Exercise demonstration
Shoulder Flexion 90 Deg Isometrics - Upside Down Kettlebell
View exercise instructions
- HOW: Get set-up in a hook lying position holding a kettlebell upside down. While balancing the kettlebell and keeping your knuckles facing the ceiling and shoulder/shoulder blade strong, perform a pressing motion towards the ceiling and hold this position.
- FEEL: You will feel your shoulder blade, shoulder, arm, and forearm muscles working with this exercise.
- COMPENSATION: Stay very strong through your hand and wrist, keep your knuckles facing the ceiling.
Phase 2: Building Capacity In The Movement System
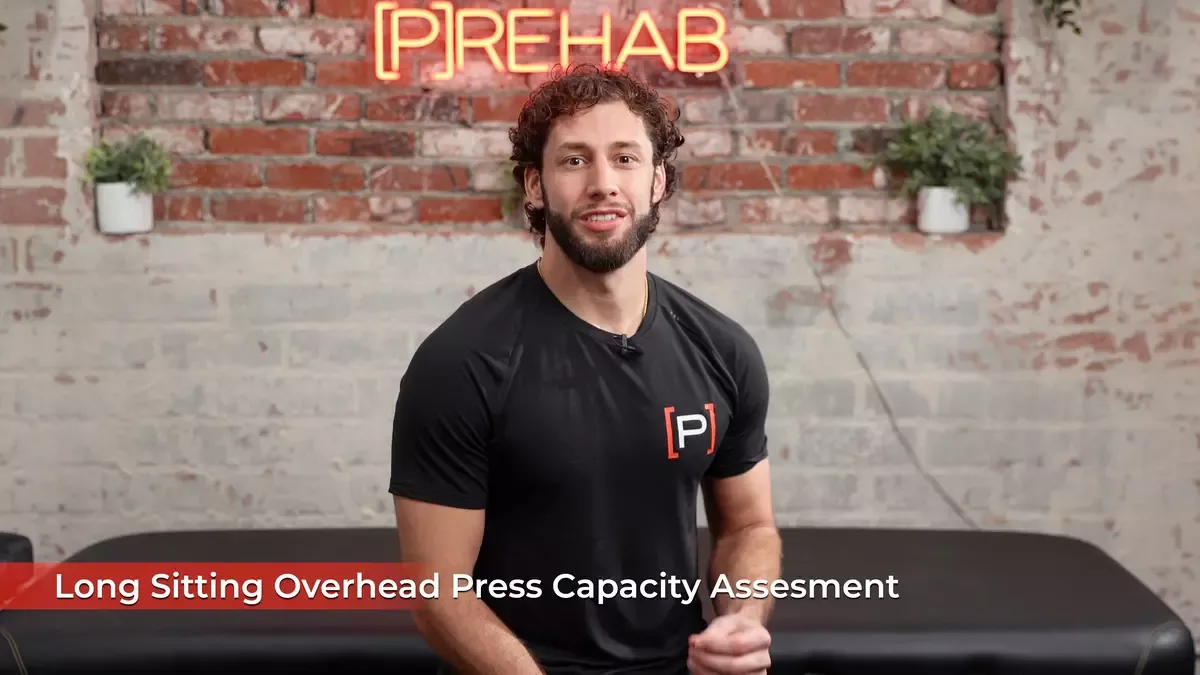
Once symptoms have cooled down a bit it's time to look at limb dominance. It is more likely that the dominant side shoulder becomes injured compared to the non-dominant side and this is where patient education and then showing them through objective assessment comes in. For example, Sayampanathan and Andrew 2017 found the dominant arm was 2.30 times more likely than the non-dominant to sustain rotator cuff-related injury! Our first go-to is the long sitting overhead press test to assess vertical pressing dominance while taking the legs out of the equation (we will talk about why in a bit).
Exercise 10 of 17
Exercise demonstration
Long Sitting Overhead Press Capacity Assessment
View exercise instructions
We can also look at limb pressing dominance in horizontal pressing and differing trunk positions while lightly adding legs via the Turkish get-up capacity test aka “The Dillon Test”.
Exercise 11 of 17
Exercise demonstration
Turkish Get-Up Capacity Test
View exercise instructions
Why did we take the legs out earlier? Simple, we want to mitigate confounding variables as much as possible when looking at upper extremity limb dominance. In this sport, we commonly see movements such as thrusters, push press, push jerk, and split jerks meaning lower limb dominance is going to play a role in this equation also. We need to make sure to take our time and address each variable before adding it all back together again for the “sexy lifts”. One way to address limb dominance is both the 5 RM Bulgarian split squats and single-leg bridge endurance assessments.
Exercise 12 of 17
Exercise demonstration
5 RM Bulgarian Split Squat Assessment
View exercise instructions
Exercise 13 of 17
Exercise demonstration
Single Leg Bridge Endurance Assessment
View exercise instructions
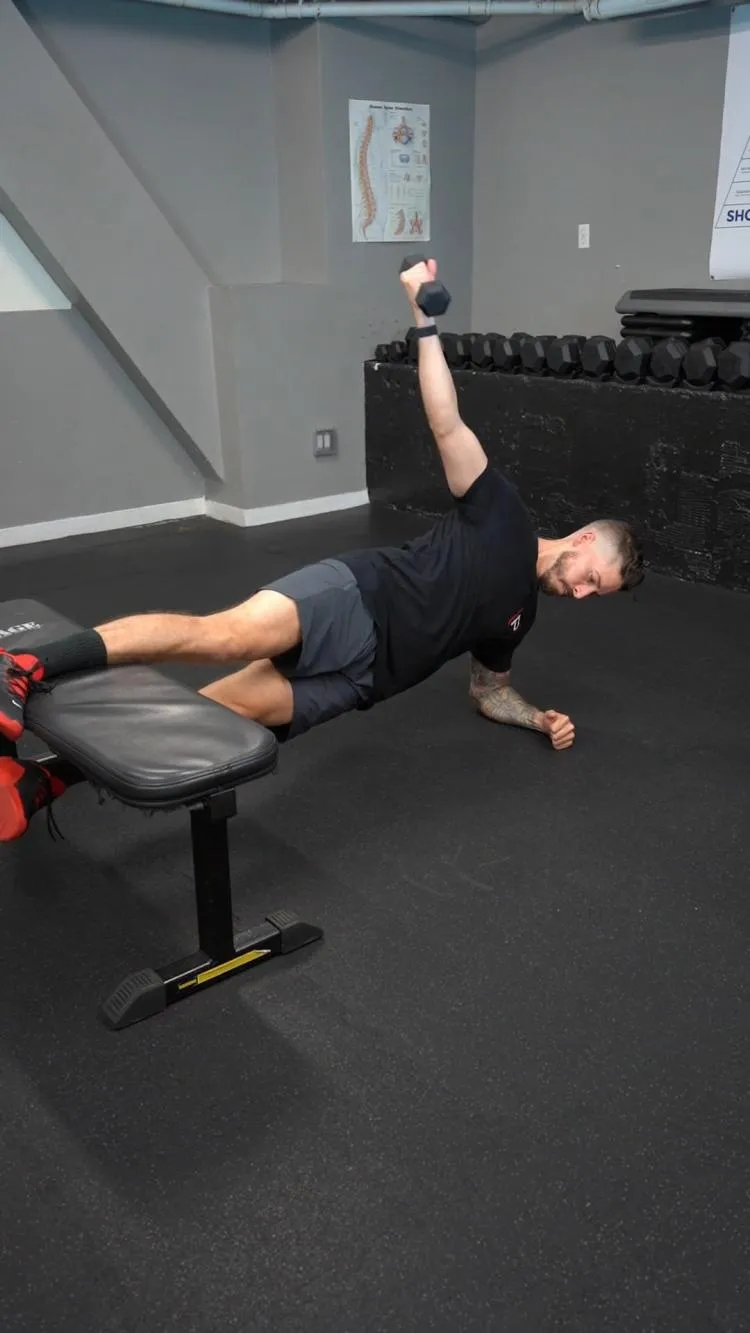
Lastly, when working on overhead stability for fitness athletes, we want to start building up strength and capacity with strict movements. If limb dominance is greater than a 10 percent difference we are going to stick with unilateral movements. Furthermore, we want to ensure we are training the scapulothoracic complex in varying positions. Too often, Y’s and T’s are only performed lying prone in a hip extended position, we need to get the body in different positions to condition these muscles fully for return to sport.
Exercise 14 of 17
Exercise demonstration
Copenhagen T - Dumbbell
View exercise instructions
- HOW: Begin on your side with one foot on top of a bench and the other below the bench on the ground. Keep your knees straight, and your elbow on the ground underneath your shoulder. Hold a dumbbell in the other hand out in the front at chest level. From here, lift your hips into the air with your leg pushing into the bench creating a side plank position. With your thumb up and elbow straight, lift the dumbbell up until you get to be straight up from your shoulder.
- FEEL: You should feel your shoulder and core muscles working.
- COMPENSATION: Keep your hips off the ground in the plank position. Keep your thumb up as you bring the dumbbell up.
Exercise 15 of 17
Exercise demonstration
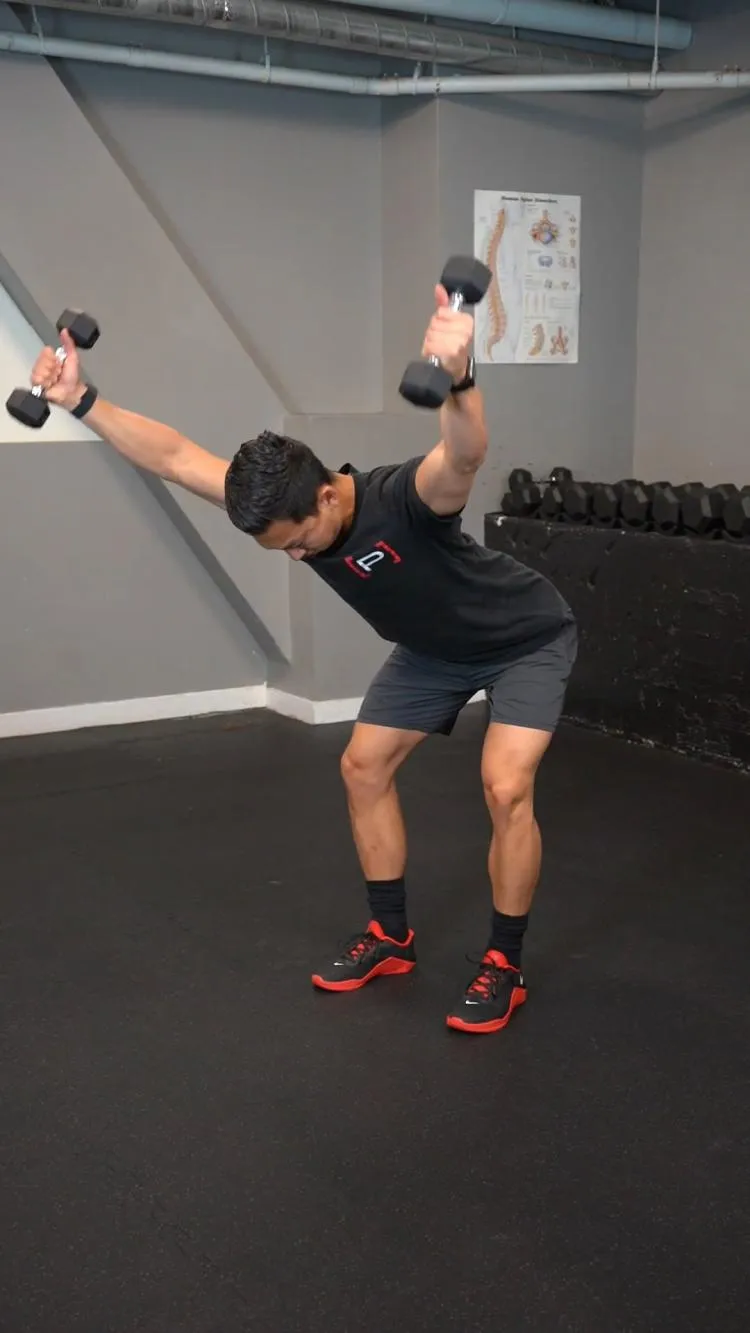
Bent Over Y - Dumbbell
View exercise instructions
- HOW: Hold two dumbbells in a standing position with your feet shoulder width apart. Hinge forward at the hips and slightly bend your knees. Hold the dumbbells with your thumbs pointed up. Squeeze your shoulder blades back and raise your arms up in a diagonal motion up to shoulder height.
- FEEL: You should feel your shoulder muscles working.
- COMPENSATION: Keep your thumbs up and as you bring your arms up.
Think of it this way, sometimes the athlete will be catching the weight using a push press; dipping their hips a bit but the catch of the weight will occur in a hip extended position. Other demands of the sport require the athlete to catch the weight overhead while they are at the bottom of the squat or hip flexed position.
Phase 3: Sport Specific Demand Capacity Building
This is where the specificity of training/rehab becomes crucial in overhead stability for fitness athletes! The rate of force development along with the ability to intelligently stabilize under fatigue becomes the focus. Fitness Athletes, along with having to lift heavy weights overhead or swing their body through the air on pull-up bars or rings, have to be able to do this while the rest of their body is completely fatigued. In this phase, we will expose them to the demands of their sport while requiring high demands of stability via earthquake presses under fatigued conditions.
Exercise 16 of 17
Exercise demonstration
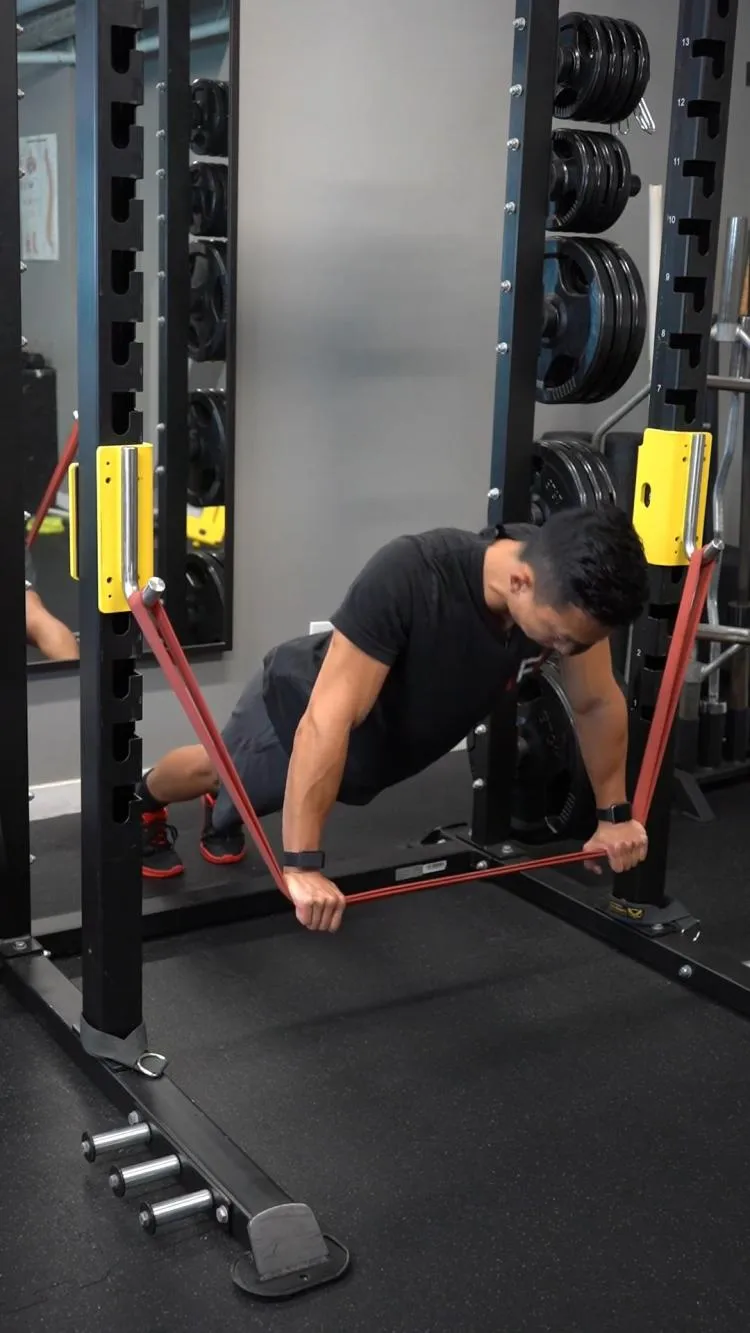
Push Up Plus - Earthquake
View exercise instructions
- HOW: Grab a thick band to loop around the inside of the squat rack at about waist height. Place your hands shoulder width apart and place your feet back with your toes pushing into the ground. From this push up position, keep your elbows straight and let your shoulder blades come back and almost touch. From there, push into the band and try to push your shoulder blades all the way around your body.
- FEEL: You should feel your chest and shoulder muscles working.
- COMPENSATION: Keep your body flat, don’t arch your back. Keep your elbows straight.
Exercise 17 of 17
Exercise demonstration
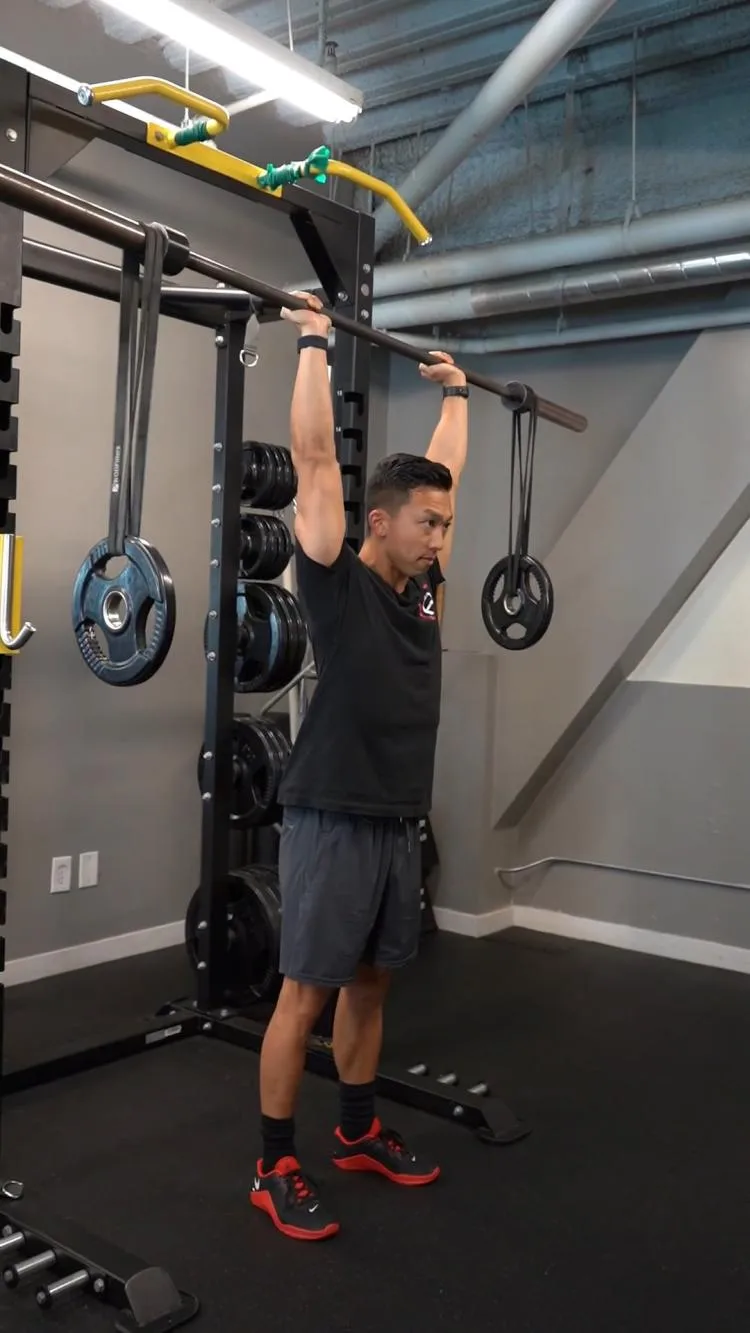
Overhead Press - Earthquake, Barbell
View exercise instructions
- HOW: In a squat rack, place a band on each end with a weight attached at the bottom of the band. Make sure the band tension and weights are even. Place the middle of the bar in the front of your shoulders with your elbows bent underneath holding onto it. In a standing position, press the bar overhead with both arms. The slower you go the easier it will be. If you press faster the bands will move the weight more.
- FEEL: You should feel your shoulder muscles working.
- COMPENSATION: Make sure you press the bar straight up overhead.
To create fatigued conditions we use heart rate primers. We need to use graded exposure keeping in mind both physical and psychological demands of training in sport-specific heart rate zones. Which heart rate zone do you use? Great question!
Depends on the specific sport and person. For example, most CrossFit WODs range on the scale of heart rate between 54-98 percent of HR max (Claudino et al 2018). Furthermore, the information from the subjective examination will give you more insight. Do the symptoms come on at a specific weight, at a specific time in a workout, or during a particular style of workout? All this information is GOLD and will allow you to really tune in to the Rehab program!

Closing Thoughts
The last thing you should be prepared for when working with this population is the famous question, “Can I keep working out or should I hold off?” If a load management plan has been discussed and implemented, then our answer to this question is HECK YA! However, avoid any symptomatic movements or training further imbalances depending on the clinical findings!
Are You Looking For An Easier, More Comprehensive Way To Build Programs?
With thousands of exercises to choose from, video demonstrations, education, assessments, and more, this is the best exercise library that you can utilize for your clients! Gain access HERE.
Clinician
Dillon Caswell, PT, DPT, SCS
Prehab Podcast Host & Head of Programs
 Dillon is a Sports Physical Therapist, performance coach, and adjunct professor residing in Syracuse, NY whose passion is providing holistic solutions to improve all aspects of human performance. Along with working with clinical athletes across the lifespan, he provides on field coverage for youth and semi-professional teams. After his undergraduate studies at Syracuse University, he earned his Doctorate in Physical Therapy from SUNY Upstate Medical University. He is the founder and owner of AP3T: Action Potential Performance Physical Therapy where he practices wellness, prevention, and solution-based health care. In his free time, he enjoys family dinners, playing with his dog, and competing as a fitness athlete. Dillon honors the opportunity to join the Prehab guys to influence and educate in a people first system!