

On this page 7 sections
Your guide
What you'll learn
The natural design of the hip allows it to serve as the key to foundational movement! It is a ball and socket joint, similar to the shoulder which allows it to be extremely mobile. However, in addition to its exceptional mobility, the hips are responsible for giving us a base of weight-bearing capabilities to perform complex movements such as walking, swinging a golf club, squatting to pick up objects, dancing, etc., as it also serves as a key stabilizer. If the hips become stiff our movement options become limited! The purpose of this Prehab Clinical Pearl is to enhance your understanding of how to facilitate long-term improvements in hip mobility either for yourself or for your patients. There will be a series of exercises from our exercise library that you can visualize as we discuss hip mobility throughout this post. You won't want to miss this hip mobility clinical pearl.
“This blog is one of our ‘clinical pearls’, which is designed to assist clinicians in understanding exercise progressions for various clinical conditions. Throughout each of these clinical pearls, you will learn multiple ways to attack similar issues we all see when treating our patients. We also highlight many of our personal exercise library videos throughout these pearls, all of which you can gain access to as an exercise library member!”
It's All In The Hips!
Being a ball and socket joint, the hip is allowed 3 degrees of freedom meaning it has mobility in all available planes of motion! Sadly humans nowadays move less, and because of this our hips move less! As technological advances have made our living and work environments easier, the sacrifice of exploring our full hip mobility in all planes of motion has been made. If we are only taking our hips through flexion/extension (sitting/standing) day after day we are missing out on significant movement potential and actually increase our risk for injury! Hip mobility limitations have been correlated with a variety of musculoskeletal conditions, including low back pain, femoral acetabular impingement (FAI), hip osteoarthritis, and labral pathologies.
To really optimize hip mobility, we need a multi-centered approach. There is a ton going on at the hip from an anatomical, physiological, and biomechanics perspective. The hip joint itself, all of the muscular and soft tissue attachments, and its proximity to the pelvis, there is a lot to consider when working on mobility. To give you some perspective, there are 27 muscles that cross the hip joint and there are many other muscle groups above and below the hip joint that affects the overall hip function! We have to attack the hip from all angles, not only figuratively, but literally as well!
We breakdown this pearl into the following sections:
- Patient Education: Movement-based work environments as well as modifying risk factors for mobility restrictions of the hip.
- Joint Mobilizations: Mostly focused on self-mobilizations, as with Prehab, one of our core values is giving society the key to the ignition and allowing them to start their own movement engines towards success. Taking ownership of your own health is what we want to continue promoting!
- Dynamic Mobility Exercises: We talk about dynamic stretching and how it also helps improve hip mobility.
- Muscle Activity/Strengthening/Re-Education: A key component that is often forgotten when optimizing hip mobility.
Are You Looking For More Hip Exercises? Our Exercise Library Has Many and More!
Step 1: Educate, Educate, Educate!!!
It all starts with education when improving hip mobility for our clients. What we want to help individuals understand is that improving mobility at the hips is not just performing exercises, but changing your lifestyle. Modifying risk factors such as work environment, sedentary habits, and so forth is crucial. Is there an ideal sitting posture...The answer is No! We are bound to fall into "faulty postures", such as slouching in a chair, shifting to one side, etc. What we can do is educate our patients on creating a movement-based work environment. For instance, we know that a lot of people are now sitting a lot for their jobs. With that being said, how can we educate our patients to create a movement-based environment within what they can control?
Education For Sitting Environment
- Invest in a standing desk if able: This allows individuals to transition between different body positions frequently throughout the day, rather than staying in one position for a large portion of the day
- Set reminders: If you are not able to have a standing desk, set reminders on your phone or computer to get up and move around at least every 20-30 minutes
Exercise 01 of 07
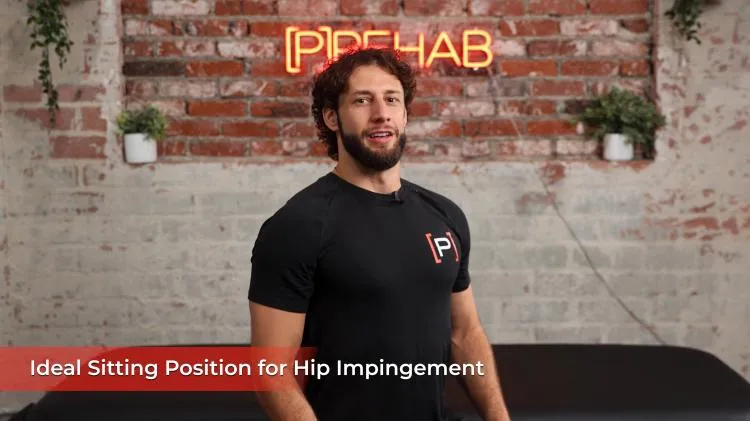
What about patients with hip impingement (FAI)? We know that hip flexion, adduction, and internal rotation (FAIR position) is painful for patients with hip impingement. Simply put, educate patients to avoid this if they have FAI! This includes:
- Avoid allowing the knees to come together, which creates femoral adduction and internal rotation, often provocative for individuals with FAI
- Avoid overcompensating in attempts to sit upright for long periods of time as this creates more hip flexion
- A slight slouch in posture is NOT bad!
A summary of the key points mentioned above are discussed below in this video.
Exercise demonstration
Ideal Sitting Posture For Hip Impingement
View exercise instructions
Step 2: Consistency Is Key - Don't Overstretch!
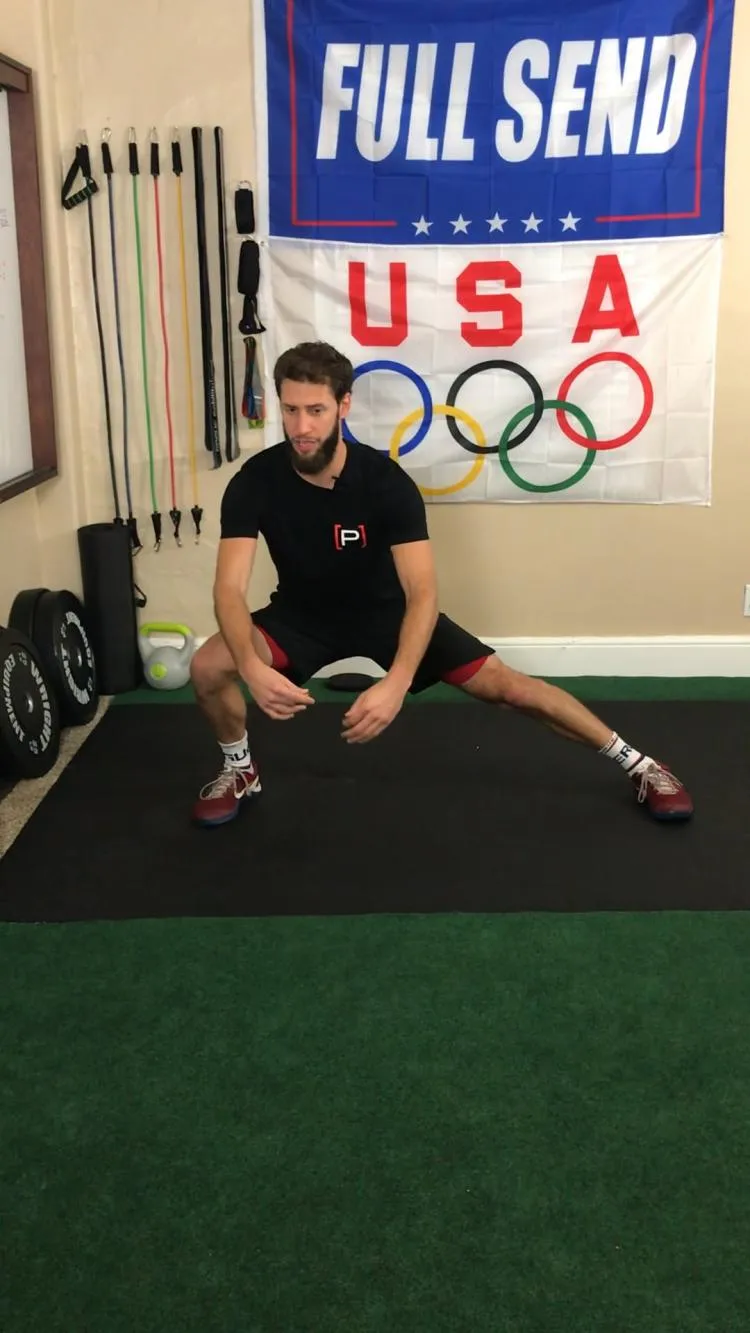
We all get questions from individuals about, how much should we stretch? The key takeaway for improving hip mobility is to work on dynamic stretching exercises, but to not overstretch. When we say overstretch, we mean pushing past your body's end range. What may happen over time if you constantly push past a limited motion is that your body may compensate and try to gain motion from somewhere else, which develops bad movement patterns. In addition, if someone continues to push past an end range of motion, discomfort/injury may result, which will hinder recovery! It is important to educate your patients on this concept from the first encounter of treatment, to ensure they understand their body's limits as well as what sensations to feel when stretching.
Exercise 02 of 07
Exercise demonstration
When Or When Not To Push Your Stretches
View exercise instructions
Sample Prehab Exercise Library Video
Patients often become eager to gain mobility quickly, and we know significant gains in mobility do not happen overnight. We must set realistic expectations for our patients and educate them to understand it is a slow process that will happen over time. Let's tap into some great dynamic stretching exercises for the hip.
Exercise 03 of 07

Exercise demonstration
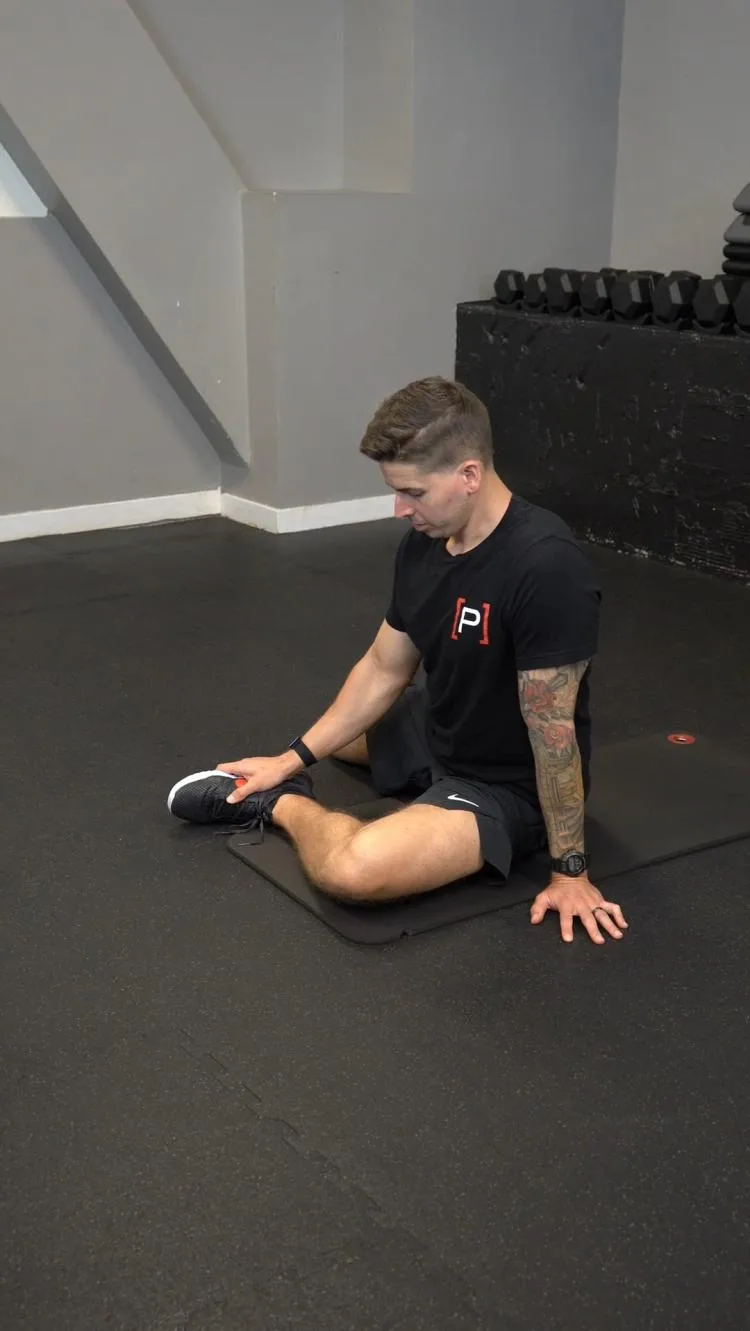
90/90 Hip Stretch - Dynamic
View exercise instructions
- HOW: Get set-up in a 90/90 position, you can use a yoga block or something else under your front hip to get into the correct position (follow video for tips and details). Once set-up, keep your thighs, knees, and feet flat against the ground, lift your chest up to make your torso long. Holding this position, shift your weight forward until you feel a stretch and hold that position for a moment, return to starting position and repeat.
- FEEL: You should feel a stretch in the back of your hip and your butt on the front thigh. You may feel a stretch inside your thigh and groin on the back leg.
- COMPENSATION: See video for tips and details, the most important thing is having a long torso and relatively straight back as best as you can especially when you shift your weight forward. We want to move through our hip and not our low back
This 90-90 position is great to work on hip mobility, as you are not only working on improving hip external rotation of one hip, but you are simultaneously attacking hip internal rotation on the opposite side!
If an individual is unable to get into a perfect 90-90 position, do NOT force it! Sometimes, if people are lacking hip external rotation mobility, they try to compensate at their tibiofemoral joint (knee joint), by attempting to externally rotate at the knee, which can lead to knee pain. As we harped on earlier, stay consistent, find where your limit is, and don't push beyond that! Overtime with consistency, you will be able to move into new, further ranges of motion.
Want to Learn More Exercises For Tight Hips?
Step #3: Hip Joint Mobilizations
There are various ways to mobilize a hip either with manual therapy or by educating your patients to perform self joint mobilizations. The purpose of these mobilizations is to improve capsule and connective tissue mobility. What is important about hip joint mobilizations is to combine them with intentional movements after they are performed. Specifically, muscular re-education exercises that activate surrounding hip musculature will create long-term carryover of these mobilizations. You must create hip mobility programs that branch out beyond just the mobilizations and dynamic stretching! Remember, active problems require active solutions.
- Convex on Concave: With convex on concave joints, the roll and glide occur in opposite directions. In regards to hip mobilizations, the hip has a convex femoral head moving on a concave acetabulum. Therefore, whichever way the roll occurs, the glide will occur in the opposite direction. We target our mobilizations in the direction of the glide!
- Clinical Pearl: Although you have learned this concept in your training and education, more recent literature supports that this rule may not matter so much when performing mobilizations. It is great to know your anatomy as well as your osteokinematics; however, don't boggle yourself up in all the small details. To keep it simple, when working on joint mobilizations, target the joint, and just move it!!
Below are examples of various self-hip joint mobilizations that can be prescribed in the clinic and/or a home exercise program.
Exercise 04 of 07
Exercise demonstration
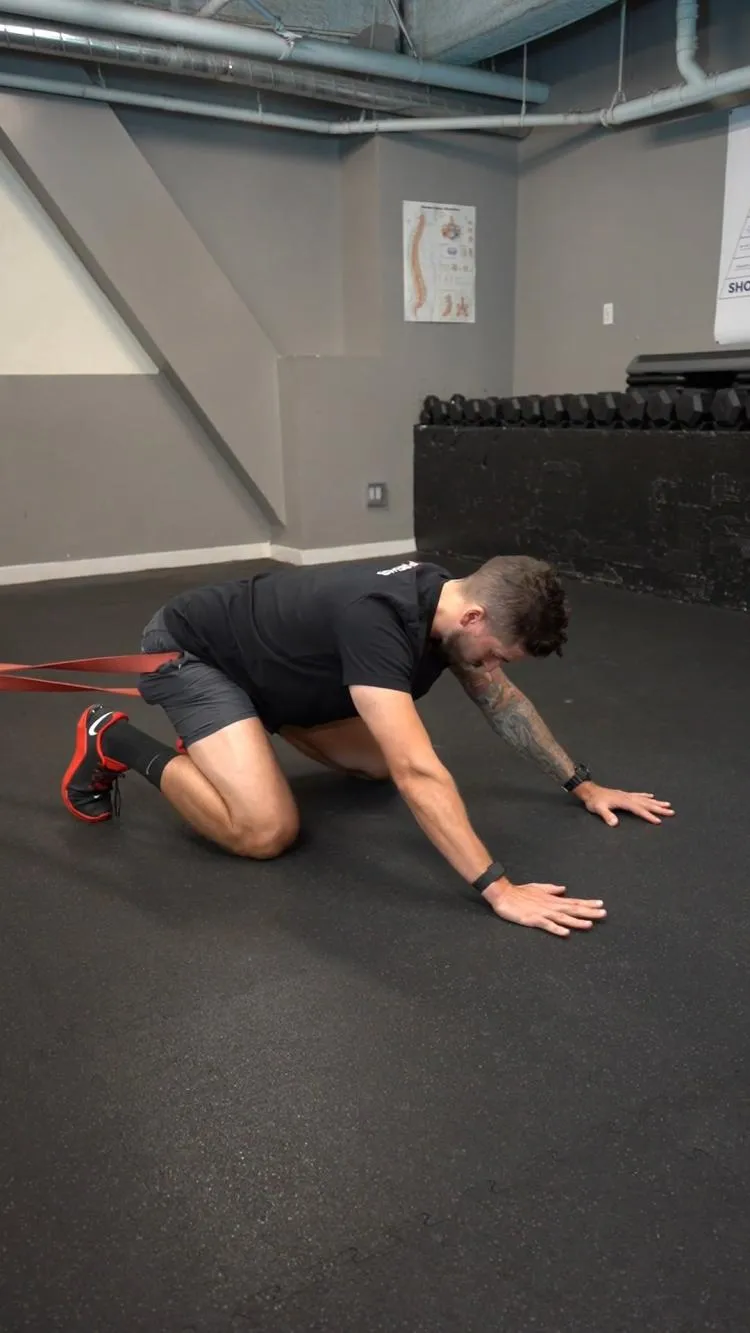
Quadruped Inferior Posterior Hip Mobilization - Band
View exercise instructions
- HOW: Anchor a strong band at about waist height if you are kneeling down. Loop the band around one hip at the top of your thigh/groin. Face away from the anchor and create tension in the band. Place both knees on the ground under your hips and each hand underneath your shoulders. In this half quadruped, tuck your hips inward by performing a posterior pelvic tilt (if you had a tail, think of tucking it under your hips). From here, let your bodyweight and the band pull your hips forward. Use your glutes to dynamically push forwards and backwards for the prescribed amount of reps or time.
- FEEL: You should feel a stretch in the front of your hip. You should also feel the muscles in the back of your hip working.
- COMPENSATION: Keep your back flat, don’t arch your back. Maintain the posterior pelvic tilt.
Sample Prehab Exercise Library Video
Posterior or inferior mobilizations of the hip help promote improvements in hip flexion and adduction. What is important with this exercise is to ensure that the spine is kept in a neutral position, by avoiding rounding of the pelvis when rocking back towards the heels. This is particularly helpful for patients who have femoral acetabular impingement (FAI) or hip osteoarthritis.
Exercise 05 of 07
Exercise demonstration
Hip Internal Rotation Mobilization

View exercise instructions
This is a great way to improve hip internal rotation, as well as an excellent transition into our next section on muscle activation for hip mobility! Arash adds active hip IR ROM in this same position after using the dowel for assistance to work on activating his internal rotators with his improved hip mobility.
This is a key take-home message of this clinical pearl, which is: utilize the new range of motion you have acquired from assistive mobilizations/stretches etc. by pairing them with muscular activation exercises!
Step #4: Don't Forget About Muscle Activation!
When you hear the word 'mobility', the first associated words that come to your mind usually include phrases such as 'flexibility', 'stretching', 'mobilizations', etc. However, in order to gain LONG TERM mobility, we need to ACTIVATE our musculature within new ranges of motion we achieve! If we solely rely on passive approaches to gaining mobility such as dynamic stretching for example, we often fall back into our limited ranges of motion.
In a study by Winter, the author investigated the effectiveness of targeted home-based hip exercises in individuals with non-specific chronic or recurrent low back pain with reduced hip mobility. The results demonstrated that the majority of individuals in all groups had clinical improvements in pain, but only the hip strengthening group had the majority of participants (80%) exhibit clinical improvements in function.
Below are some hip stability and strengthening exercises that can be paired with other hip mobility interventions.
Exercise 06 of 07
Exercise demonstration
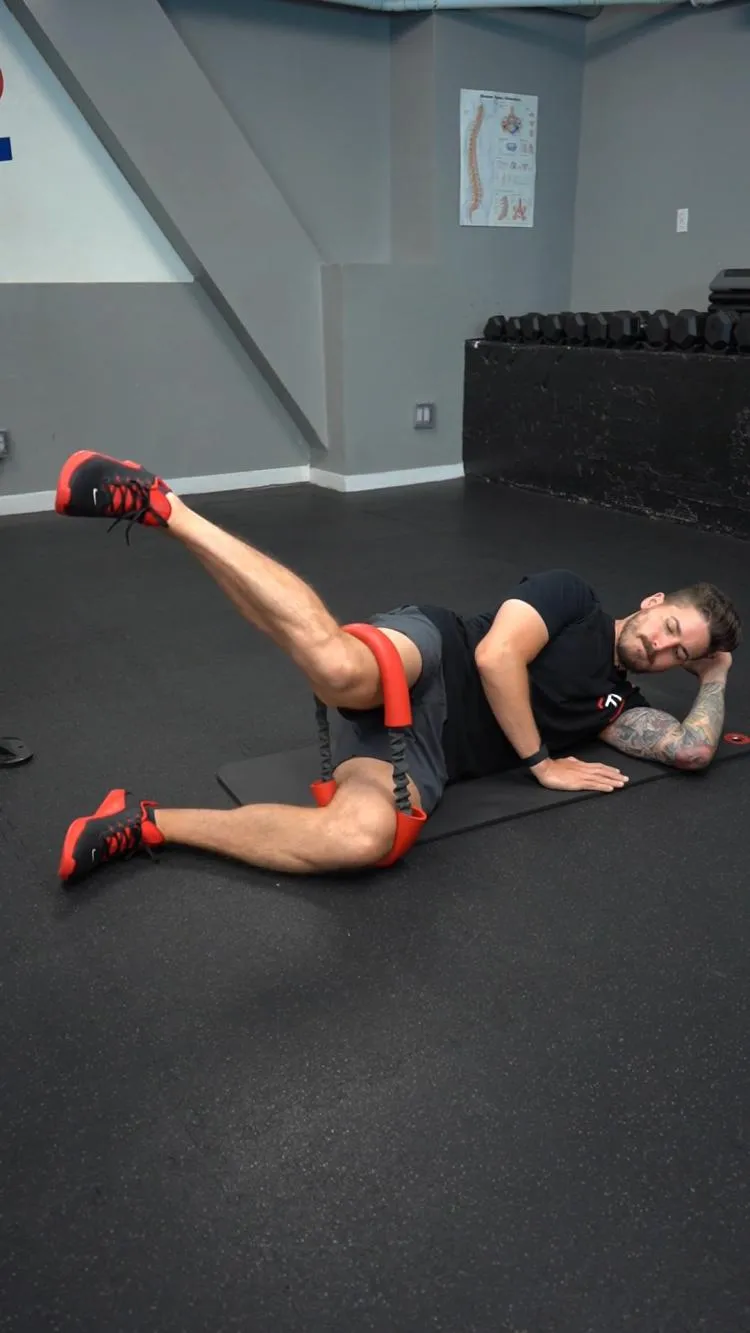
Reverse Clam - Band
View exercise instructions
- HOW: While laying on your side, bend your knees and bring them forward. Make sure the band is looped around your knees. Rotate the top knee up against the band and hold that position. Then, rotate your ankle up towards the ceiling as your knee stays up against the resistance of the band. Try to keep your knee still as best as you can. Lower your foot down and repeat
- FEEL: You should feel all the deep muscles in your hip and glutes working.
- COMPENSATION: Don’t roll forward or backward while rotating your hip, keep your knee still as you lift your foot up/down off the ground.
Sample Prehab Exercise Library Video
After working on hip internal rotation mobilizations and/or dynamic stretches, this is a great way to actively recruit the hip internal rotators. If it is too challenging for someone with a resistance band, simply start in side lying without a band against gravity, and progress as able. You can view various reverse clam progressions and regressions in our exercise library.
Exercise 07 of 07
FRC is defined as strength and control in order to expand upon usable ranges of motion, articular resilience (i.e. load bearing capacity), and overall joint health. Prioritizing FRC principles in your training and Prehab program can be a huge game changer! The mechanoreceptors that innervate our joint capsules provide the CNS with afferent feedback carrying signals that pertain to what is going on within the joint. More stimulus to the mechanoreceptors means more afferent feedback to the CNS, which causes more efferent output back to the musculoskeletal system, ultimately inducing more control.
Exercise demonstration
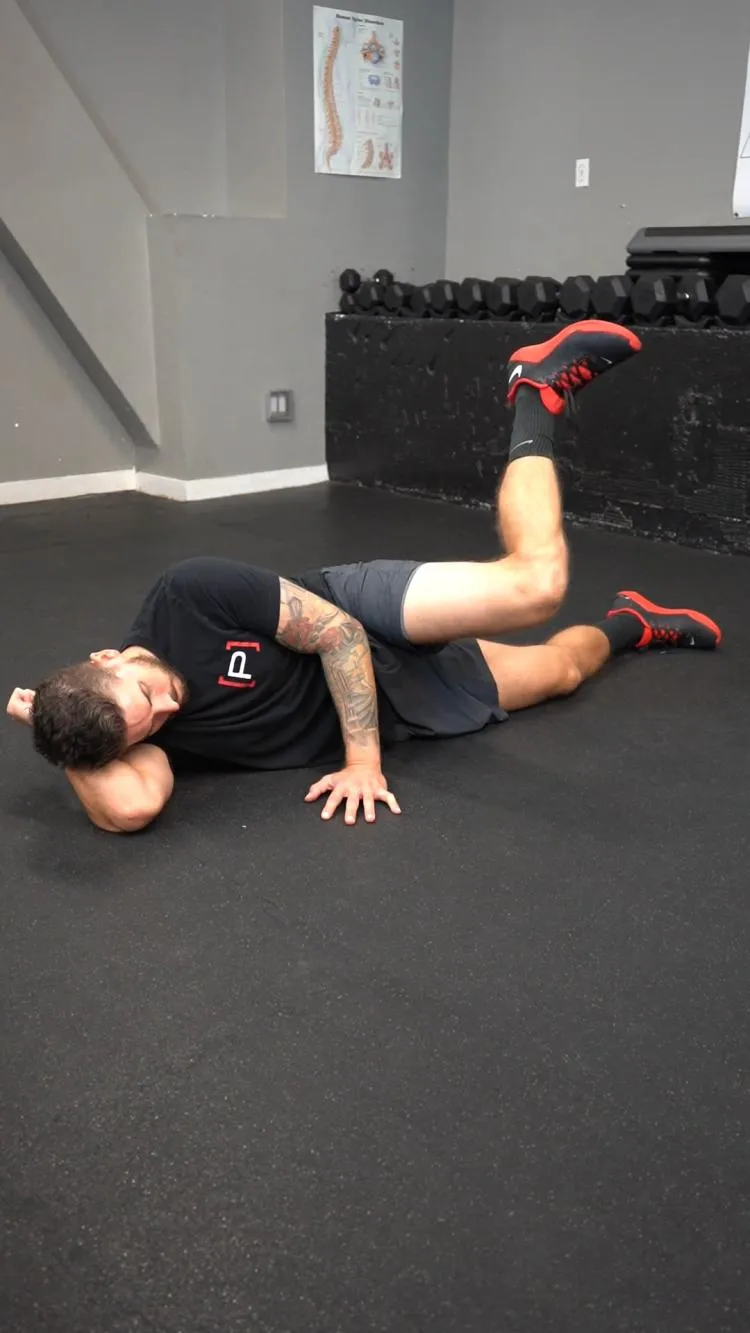
Hip CARs - Side Lying, In Flexion
View exercise instructions
- HOW: Begin by lying on your side with the leg you want to exercise on top and the lower leg bent on the ground. The knee can be straight out from the hip. The bottom arm can be supporting your head, and the top arm can be bent with your hand on your hip. Keep your hips facing forward parallel to the ground. While keeping the knee straight and parallel to the ground, raise the top leg up and slightly move it forwards in front of you. From here, rotate your foot back and forth to point down to the floor and then up to the sky.
- FEEL: You should feel the hip muscles on the side and front working to rotate the leg and hold it up.
- COMPENSATION: Keep the knee straight, don’t bend it. Don’t let your leg drop down as you rotate your hip.
Each time when performing CARs, try to create larger "circles" to improve control on the outer limits of your range, thus enhancing the adaptability of your tissues and aiding in joint health, integrity, and protection. Also, to increase the intensity of this exercise, you can increase the resistance through the air from 0% to 100%. This will help create more tension throughout the body to ultimately improve muscular and neurological control. This is a great intro to FRC and an excellent starting point!

Closing Thoughts
To improve hip mobility, we not only need to perform the right type of exercises, but we also have to set ourselves up for success. Everything we do outside of exercise also plays an integral role in our body's health. Education for our patients is the starting point. From there, develop a wholesome approach to moving the hip, with activation exercises being the quarterback. The rest of the team consists of self-mobilization exercises and dynamic flexibility exercises to enhance overall movement capacity. Even if someone may not have limited mobility within a particular plane of motion at the hip, still move within all planes of hip movement! The more individuals are able to move their hips within the sagittal, frontal, and transverse planes, the more adaptable the hip will be to all movements it can perform.
Searching For A More Comprehensive, User-Friendly Exercise Library
Clinician
Sherif Elnaggar, PT, DPT, OCS, SCS
Prehab Head of Content
 Sherif graduated from Temple University with a Bachelor’s of Science Degree and a concentration in Kinesiology. He then received his Doctorate of Physical Therapy Degree from DeSales University, graduating with honors of the professional excellence award and research excellence award.
After his graduate studies, he served as Chief Resident of the St. Luke’s Orthopedic Physical Therapy Residency Program. Sherif is a Board Certified Orthopedic Clinical Specialist. Sherif focuses on understanding how movement impairments are affecting function while also promoting lifestyle changes in order to prevent recurrences of injury.
His early treatment interests include running related injuries, adolescent sports rehab, and ACL rehab in lower extremity athletes. He also has been involved in performance training for youth soccer players.
Outside of working as a physical therapist, he enjoys traveling, running and cycling, following Philadelphia sports teams, and spending time with his family.