

On this page 6 sections
Your guide
What you'll learn
One of the most nerve-wracking sensations you can experience is the feeling of your knee “giving out” or suddenly buckling on you. After it happens once, it’s easy to start questioning every step or avoiding activities altogether out of fear that it will happen again. If this sounds familiar, you are in the right place, as the rest of this article will cover the most common myths and causes of knee instability, as well as some of the best exercises for treating patellar dislocation.
Anatomy of The Patella
Luckily, the basic anatomy of the knee is fairly simple. You have the bone of your upper leg or thigh, known as the femur, and the bones of your lower leg, known as the tibia and fibula. In between these bones, you have muscles, ligaments, and tendons creating stability throughout the knee. Ligaments provide passive stability, and muscles provide more active control of the knee as you move.
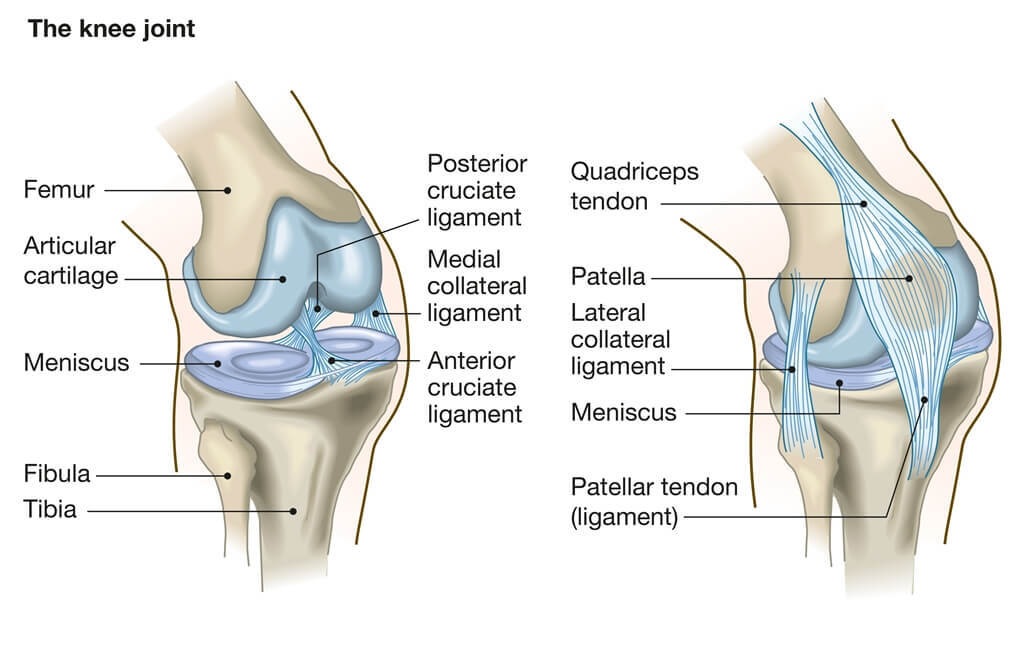
One of the last remaining structures worth noting, then, is the patella. This is a small, round, and bony structure that sits in the front of the knee on top of the previously mentioned bones. The primary job of the patella is to act as a fulcrum for the quadriceps muscle, allowing for increased efficiency when straightening the leg. You can think of the patella as the base of a seesaw, as it allows muscles on either side of the knee to generate better leverage when extending the leg. (1)
The secondary job of the patella is to protect the structures inside the knee during movement and impact. It is the first layer of defense against external forces, such as falls, bumps, or contact during sports. By absorbing and distributing the load across the knee joint, the patella helps prevent damage to deeper structures like the cartilage, ligaments, and bones underneath.
Check out our Patellofemoral Rehab program to improve knee cap strength!

If you're dealing with patellar dislocations, get started with our Patellofemoral Rehab program! It's the perfect program to begin to address any discomfort in your knee while working on strengthening the muscles of the knee including the quadriceps, hamstrings and hip and calf muscles!
What is a Patellar Dislocation?
Before we get into exercises to prevent future dislocations, let’s talk for a minute about what causes patellar dislocations in the first place. There are two main causes:
- Acute Dislocations: With acute patellar dislocations, think about a traumatic collision or fall in which your knee experiences contact that forces the patella “out of place.” Basketball, American football, and soccer are some of the highest-risk contact sports for an injury of this nature to occur. When it happens, the patella will typically move towards the outside of the knee, and there is often tearing of the medial patellofemoral ligament (MPFL). Once this ligament is damaged, there is an increased risk of future dislocations as you lose stability in that area.
- Congenital Dislocations: Congenital dislocations stem from the structural alignment of the knee at birth. Some common causes of dislocation here include rotational dislocations, where the tibia is rotated inward and the patella sits further on the outside. Another potential cause is an abnormally tight IT band that causes the patella to get pulled towards the outside of the knee in what may be considered non-optimal alignment.
- Other causes for instability: When it comes to patellar dislocations, you will hear a lot of different terminology thrown around in reference to knee anatomy, including patella alta/baja, Q angles, or maybe even trochlear dysplasia. Do not get overwhelmed by all this language. In most cases, dislocations are acute, and if it is an ongoing issue, your care team may order imaging to better assess the structural angles contributing to instability.

Top 3 Myths About Patellar Dislocations
There are a lot of misconceptions following patellar dislocations and this makes it especially challenging for many to decide how to approach recovery following this injury. Here are three of the most common myths:
Myth #1: Surgery is always required to address patellar dislocations.
This is a major concern for many individuals following a dislocation. However, contrary to popular belief, even if there is a dislocation, that does not necessarily mean you will need surgery. In congenital cases, it is likely that surgical correction will be the most effective route. For acute dislocations, on the other hand, physical therapy and rehab are often very effective in restoring stability around the joint. (2)
Myth #2: Patellar pain is always related to “patellar maltracking.”
Maltracking essentially just means the kneecap isn’t moving smoothly in its groove, and this is often blamed for knee pain. While maltracking can play a role, it's not the root cause in most cases. Patellar pain is more often driven by tissue sensitivity, muscle weakness, or poor movement control, often at the hip and ankle. Many people with “imperfect” tracking have no pain, while others with normal tracking do. Instead of blaming alignment, focus on building strength, improving movement patterns, and gradually increasing load tolerance. If you want a deeper dive into patellar maltracking, check out this article here:
READ: PATELLAR MALTRACKING: BUSTING MYTHS ON HOW THE KNEECAP ACTUALLY MOVES

Myth #3: Bracing should be used long-term following patellar dislocations
The current best evidence shows that bracing after initial dislocation can prevent another dislocation in the short term by limiting excessive lateral movement of the patella. However, long-term use isn’t recommended, as it may lead to muscle weakness and reduced engagement of your quadriceps and hip muscles. The key here is to wean off the brace as soon as strength, control, and confidence begin to return in the weeks following the injury, as rehab progresses. (3,7)
Exercises for Patellar Dislocations:
Now let’s get into the good stuff, the exercises. When it comes to rehab following a patella dislocation, we want to focus on not only strength and stability, but also movement confidence, meaning your ability to move through daily tasks, workouts, or sport without fear or hesitation. We'll break these exercises into three main areas of importance: quad strengthening, stability, and functional training.
READ: CHONDRAMALCIA PATELLAE: WHAT IS IT AND IS IT A PROBLEM?
#1 Quad strengthening: When it comes to overall stability of the knee, the quad is an absolute powerhouse. A strong quad muscle can make up for damage or instability within the rest of the structures of the knee. When there is an injury to the knee, including dislocations, the quad muscle has a tendency to shut down. This is why “waking the quad up” is one of the most important first steps to rehab. In doing so, you may hear mention of “isolating the vastus medialis oblique (VMO)” to get stronger to prevent future dislocation. This is the muscle on the inside of the thigh that is thought to prevent the knee from moving laterally. It has become clearer over time that although this muscle group is important, we cannot necessarily isolate this muscle. Instead, we can focus on training all the muscles of the quad together, knowing the VMO will be included. (6)
LISTEN: CAN YOU ACTUALLY ISOLATE THE VMO?

Here’s a simple quad strengthening progression, moving from seated to standing positions. The key with all of these exercises is to hold your quad contraction at the end of each repetition for a few seconds to get the most out of the movement.
Exercise 01 of 06
Exercise demonstration
Quad Set
View exercise instructions
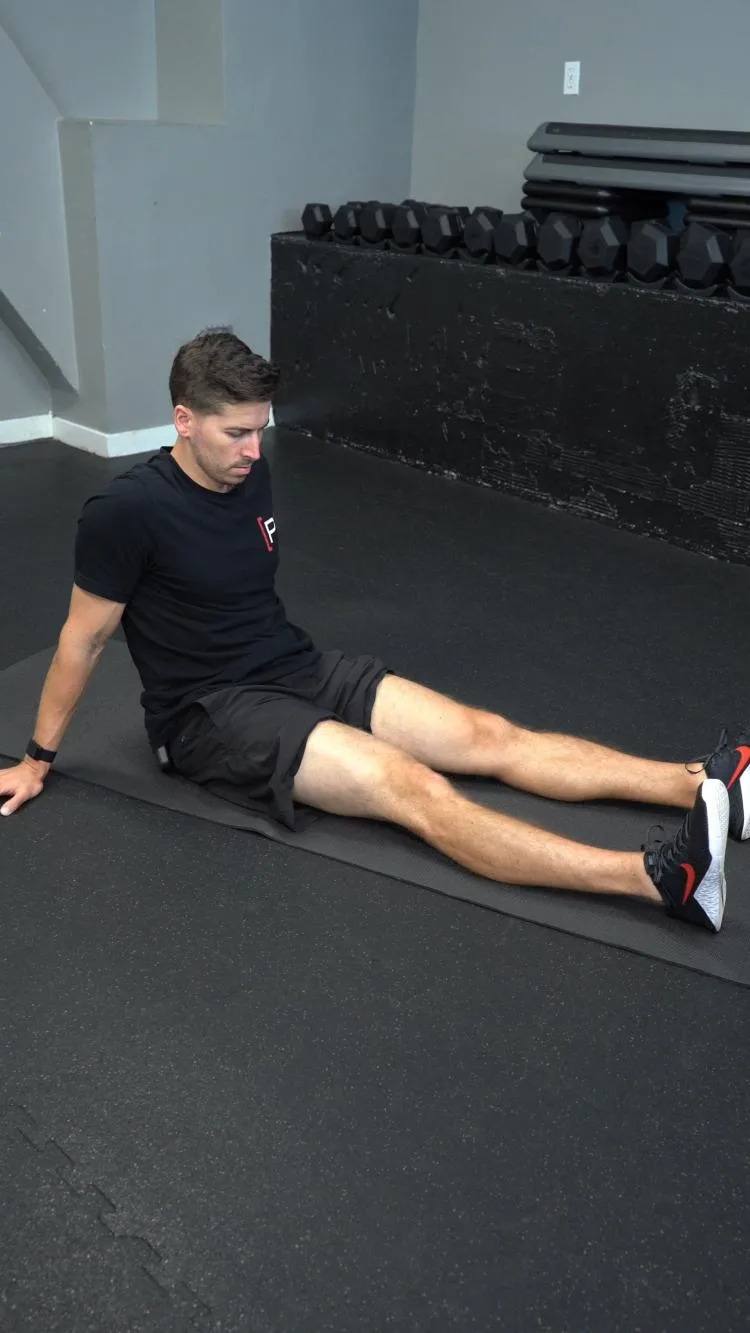
- HOW: Follow this foolproof guide to wake your quad back up! Laying on the ground or on a table with your knee straight and foot supported, attempt to push your knee down and lift your heel off the ground by squeezing your quadriceps muscle until your knee is fully straight. return to starting position and repeat.
- FEEL: Really focus on squeezing your quad. Sometimes touching the muscle, massaging it, or hitting it can help. Think about moving your kneecap up and towards your hip socket. Push your knee down into the ground. Move your shin bone in the shape of a “J” by moving your knee down and your heel up at the same time. Squeeze both quadriceps at the same time to improve the quality of the quad contraction.
- COMPENSATION: Do not lift your entire leg off the ground, focus on getting your knee fully straight similar to the other side.
Exercise 02 of 06
Exercise demonstration
Terminal Knee Extension
View exercise instructions
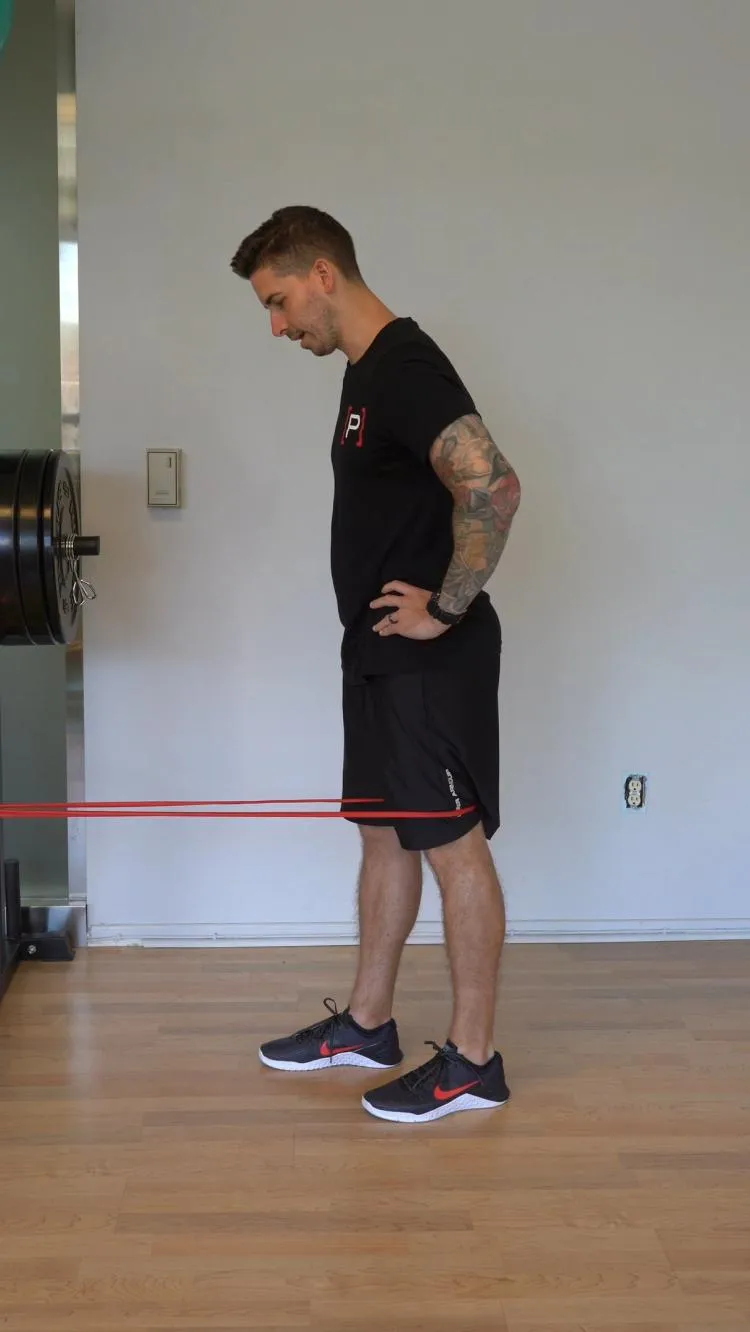
- HOW: Get set-up standing with a band around and above the knee with the band anchored in front of you. To perform the exercise, put tension on the band so that it wants to pull your knee forward, let your knee bend and your foot go onto the toes followed by squeezing your quad, pushing your heel into the ground, and pushing your knee back until it is fully straight.
- FEEL: You will feel your quads working with this exercise and maybe even your glutes. You may also feel a stretch behind your knee in the calf and hamstring region when your knee is straight.
- COMPENSATION: Keep your hip extended (pushed forward) and stand tall as you perform this exercise, don't let your butt go back and your hip bend when you straighten your knee.
#2 Stability Training: Once the quad muscle gains strength and begins to activate well, the next priority is teaching your body how to improve control, especially during single-leg movements. At this point, we have to look at not just the knee, but also the hip and ankle. Bridges help engage the hips and build additional stability beyond the quads, which will translate to additional support for the knees. Begin with double leg bridges, and you can progress to single leg bridges. Step downs, on the other hand, will help expose the knee to increased stress, while maintaining control and position of the knee as you enter greater ranges of flexion, or bending, which are required throughout daily life. (7)
Exercise 03 of 06
Exercise demonstration
Single Leg Bridge - Leg Straight
View exercise instructions
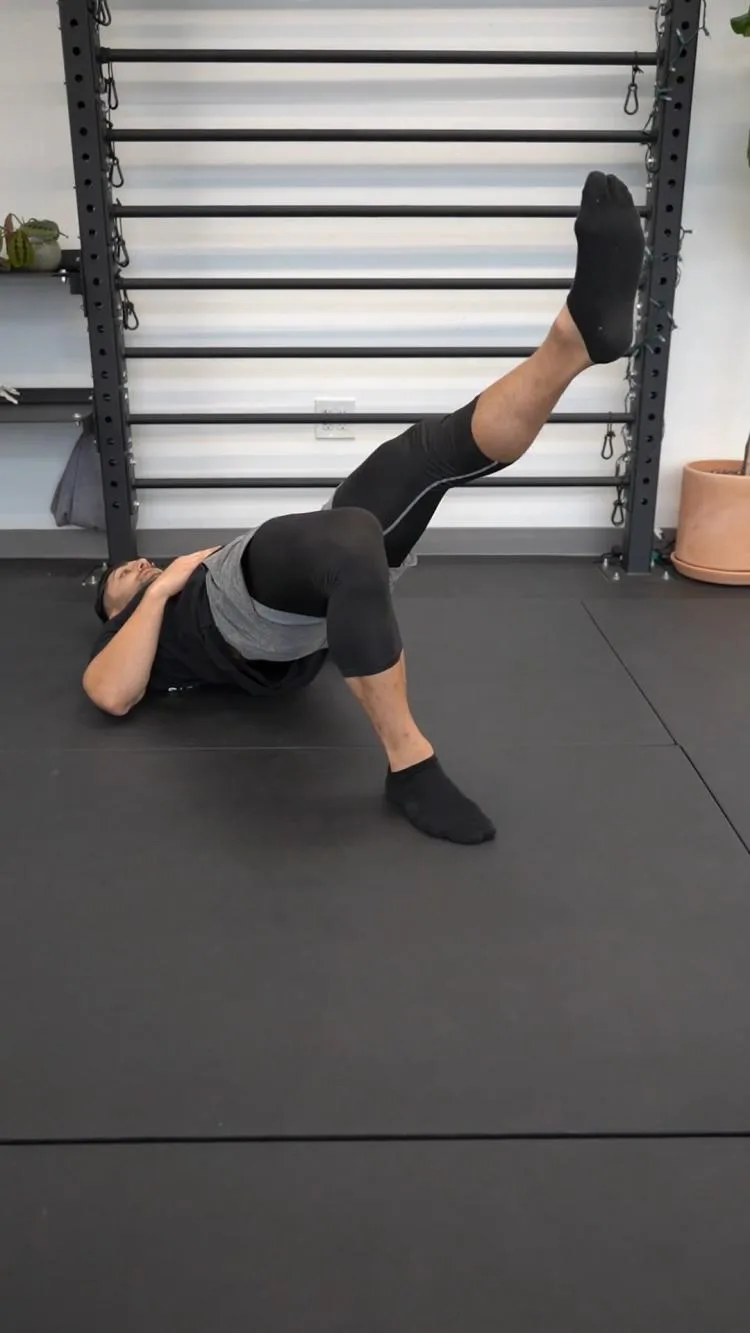
- HOW: Start on your back with one knee bent on the floor and the opposite leg straightened out slightly elevated. Tighten up your stomach first, then your glutes. Next, drive your heel into the ground and lift your hip up towards the ceiling with the bent knee. At the end position - your knee, hip, and shoulder should be in one straight line along with the opposite leg that is straight. Hold the end position and squeeze the glutes, then slowly return to starting position.
- FEEL: You should feel your glutes work to control this motion. At no point should you feel your low back muscles doing the lifting motion. If you feel it only in your hamstrings, try bending your knees a bit more and repeat. You will feel the muscles in your hip and thigh working on the other leg to keep it straight and elevated
- COMPENSATION: Avoid arching at the low back as you perform this.
Exercise 04 of 06
Exercise demonstration
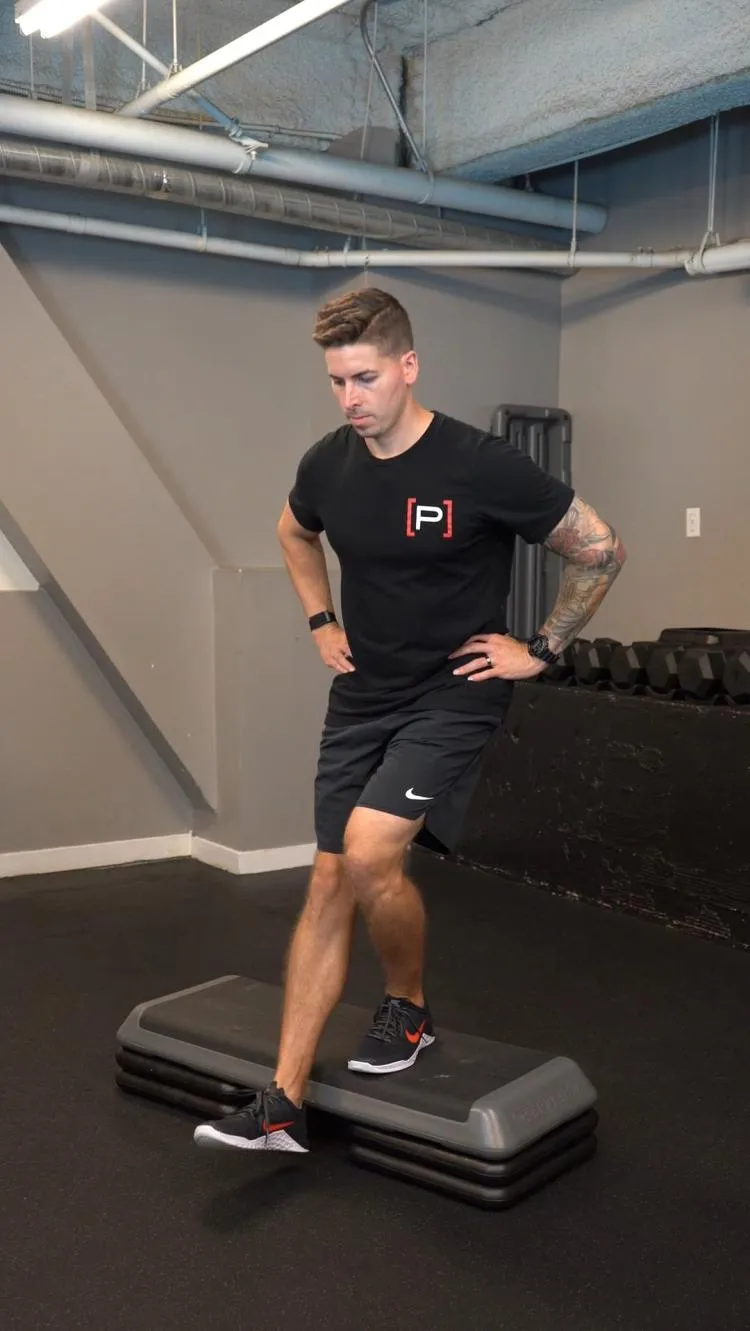
Anterior Step Down
View exercise instructions
- HOW: Stand on the step. Shift all of your weight to one leg. With the foot in the air, you will reach forward and lightly tap the ground with your heel, and then come back up to your starting position.
- FEEL: You should feel all the thigh muscles and the butt muscles working in the leg you're standing on, but primarily in the thigh muscles.
- COMPENSATION: Avoid putting too much weight (if any weight at all) on the foot you are reaching down with. Don’t let your knee cave in, and avoid rounding your back or side bending.
#3 Functional Training: Finally, we need to make sure the rehab process doesn’t just stop with strength and mobility. We need to translate this progress into real-world movement with the activities that you enjoyed doing prior to dislocation. This step will look a little bit different for everyone, but may include stair training, squatting, or return to running/jumping/a specific sport. This step carries a significant psychological component, as you regain confidence and reduce fear of future dislocation. (5) Let’s take the squat progression for example. You can begin with mini-squats, before gradually progressing into full-depth squats and then adding resistance over time. The key is that during each step of the progression, you are able to control the movement. You can do the same with lunges, beginning with a reduced range of motion and progressing to the full motion with added resistance.
Exercise 05 of 06
Exercise demonstration
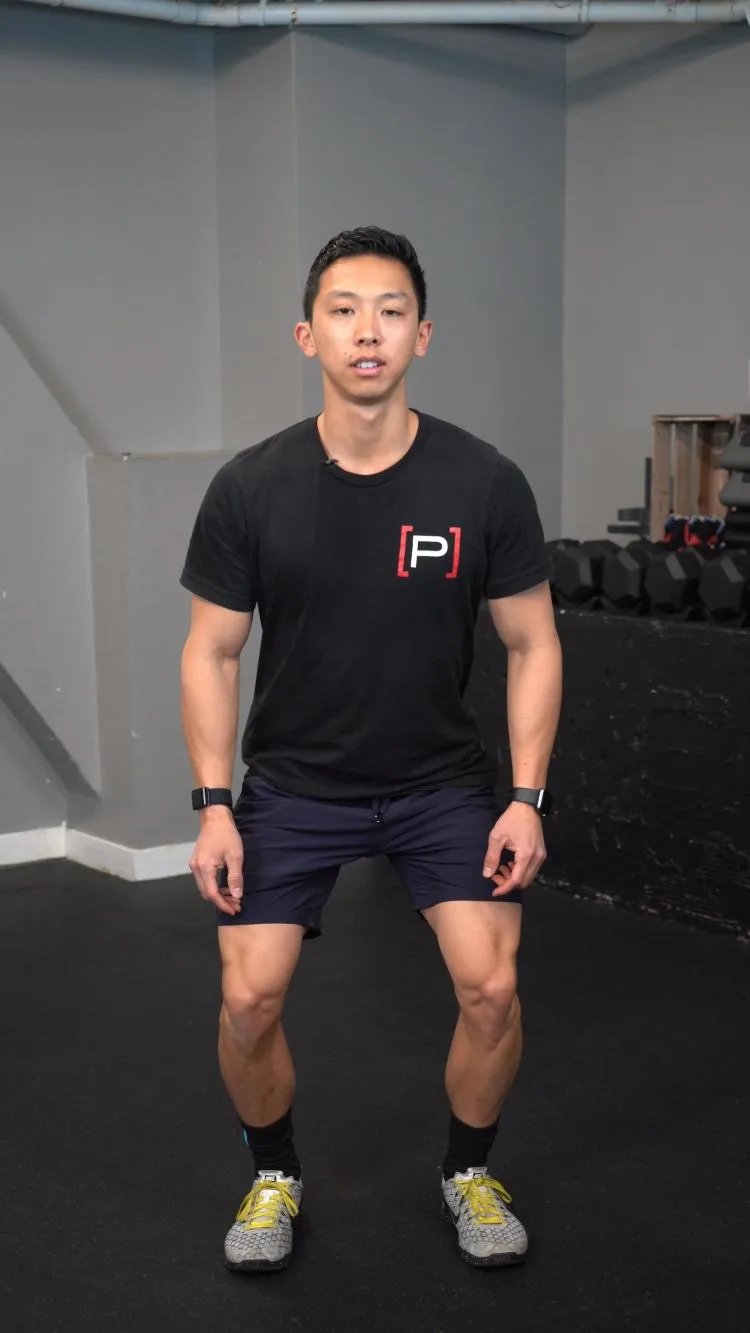
Mini Squat
View exercise instructions
- HOW: Stand with your feet about shoulder-width apart. Keep the both feet entirely on the ground throughout the movement. Sink your hips down and backwards, and then stand back up. Only let your hips and knees bend a little bit, and get comfortable with this squat movement pattern.
- FEEL: You should feel all of the thigh muscles and butt muscles working.
- COMPENSATION: Avoid letting the knees cave in or bow out. Keep equal weight distribution in both feet, and try not to let your hips shift left or right. Keep a neutral spine by keeping your core engaged to avoid having a over-arched or rounded back.
Exercise 06 of 06
Exercise demonstration
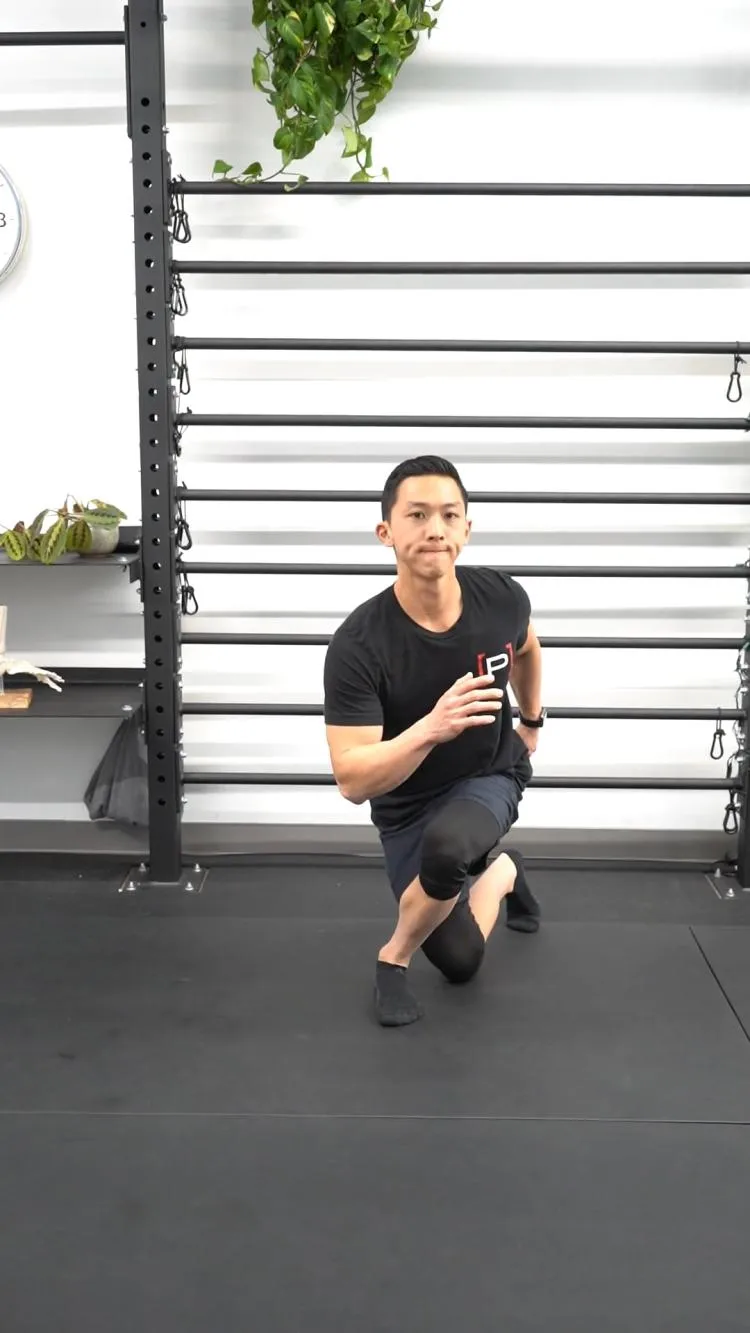
Curtsey Lunge
View exercise instructions
- HOW: Step backwards and out to the side like you were to perform a curtsey, lower yourself into a lunge position. Keep most of your weight on your front leg, use the back leg for balance.
- FEEL: You should feel a good glute stretch and your hip muscles activated. You should feel your glutes and quads working to lower yourself and stand back up.
- COMPENSATION: Don’t put too much of your weight on your back leg as you step back, focus on good knee position with the front leg by not letting it cave in or bow out too much.
Closing Thoughts:
Patellar dislocations can shake your confidence temporarily, but they do not have to define your future. The knee is incredibly adaptable, and so are you. With the right focus on strength, stability, and real-world function, it's possible to get back to the activities you love and move with the same amount of control and confidence (if not more) than before. The key with rehabbing an injury of this nature is starting small, staying consistent, and building up over time. Your knee and your mindset are capable of a lot more than you think.
If you want more access to exercises to improve your knee health, check out our knee programs here, specifically our Patellofemoral Rehab program!
Check out our Patellofemoral Rehab program to improve knee cap strength!
References:
- Cox, C. F., Sinkler, M. A., Black, A. C., et al. (2025). Anatomy, bony pelvis and lower limb, knee patella [Updated 2023 Oct 27]. In StatPearls [Internet]. StatPearls Publishing. https://www.ncbi.nlm.nih.gov/books/NBK519534/
- Cochrane Database of Systematic Reviews. (2015). Surgical versus non-surgical interventions for treating patellar dislocation, 2015(2), CD008106. https://doi.org/10.1002/14651858.CD008106.pub3
- Clinical Orthopaedics and Related Research. (2007). First-time traumatic patellar dislocation: A systematic review, 455, 93–101. https://doi.org/10.1097/BLO.0b013e31802d3461
- LimbLength.org. (n.d.). Congenital dislocation of the patella. https://www.limblength.org/conditions/congenital-dislocation-of-the-patella/
- Patel, M., Kruse, K., & Robinson, J. (2024). Return-to-sport rehabilitation for patellofemoral instability: Functional exercise progressions and considerations. Sports Health, 16(2), 97–106. https://doi.org/10.1177/19417381231220476
- Sarikaya, S., Aktürk, G., Sönmez, M. M., & Yalnız, E. (2024). Evaluation of quadriceps strength and function after patellar dislocation in athletes. Journal of Orthopaedic Surgery and Research, 19, 140.
- Wang, X., Zhang, L., & Yu, T. (2023). Early rehabilitation protocols following primary patellar dislocation: A systematic review and meta-analysis. Journal of Orthopaedic Surgery and Research, 18, 389. https://doi.org/10.1186/s13018-023-03867-6
About The Author
John Schaefer PT, DPT, OCS, CSCS
Prehab Writer & Content Creator

John is a native of Rochester, MN and a double graduate of Saint Louis University, where he studied marketing and exercise science before earning his DPT.
Always up for an adventure, John traveled to Boston following graduation to intern at Champion PT and Performance. There he was able to work with high-level high school, college, and professional athletes. Following this experience, he headed south to pursue orthopedic residency training in Houston, TX at Harris Health System, working with a largely underserved and non-English speaking population.
John’s treatment philosophy hinges on empowering movement through extensive education and easy-to-replicate exercises, as well as meeting patients where they are. This perspective is shaped by his personal experiences, including five broken bones and two surgeries, during a multi-sport childhood filled with lots of activity and adventure.
Outside of work, you can find John cycling, attending concerts/festivals, hiking, and traveling!
Follow along on instagram @johnschaefer.dpt