

On this page 12 sections
Your guide
What you'll learn
The bridge is probably the single most prescribed exercise by physios...it seems that the bridge exercise is ubiquitous with physical therapy and rehab. As you may be suspecting, we think this is a pretty bad thing! Yes - the bridge is in fact a decent exercise that can help groove a hip hinge movement pattern and can be the starting place for a host of pathologies ranging from the lumbar spine all the way to the foot and ankle. But that doesn't mean that our clients need to perform 3 sets of 10 bridges for months on end during the course of their rehab! Our exercise library has tons of exercises to help groove the horizontal hip hinge movement pattern, starting from the basic supine bridge all the way to a loaded barbell hip thrust. Follow along in this clinical pearl as we discuss bridge exercise progressions for rehabilitation!
“This blog is one of our ‘clinical pearls’, which is designed to assist clinicians in understanding exercise progressions for various clinical conditions. Throughout each of these clinical pearls, you will learn multiple ways to attack similar issues we all see when treating our patients. We also highlight many of our personal exercise library videos and HEP templates throughout these pearls, all of which you can gain access to as an exercise library member! The template we will be discussing is Double Leg Bridge Progressions.”
Gain Access To The Most Comprehensive Exercise Library

With thousands of exercises to choose from, video demonstrations, education, assessments, and more, this is the best exercise library that you can utilize for your clients! Gain access HERE.
Teaching The Bridge: Where To Start
When teaching someone a bridge, I will usually start with either a supine bridge or a bridge hold. Why one or the other? First off, let's discuss the supine bridge. The supine bridge is the most basic supine horizontal hip hinge movement and the best way to teach a hip hinge within this supine constraint. However, if my goal is to teach someone to feel their glutes or improve body awareness in a horizontal hip hinge pattern, then I will opt for the bridge hold first. Isometrics are a great way to cue individuals into feeling the proper muscles working, as you can ramp up the effort to near 100% by encouraging your clients to drive through the ground as hard as possible. Internal cueing is great for developing a mind-body connection!
Exercise 01 of 15
Exercise demonstration
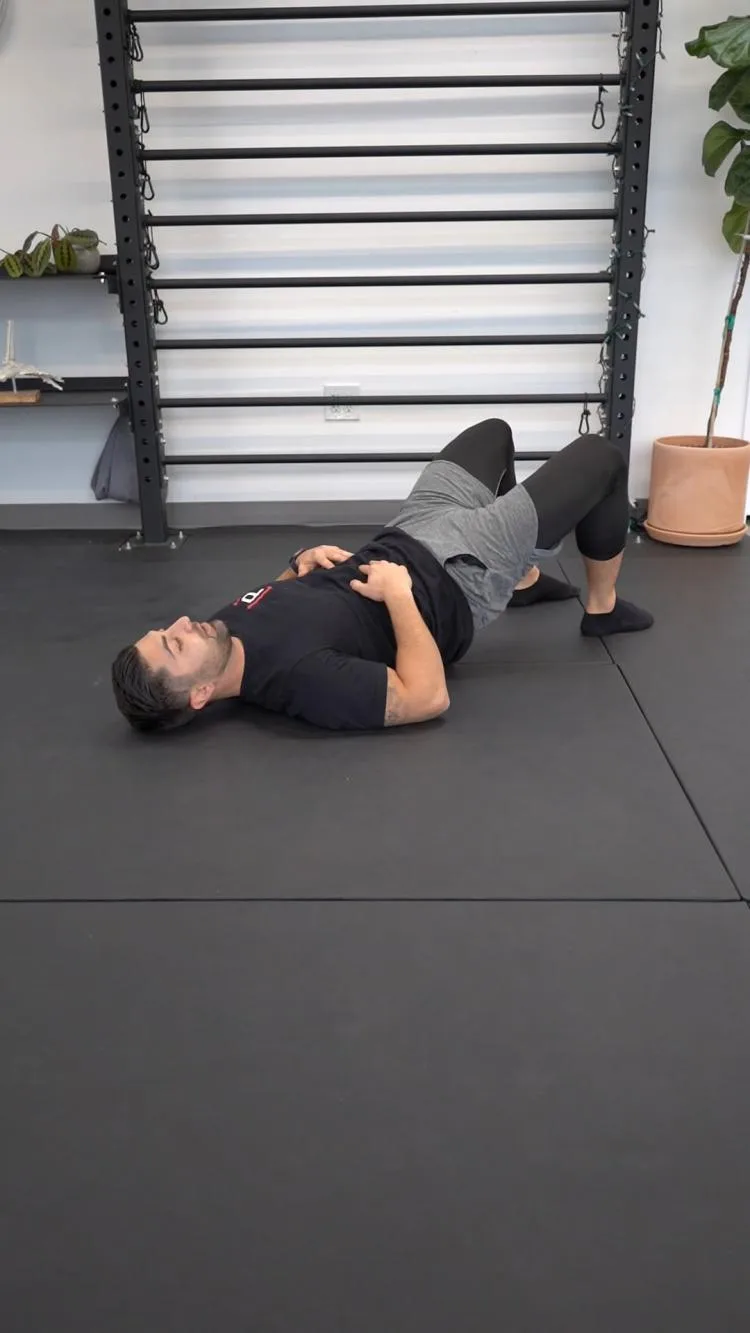
Supine Bridge
View exercise instructions
- HOW: Start on your back with your knees bend and slightly spread apart. Tighten up your stomach first, then your glutes. Next, drive your heels into the ground and lift your hips up towards the ceiling. At the end position your knee, hip, and shoulder should be in one straight line. Hold the end position and squeeze the glutes, then slowly return to starting position.
- FEEL: You should feel your glutes work to control this motion. At no point should you feel your low back muscles doing the lifting motion. If you feel it only in your hamstrings, try bending your knees a bit more and repeat.
- COMPENSATION: Avoid arching at the low back as you perform this.
Exercise 02 of 15
Exercise demonstration
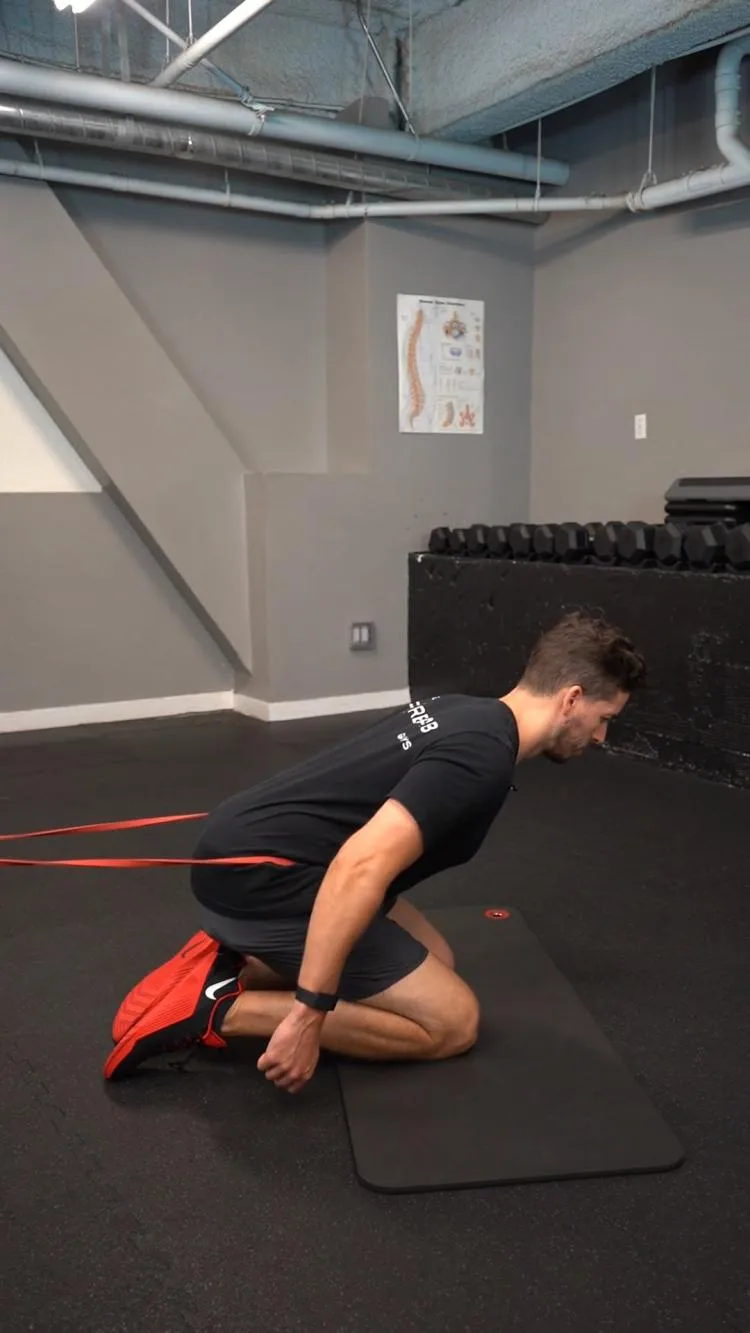
Tall Kneeling Hip Hinge - Band
View exercise instructions
- HOW: Begin by kneeling on both knees and anchoring a band behind you at waist level. Loop the band around your waist. Push your toes into the ground with your heels facing up. Sit back on your heels by hinging forward at your hips while keeping your back straight. From here, push into the ground and drive your hips forward against the resistance of the band. Repeat for the prescribed amount of reps.
- FEEL: You should feel your hip muscles working.
- COMPENSATION: Keep your back straight, don’t slouch.
Using Levers To Target The Hamstrings
The hip extension movement within the bridge will utilize the body's primary hip extensors in a relatively neutral position: the glute max and the hamstrings. While both contribute to active hip extension, only the hamstrings contribute to active knee flexion. Thus, we can change our foot placement of the traditional bridge to increase the internal moment of the hamstring muscle group's contribution to active knee flexion! Typically, this is accomplished by either setting up the feet further from the hips or by placing the feet on an elevated surface!
Exercise 03 of 15
Exercise demonstration
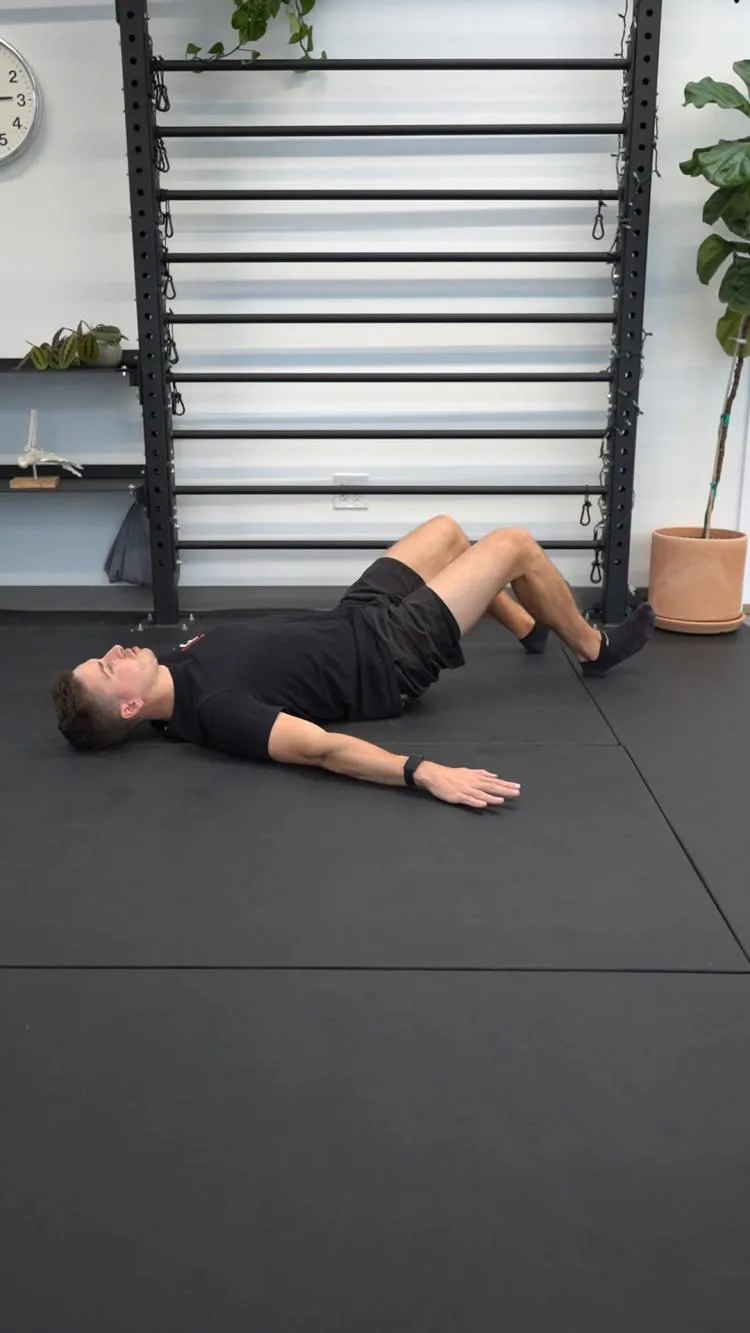
Bridge - Hamstring Bias
View exercise instructions
- HOW: Get set-up on a surface that will allow you to slide your heels. You can also use something to slide on the floor, like a towel on a hardwood surface. With your knees bent to 90 degrees, perform a bridge on your heels with the front of your feet off the ground. Repeat.
- FEEL: You should feel your glutes, hamstrings, and even your calves working.
- COMPENSATION: Do not arch your low back, keep your core engaged by first flattening your low back into the ground.
When & How To Use Bands To Your Benefit
Without changing the movement pattern, we can easily recruit the glute max to a greater degree by calling upon its other two primary muscle actions: hip abduction and external rotation. This can easily be accomplished through the use of resistance band tubing.
Exercise 04 of 15
Exercise demonstration
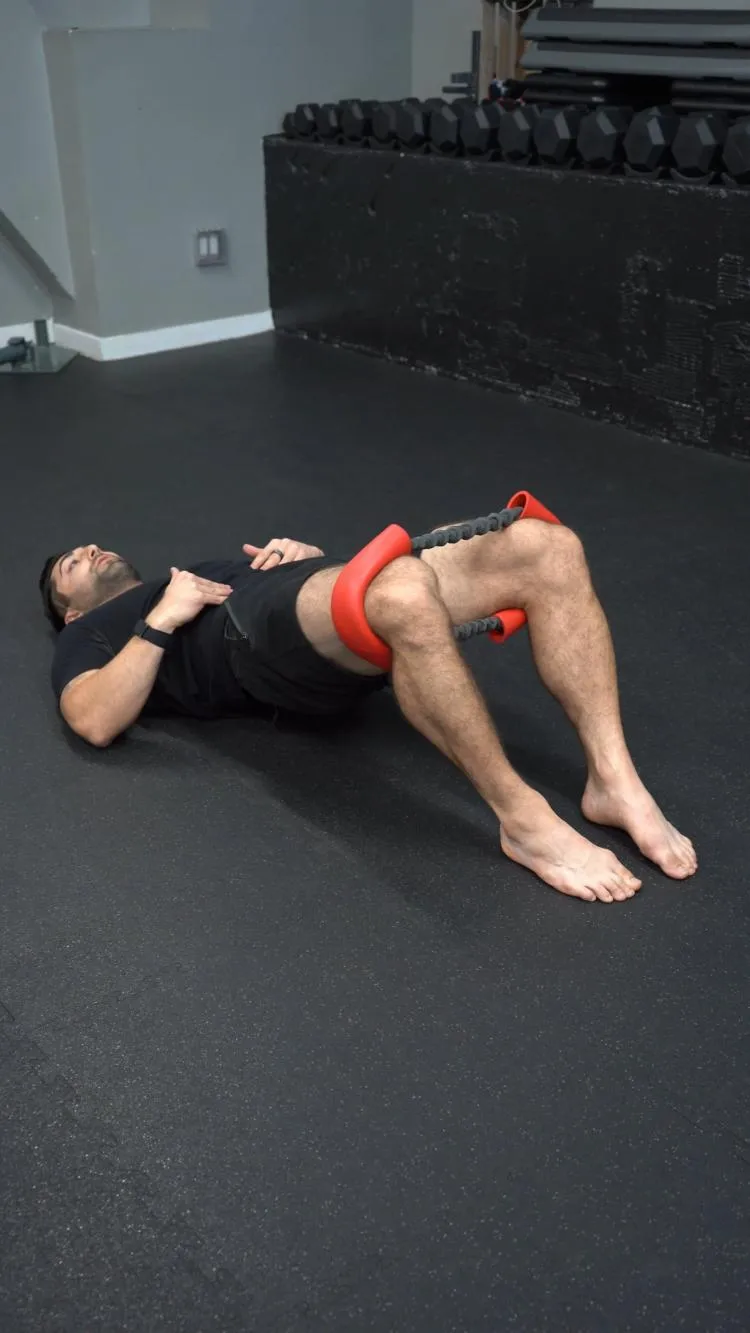
Isometric Bridge - Hip Abduction, Band
View exercise instructions
- HOW: Get set-up laying on your back with your knees bent. Place a band above your knees. Perform the exercise by beginning with a bridge, focusing on driving the hips towards the ceiling, think about tucking your tailbone when you are at the top. Next focus on separating your knees by pushing out against the band as hard as you can, return, and repeat while keeping your hips elevated for the entirety of this exercise.
- FEEL: You will feel the muscles on the back and outside of your hips and thighs with this exercise.
- COMPENSATION: Don't allow your back to arch, your hips should be the area that is working to elevate your body off the floor. Avoid allowing your feet to roll out as you perform the clam, make sure your feet stay flat on the floor.
Exercise 05 of 15
Exercise demonstration
How to Properly Perform a Hip Thrust - Set Up, Execution, and Master Even Without A Hip Thruster
Typically, if your client is able to perform a hip thrust we are beginning to load up that hip extension movement. If your client doesn't have a barbell handy, there are a few other ways that we can add load through bands and dumbbells that we will highlight below. All of the same concepts we discussed for the supine bridge apply to the hip thrust! This is touched on in more detail at the end of this clinical pearl.
Bridge With Extra Adductor Activation
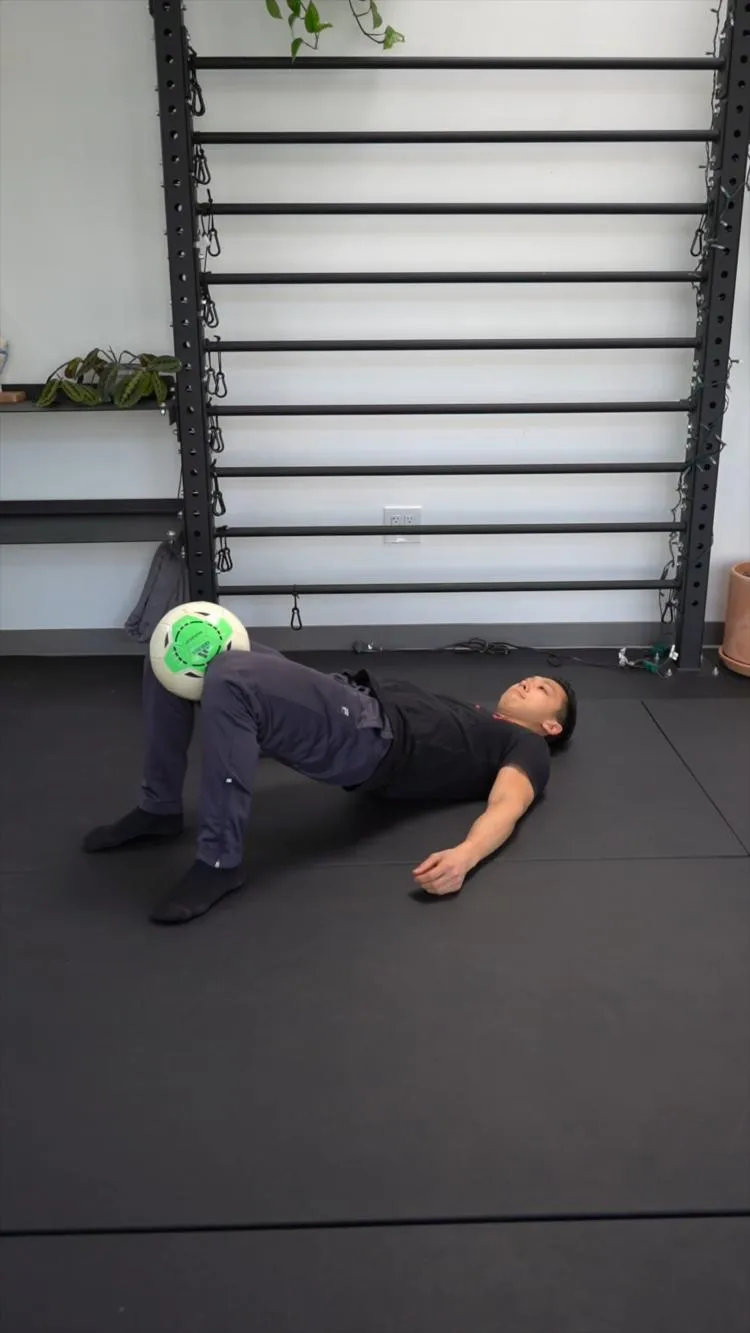
Working in the exact opposite fashion, we also have an isotonic bridge with isometric hip adduction. This one really fires up the hip adductors, which also play a big role in hip extension at higher degrees of hip flexion (adductor magnus). This is a popular technique for therapists that are looking to work on sacroiliac joint force closure after an SIJ MET, which we also have in the library. Remember, if there is a technique or exercise we do not have in the library, simply request it and we will film it!
Exercise 06 of 15
Exercise demonstration
Bridge - Adduction
View exercise instructions
- HOW: Place a firm object like a ball between your legs and squeeze. Maintain this contraction the entire time while performing a bridge.
- FEEL: You should feel the muscles on the insides of your thighs and glutes working.
- COMPENSATION: Do not arch the back. Use your hips to lift you up, not your back.
Looking for more adductor specific content? Check out this Prehab Audio Experience Podcast Episode!
LISTEN: HOW TO TRAIN THE ADDUCTORS!

Bridge for Spine Articulating
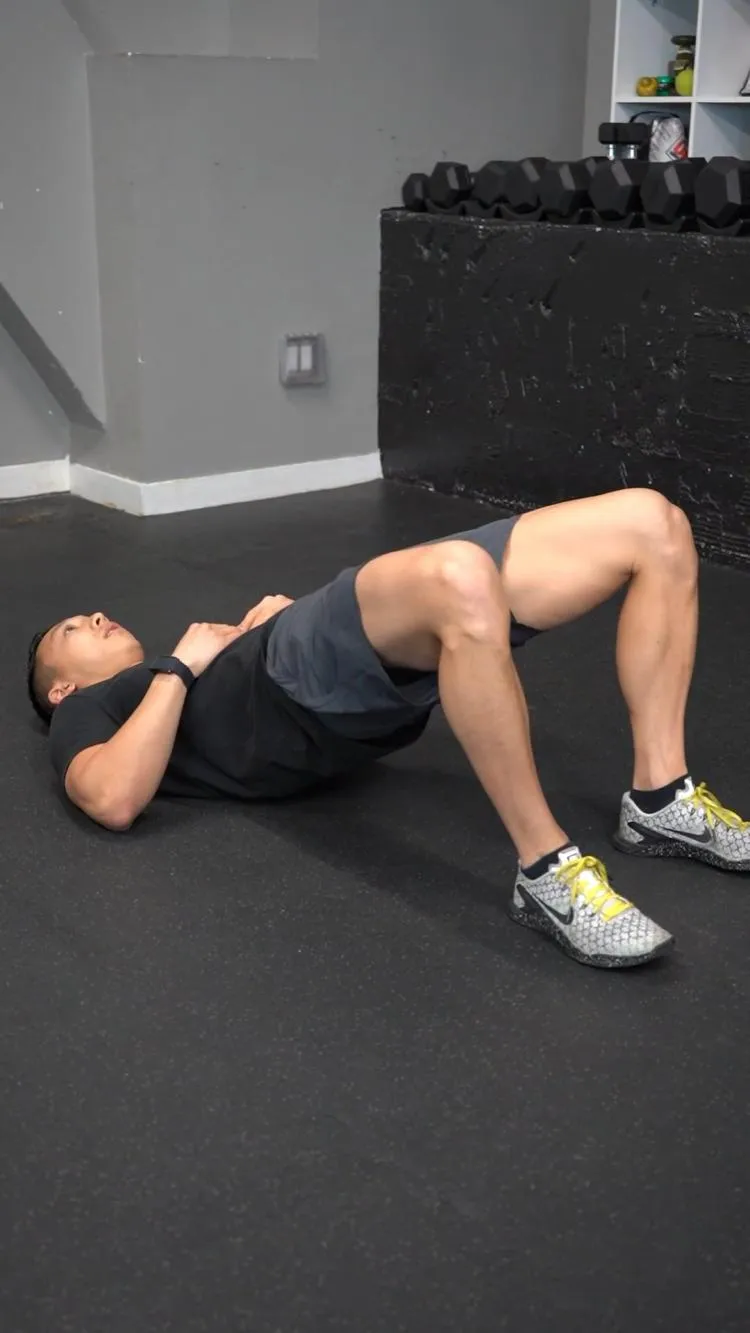
I am a big fan of spine articulating, especially into flexion, for any flexion-sensitive low back patients. This is especially true for those that have chronic low back pain and have simply lost the ability to flex through their lumbar spine. We have a ton of "segmental" exercises in the Prehab Exercise library, and including this segmental version of the bridge. The key is to really focus on a posterior pelvic tilt at the start of the motion, letting the pelvis guide the lower lumbar into flexion - rather than just focusing on a PPT at the top of the motion.
Exercise 07 of 15
Exercise demonstration
Bridge - Segmental
View exercise instructions
- HOW: Lay flat on the ground or table. Bend your knees and put your feet flat. Contract your core muscles and slowly push into the ground with your feet. Raise your hips first, then lower back, and finally your mid to upper back. Focus on slowly peeling the spine off of the ground. You should reverse that movement and slowly lower your back down to the ground.
- FEEL: You should feel a combination of your core, low back, hip/glutes, and hamstring muscles working together.
- COMPENSATION: At the top of the bridge, keep your spine in line with knees, do not arch too much. Make sure your feet aren’t too far in front of you or too far underneath you.
Progressing to a True Single Leg Bridge
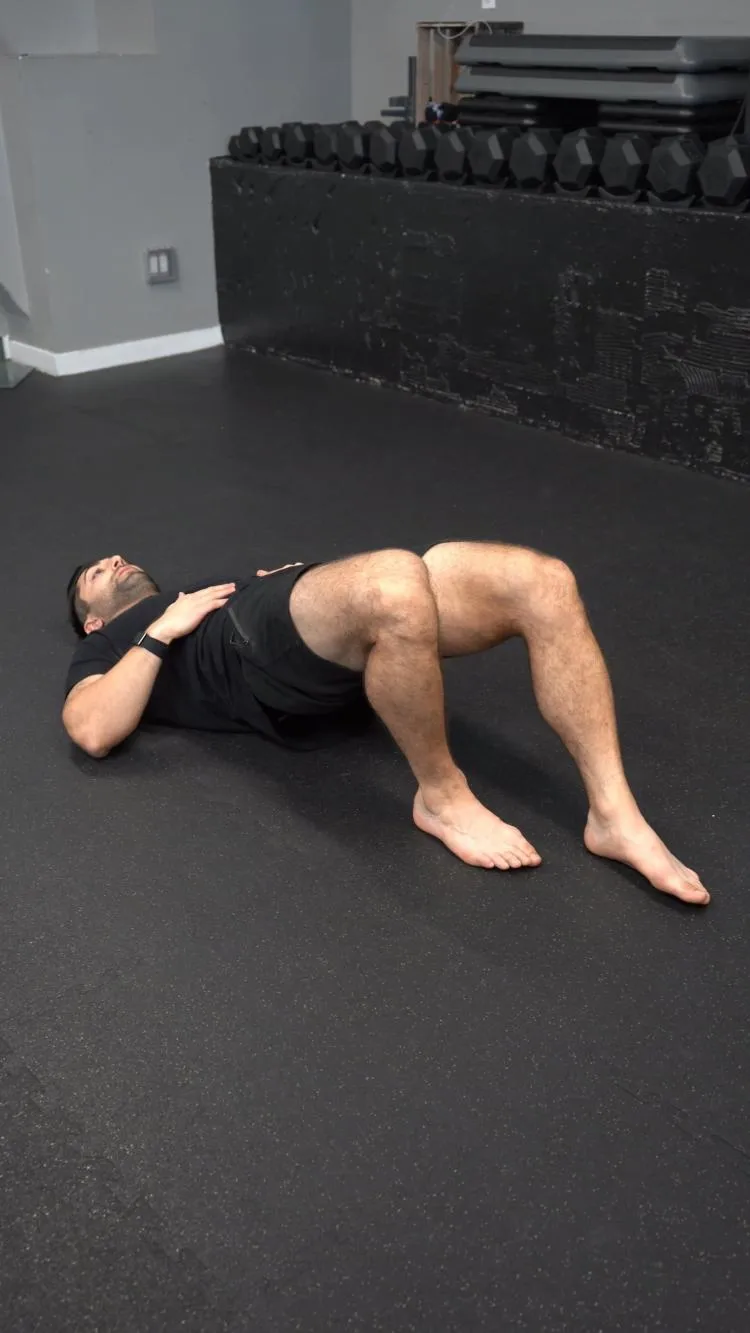
You may be able to progress directly from a double leg bridge to a single leg bridge if your client has the requisite lumbopelvic control and hip strength to control a single leg bridge with a level pelvis. If they do not, the following two variations are a great way to slowly build up the strength and control required of a pristine single-leg bridge! In the staggered bridge below, remember to cue the leg closest to the body to do most of the lifting into hip extension. You can slowly cue your client to push less and less through the foot that is further away. Now, if you were progressing someone's hamstring loading, the cueing would actually be the opposite :)
Exercise 08 of 15
Exercise demonstration
Staggered Bridge
View exercise instructions
- HOW: Start on your back with your legs spread and both knees bent, bend the knee in which you want to bias more - meaning that heel is closer to your butt. Tighten up your stomach first, then your glutes. Next, drive your heels into the ground and lift your hips up towards the ceiling. At the end position your knee, hip, and shoulder should be in one straight line. Hold the end position and squeeze the glutes, then slowly return to starting position. The leg of the knee bent more should be working harder here.
- FEEL: You should feel your glutes work to control this motion, particularly of the leg you are biasing. At no point should you feel your low back muscles doing the lifting motion.
- COMPENSATION: Avoid arching at the low back as you perform this.
The bridge march is actually a true isometric single leg bridge, albeit for a split second. This is a great way to "bridge" someone to an isotonic single leg bridge (like what I did there?!) In this example, you'll notice that Arash lifts his entire contralateral foot off the ground. A micro progression of this would be to just lift the heel off the ground while continuing to push as much as needed through the forefoot. This same march can be performed on an elevated surface if the goal is to hit the hamstrings more. Again, it's all about micro-changes so our clients can find success in their programs!
Single Leg Bridge Options
Once your client is able to progress to a single leg bridge, one of the most common questions I get from my clients is "what do I do with my other leg"? While there is no wrong answer to this question, understand that the other leg provides a "heavier lower body" to the working hip! Meaning, that progressing from the contralateral leg bent, to crossed, to straight out is the most linear progression from easiest to hardest.
Exercise 09 of 15
Exercise demonstration
Single Leg Bridge - Leg Bent
View exercise instructions
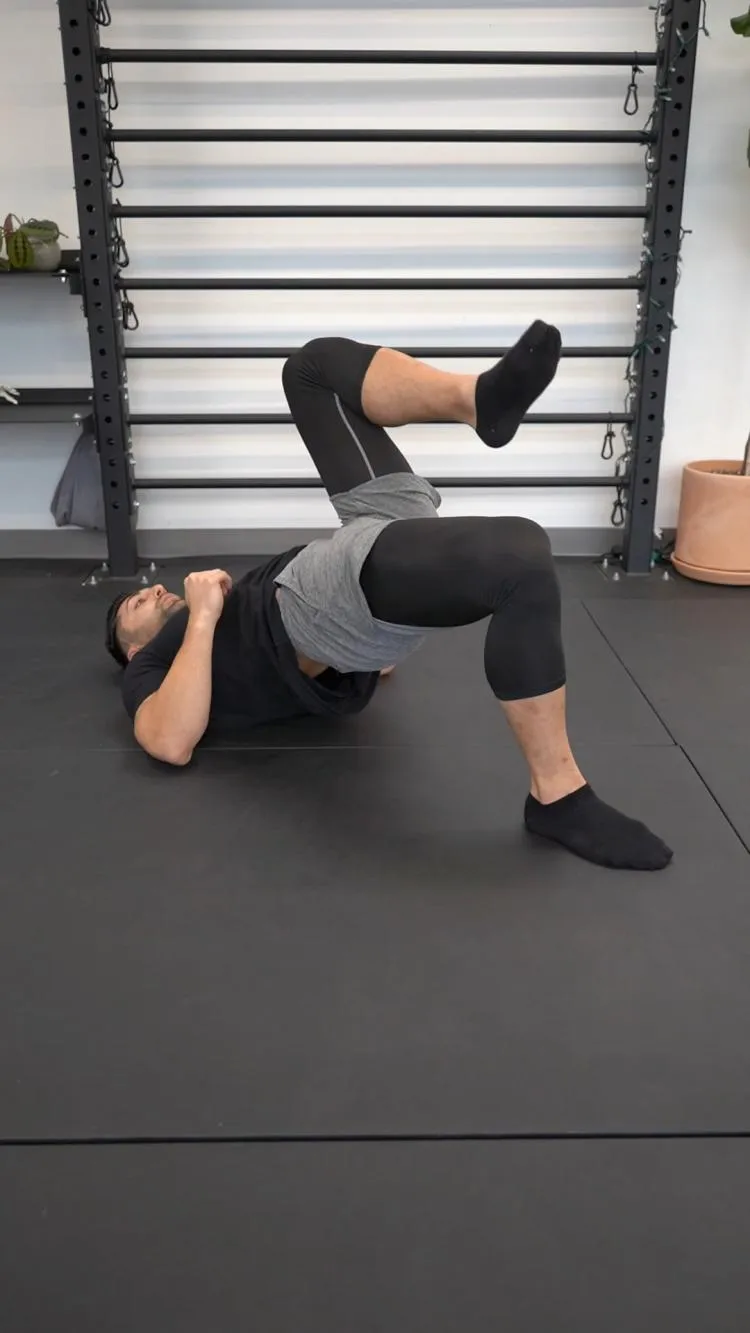
- HOW: Start on your back with one knee bent on the floor and the opposite leg bent in towards your chest. Tighten up your stomach first, then your glutes. Next, drive your heel into the ground and lift your hip up towards the ceiling with the bent knee. At the end position your knee, hip, and shoulder should be in one straight line. Hold the end position and squeeze the glutes, then slowly return to starting position.
- FEEL: You should feel your glutes work to control this motion. At no point should you feel your low back muscles doing the lifting motion. If you feel it only in your hamstrings, try bending your knees a bit more and repeat.
- COMPENSATION: Avoid arching at the low back as you perform this.
I know many clinicians that like to have their clients "hug" their opposite knee to promote a posterior pelvic tilt. This is definitely a feasible option!

Exercise 10 of 15
Exercise demonstration
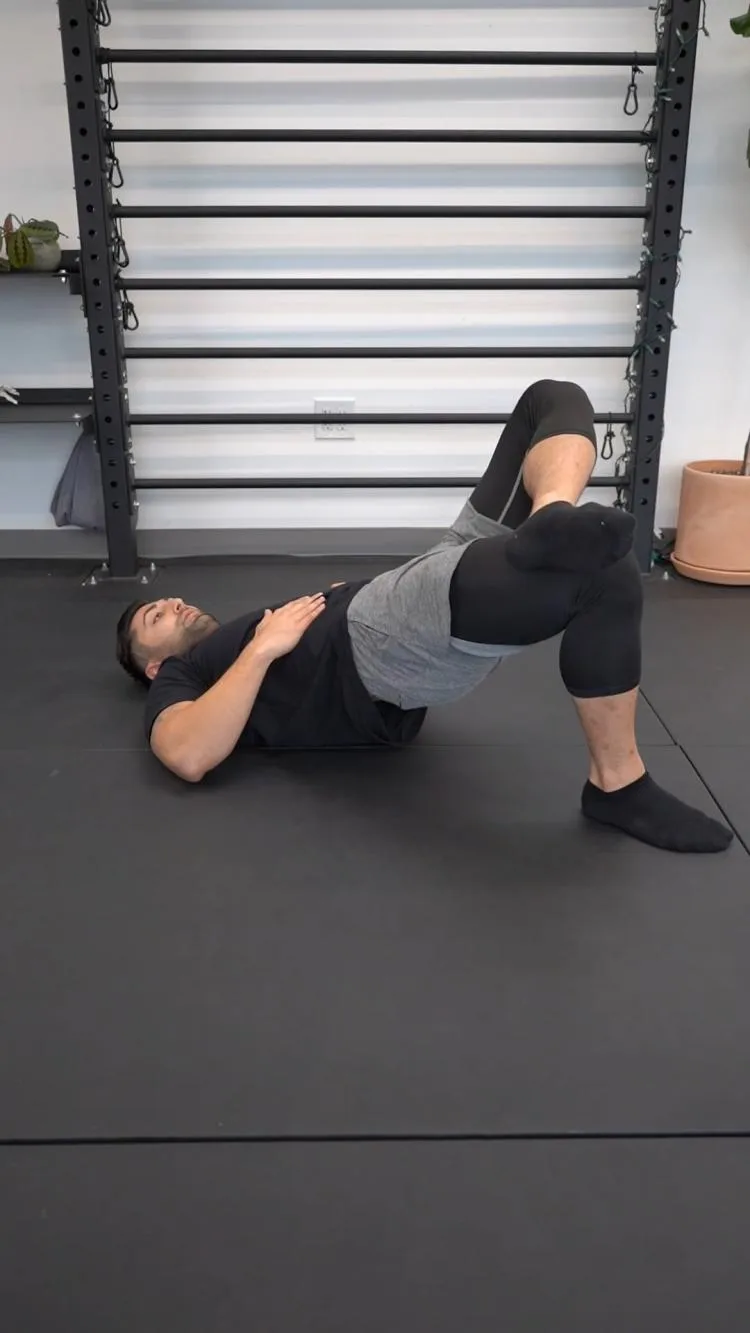
Single Leg Bridge - Leg Crossed
View exercise instructions
- HOW: Start on your back with one knee bent over the other. Tighten up your stomach first, then your glutes. Next, drive your heel into the ground and lift your hip up towards the ceiling. At the end position your knee, hip, and shoulder should be in one straight line. Hold the end position and squeeze the glutes, then slowly return to starting position. You can use assistance from the crossed leg if needed.
- FEEL: You should feel your glutes work to control this motion. At no point should you feel your low back muscles doing the lifting motion. If you feel it only in your hamstrings, try bending your knees a bit more and repeat.
- COMPENSATION: Avoid arching at the low back as you perform this.
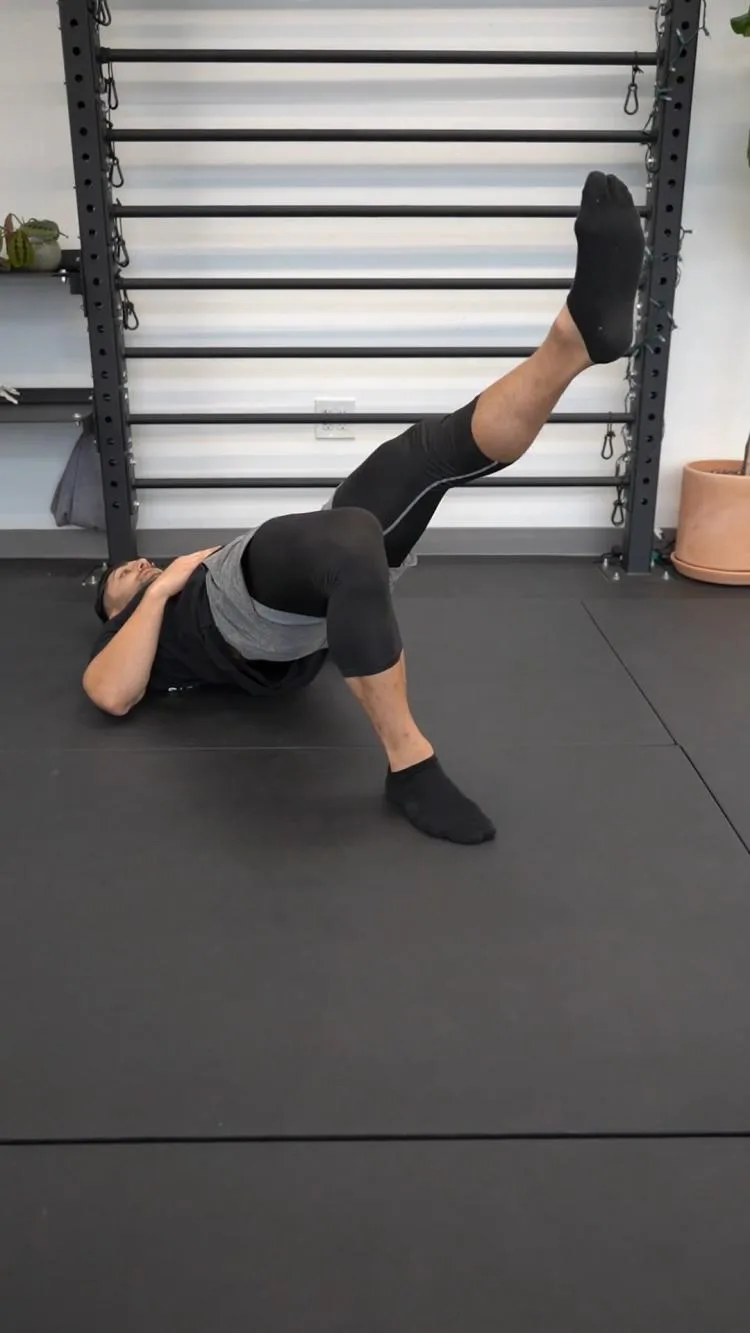
If I have a client who is struggling with their lumbopelvic control in a single leg bridge with the leg straight out, oftentimes I will regress to the crossed leg version above rather than make a bigger macro change to some form of a staggered bridge. The straight leg bridge I consider the "gold standard" of a supine single leg bridge as it's not only the hardest, but we get to work on the contralateral hip flexors simultaneously.
Exercise 11 of 15
Exercise demonstration
Single Leg Bridge - Leg Straight
View exercise instructions
- HOW: Start on your back with one knee bent on the floor and the opposite leg straightened out slightly elevated. Tighten up your stomach first, then your glutes. Next, drive your heel into the ground and lift your hip up towards the ceiling with the bent knee. At the end position - your knee, hip, and shoulder should be in one straight line along with the opposite leg that is straight. Hold the end position and squeeze the glutes, then slowly return to starting position.
- FEEL: You should feel your glutes work to control this motion. At no point should you feel your low back muscles doing the lifting motion. If you feel it only in your hamstrings, try bending your knees a bit more and repeat. You will feel the muscles in your hip and thigh working on the other leg to keep it straight and elevated
- COMPENSATION: Avoid arching at the low back as you perform this.
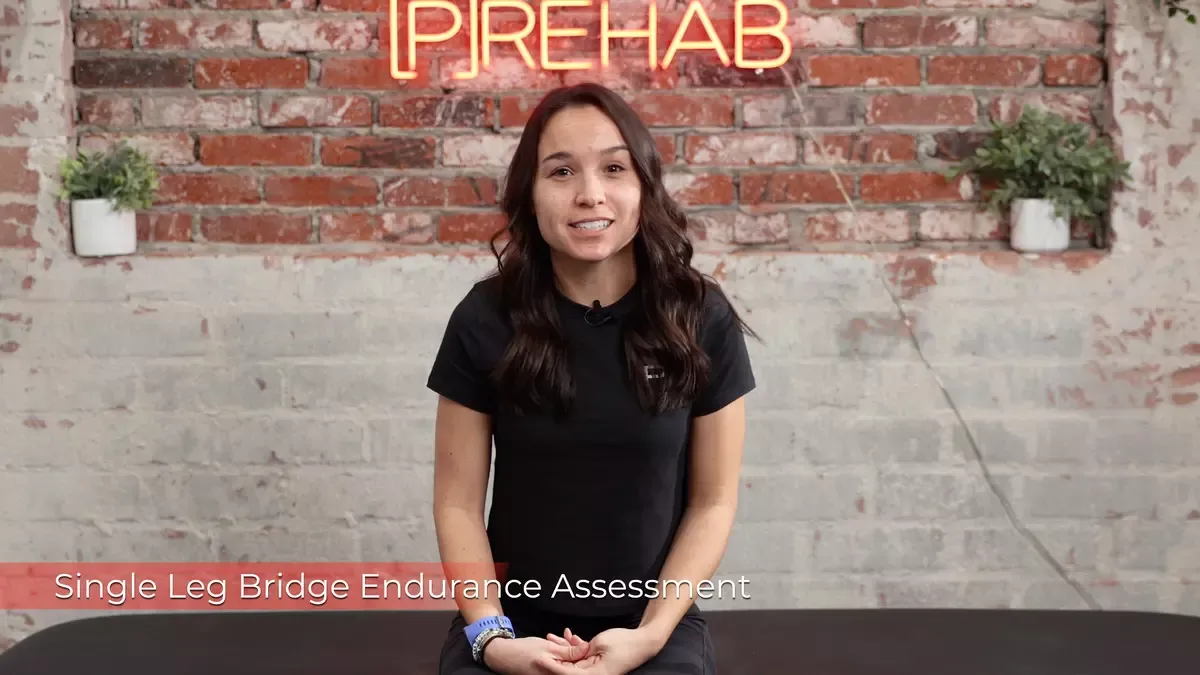
Once your client has mastered a single leg bridge, it can be used as a fantastic objective assessment for the comparison of side to side differences in strength/motor control. The Single Leg Bridge Endurance Test is a reliable tool developed and used to evaluate proximal lower body strength, pelvis and trunk control, and muscle endurance. Please watch the video to get a visual demonstration of how to perform the test and what to be mindful of. We have a lot of other assessments in the library that you can check out under the "assessments" tab!
Exercise 12 of 15
Exercise demonstration
Single Leg Bridge Endurance Assessment
View exercise instructions
Reverse Bridge Variations
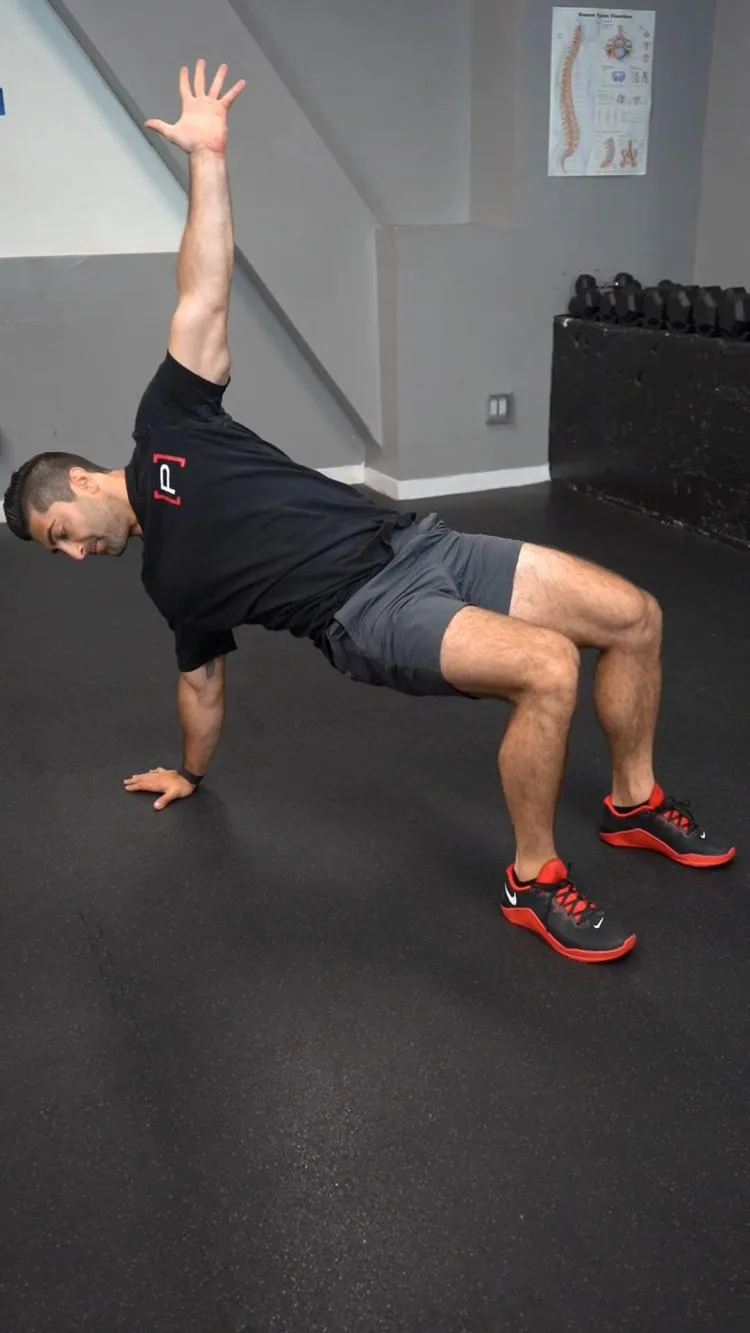
The next two variations shown are examples of a thoracic spine bridge. It's essentially a bridge in a reverse tall plank position where the upper body is completely off the ground. In order to accomplish this movement successfully, you have to keep one of your hands on the ground behind you and rotate your thorax ipsilaterally. It's a great way to work on active thoracic spine rotation.
Exercise 13 of 15
Exercise demonstration
Thoracic Spine Bridge
View exercise instructions
- HOW: Begin in a seated position with your knees bent up and your arms behind your with your palms on the ground. Shift all of your weight onto one shoulder as you lift your hips up as high as you can. As your hips are rising, rotate the other side of your body towards the arm that is pushing up. Alternate sides for the prescribed amount of reps.
- FEEL: You should feel your core and shoulder muscles working.
- COMPENSATION: Keep your hips up as you rotate to the one side, don’t let them drop
The bear-to-high single leg bridge position exercise is very similar to the more mobility-focused thoracic spine bridge except that it starts from a bear position. I typically like this combo movement as part of a dynamic warm-up!
The Bridge As A Base Position
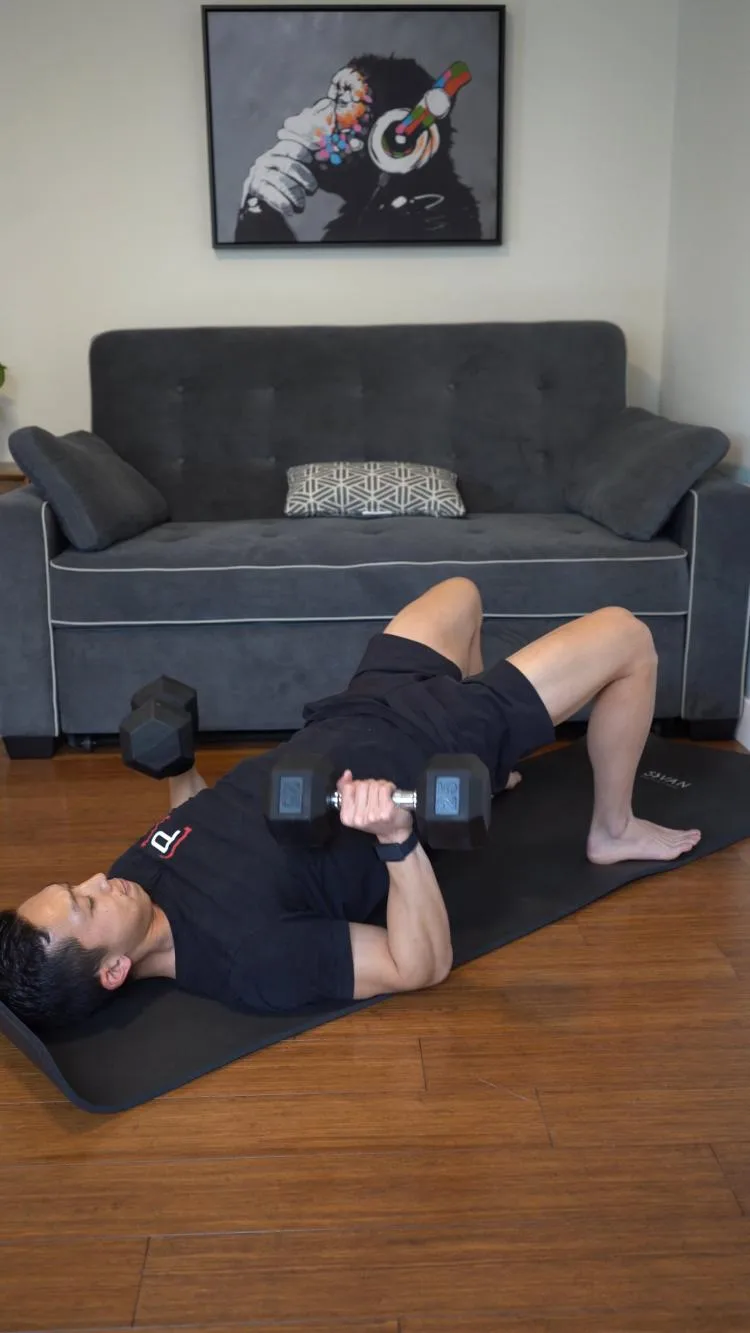
The bridge position can be used as a base position as well! When performing upper extremity tasks, typically we must derive stability proximally. Usually, we think of this as coming from the scapular muscles or core, but this can also extend to the glute as well! A prime example of this would be in the example below. You need good activation through the glutes in order to stay stale during the floor press. During COVID quarantine this was my way of mimicking the torso angle of a decline bench press without a decline bench!
Exercise 14 of 15
Exercise demonstration
Floor Press - Bridge Position
View exercise instructions
- HOW: Start laying flat on your back with your knees bent to at least 90 degrees. With weights or objects supported in each hand, bridge up by lifting your hips off the ground. While holding the top of the bridge position, perform a bench press motion with your arms, lower your arms all the way down until they touch the ground and repeat. Your arms can be angled 45 degrees from your torso, or however you prefer.
- FEEL: This should feel like a full body workout, your glutes will be working to keep your hips off the ground, your core will be working to keep your torso still and tight, and your arms will be working with the floor press.
- COMPENSATION: Do not lose the top of the bridge position, do not let your hips sag, do not let your back excessively arch or bend. All of the same rules apply with a regular floor press form, at the top of the press the weights/objects should be positioned over your shoulders.
The Hip Thrust
Now, onto the mack daddy of them all...the hip thrust! The hip thrust is great for targeting the largest muscle of the body, the Gluteus Maximus. When looking at the EMG activity of muscles during a hip thrust we see great activation of the hamstrings, quadriceps, and adductors as well; making this exercise a great bang for your buck movement! I have seen the hip thrust performed in all kinds of ways, below Arash shows you how he likes to perform the traditional hip thrust with the goal of biasing the posterior chain muscles. We have a great podcast episode with Bret Contreras that you can check out HERE where he covers everything you need to know about the hip thrust and its origins!
Exercise 15 of 15
Exercise demonstration
Double Leg Hip Thrust With Cuing
View exercise instructions
- HOW: Begin with your mid-back against a bench with you feet about hip width apart. While keeping your chin tucked, thrust your hips towards the ceiling. Focus on driving into the floor with your heels and tuck your tailbone (AKA posteriorly tilt your pelvis) at the top of the thrust. Slowly return back to starting position and repeat.
- FEEL: You will feel the gluteal and hamstring muscles working with this exercise particularly of the leg the is bent in closer to you.
- COMPENSATION: Avoid arching with the lower back, allow a majority of this movement to come from the hips and pelvis.
You'll notice in this example that we do not have a hip thruster. We are going to assume that most of your clients do not have one too!
Closing Thoughts
We hope you have been able to learn more about bridge exercise progressions and variations that you can implement for your clients! Thank you for taking the time to read, and please leave comments if you have any insights you would like to share or questions!
Maximize Your Time Creating Programs For Your Clients!
With thousands of exercises to choose from, video demonstrations, education, assessments, and more, this is the best exercise library that you can utilize for your clients! Gain access HERE.
Clinician
Michael Lau, PT, DPT, CSCS
Prehab Co-Founder & Chief Product Officer
 Michael was born and raised in Northern California but now currently resides in Sunny SoCal ever since attending the University of California, Los Angeles as an undergraduate majoring in physiology. After his undergraduate studies, he received his Doctorate in Physical Therapy from cross-town rival the University of Southern California.
As a licensed physical therapist with a strong background in strength and conditioning, Michael likes to blend the realms of strength training and rehabilitation to provide prehab, or preventative rehabilitation, to his patients.
A common human behavior is to address problems after they become an issue and far often too late, which is a reactionary approach. He believes the key to improved health care is education and awareness. This proactive approach-prehab-can reduce the risk of injuries and pain in the first place.
He is a huge proponent of movement education and pain science. Clinically, he has a special interest in ACLR rehab and return to sport for the lower extremity athlete.